

10 Easy Food Dehydrator Recipes for Kiwi Homes | Simple & Sweet
A food dehydrator is a game-changing appliance for any Kiwi kitchen, transforming fresh produce into long-lasting, flavourful snacks and pantry staples. It’s an incredibly efficient way to reduce food waste, save money on groceries, and unlock a new world of culinary creativity. By gently removing moisture, you concentrate the natural flavours of fruits, vegetables, and meats, creating healthy, preservative-free options that are perfect for school lunches, tramping trips, or simply stocking your cupboards.
This article provides 10 easy food dehydrator recipes for Kiwi homes, designed to be straightforward and delicious. We'll move beyond the basics, offering step-by-step instructions for everything from classic beef jerky and crunchy kumara chips to versatile tomato powder and vibrant beetroot leather. You’ll learn how to perfectly preserve your garden herbs, make sweet apple rings, and create healthy fruit snacks that the whole family will love. Dehydration is just one of many fantastic preservation methods; for a broader look, this comprehensive guide to preserving food at home covers various techniques to help you make the most of your harvest. Get ready to power up your dehydrator and fill your pantry with homemade goodness.
1. Classic Kiwi Beef Jerky
There's nothing quite like a good piece of beef jerky, and making your own is a game-changer. It’s a quintessential Kiwi snack, perfect for tucking into your pack before a tramp, keeping in the ute for a long day on the farm, or simply enjoying as a high-protein treat at home. By making it yourself, you control the quality of the beef, the salt content, and the exact flavour profile.
This classic recipe leans on a simple, savoury marinade that enhances the natural flavour of the beef without overpowering it. It’s one of the most satisfying and straightforward dehydrator recipes for Kiwi homes, transforming a humble cut of meat into a delicious, long-lasting snack.
Ingredients & Method
-
Ingredients:
- 1kg lean beef (topside, silverside, or flank steak work well)
- 1/2 cup soy sauce
- 2 tablespoons Worcestershire sauce
- 1 tablespoon honey or brown sugar
- 1 teaspoon garlic powder
- 1 teaspoon onion powder
- 1 teaspoon black pepper
- Optional: 1/2 teaspoon smoked paprika or a dash of liquid smoke for extra flavour.
-
Instructions:
- Partially freeze the beef for about 1-2 hours. This makes it much easier to slice thinly and evenly.
- Slice the beef against the grain into 5mm thick strips.
- In a bowl, whisk together all marinade ingredients. Add the beef strips and ensure they are fully coated.
- Cover and marinate in the fridge for at least 8 hours, or preferably overnight.
- Remove strips from the marinade, pat them dry with a paper towel, and arrange them in a single layer on your dehydrator trays.
- Dehydrate at 65-70°C for 4-8 hours, or until the jerky is dry but still slightly pliable. It should bend and crack but not snap.
Pro Tip: For a chewier jerky, slice your beef with the grain. For a more tender, brittle jerky, slice against the grain. Experiment to find your preferred texture.
2. Dehydrated Kiwi Fruit Chips
What could be more Kiwi than turning our iconic national fruit into a delicious, healthy snack? Dehydrated kiwi fruit chips are sweet, tangy, and chewy, packing a vibrant flavour punch that’s a world away from store-bought lollies. They are a fantastic way to preserve a glut of kiwifruit from the garden or a market special, locking in that unique taste and a surprising amount of vitamin C.
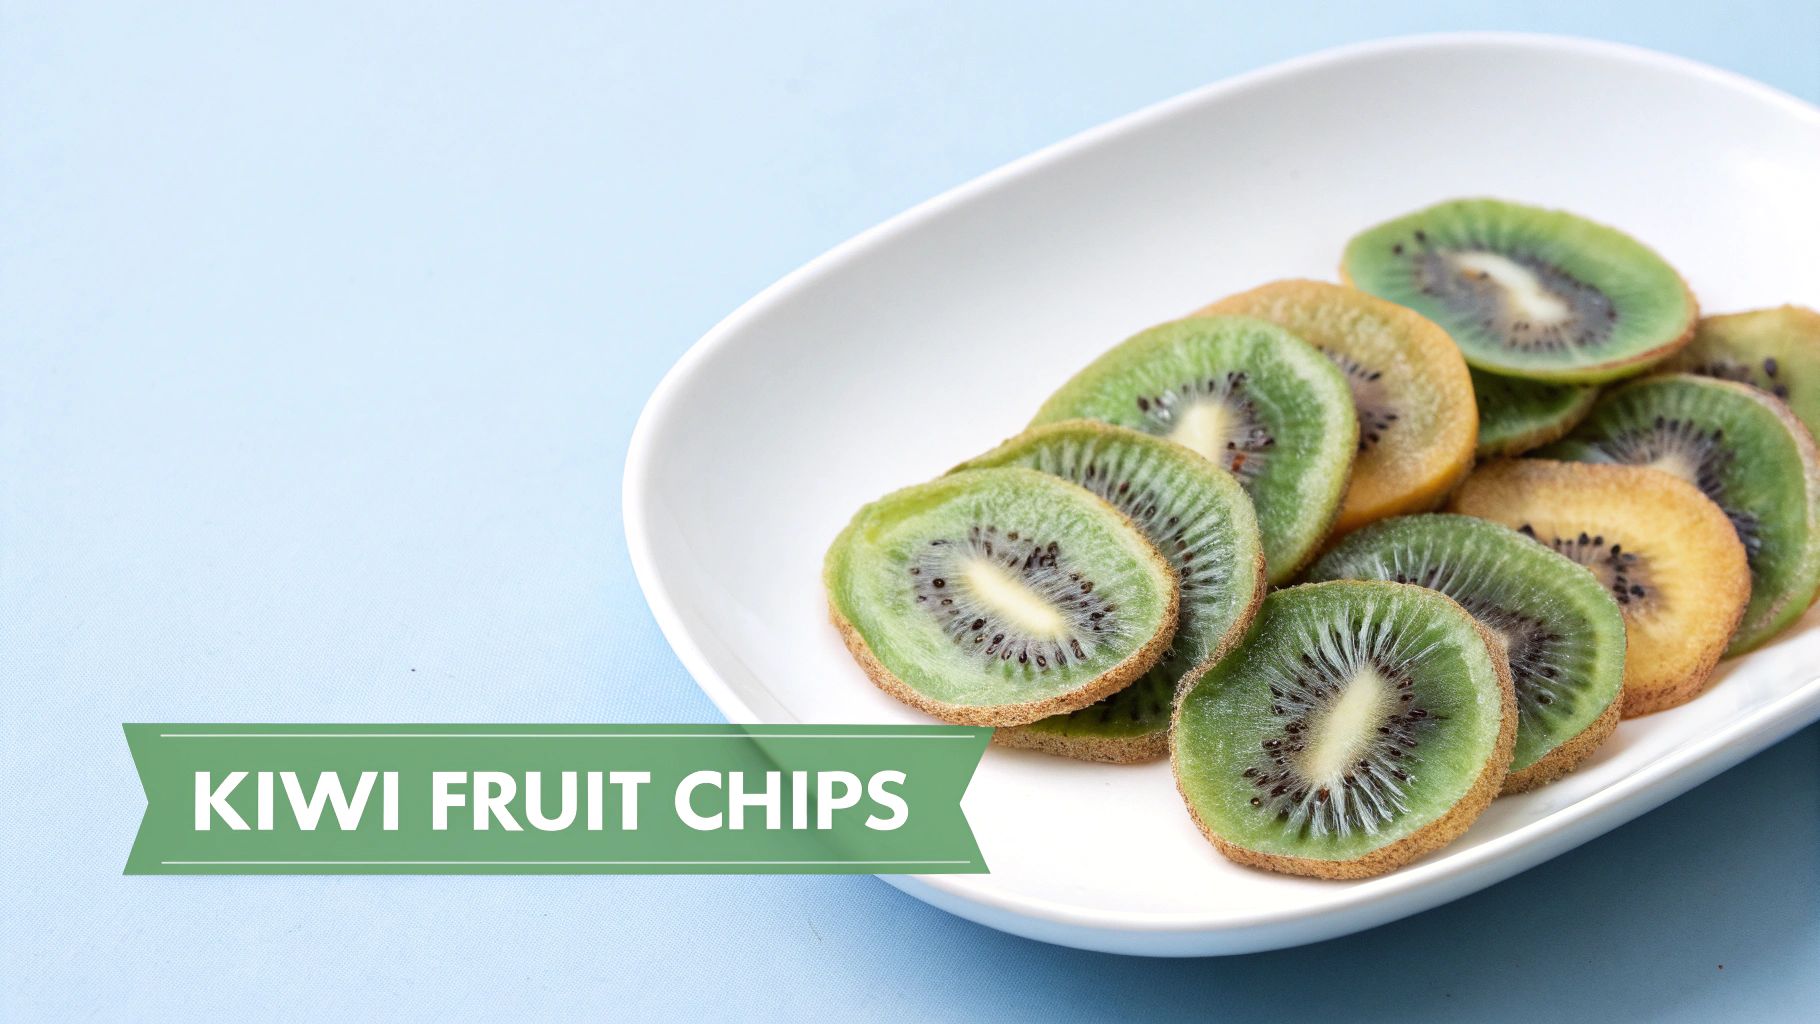
These vibrant green discs are perfect for kids' lunchboxes, as a colourful addition to a grazing platter, or chopped into muesli and baking. Making them at home is one of the easiest food dehydrator recipes you can try, celebrating local produce in its purest form. A quality appliance like the Sunbeam Food Lab Electronic Dehydrator makes the process incredibly simple and consistent.
Ingredients & Method
-
Ingredients:
- 8-10 ripe but firm kiwifruit
- Optional: 1-2 tablespoons lemon juice mixed with 1 cup of water (to prevent browning)
-
Instructions:
- Wash the kiwifruit well. There's no need to peel them; the skin becomes crisp and adds extra fibre.
- Slice the kiwifruit into uniform 6mm thick rounds. Consistent thickness is key for even drying.
- If desired, dip the slices into the lemon juice and water mixture for a few minutes. This helps them retain their bright green colour.
- Pat the slices gently with a paper towel to remove excess moisture.
- Arrange the slices in a single layer on your dehydrator trays, ensuring they don't overlap.
- Dehydrate at 55-60°C for 6-10 hours. The chips are ready when they are leathery and flexible, but with no moist spots.
Pro Tip: For a slightly sweeter treat, you can lightly sprinkle the kiwi slices with a pinch of caster sugar before dehydrating. This creates a beautifully caramelised edge and a candy-like texture.
3. Herb Mix from Garden Herbs
If you have a herb garden, you know how quickly it can become an overflowing jungle of flavour. Dehydrating your own herbs is a fantastic way to preserve your bountiful harvest, reduce waste, and create custom seasoning blends that are far more vibrant and potent than anything you can buy at the supermarket. It’s a simple, sustainable practice that captures the essence of your garden for year-round use.
This method transforms fresh, fragrant herbs like rosemary, thyme, oregano, and sage into a versatile dried mix. It's one of the most practical and easy food dehydrator recipes for Kiwi homes, perfect for seasoning everything from a Sunday roast to a simple pasta sauce. You gain complete control over the flavour combinations, ensuring your pantry is always stocked with high-quality, homegrown seasonings.
Ingredients & Method
-
Ingredients:
- Fresh herbs from your garden (e.g., rosemary, thyme, oregano, sage, parsley, marjoram)
- You can dry a single type of herb or a mix of your favourites.
-
Instructions:
- Harvest your herbs in the morning after the dew has evaporated but before the sun gets too hot. This is when their essential oils are most concentrated.
- Wash the herbs gently and pat them thoroughly dry with a paper towel or use a salad spinner.
- Remove leaves from tough, woody stems (like rosemary and thyme). Tender stems (like parsley and coriander) can be left on.
- Arrange the herbs in a single layer on your dehydrator trays, ensuring there is plenty of room for air to circulate.
- Dehydrate at a low temperature, around 35-45°C, for 2-6 hours. The time will vary depending on the herb's moisture content.
- The herbs are ready when they are brittle and crumble easily between your fingers. Once cool, you can store them whole or crush them into a custom blend.
Pro Tip: Dry stronger herbs like rosemary and sage separately from delicate ones like parsley or basil. This prevents their powerful aromas from transferring and allows you to control the drying time for each type more accurately.
4. Apple Rings with Cinnamon
Transforming New Zealand’s abundant and crisp apples into sweet, chewy rings is one of the simplest pleasures a food dehydrator can offer. This recipe creates a healthy, lunchbox-friendly snack that captures the essence of autumn in a bite. It’s a fantastic way to use up a surplus of apples from the backyard tree or a farmers' market haul, turning them into a delicious treat that lasts for months.
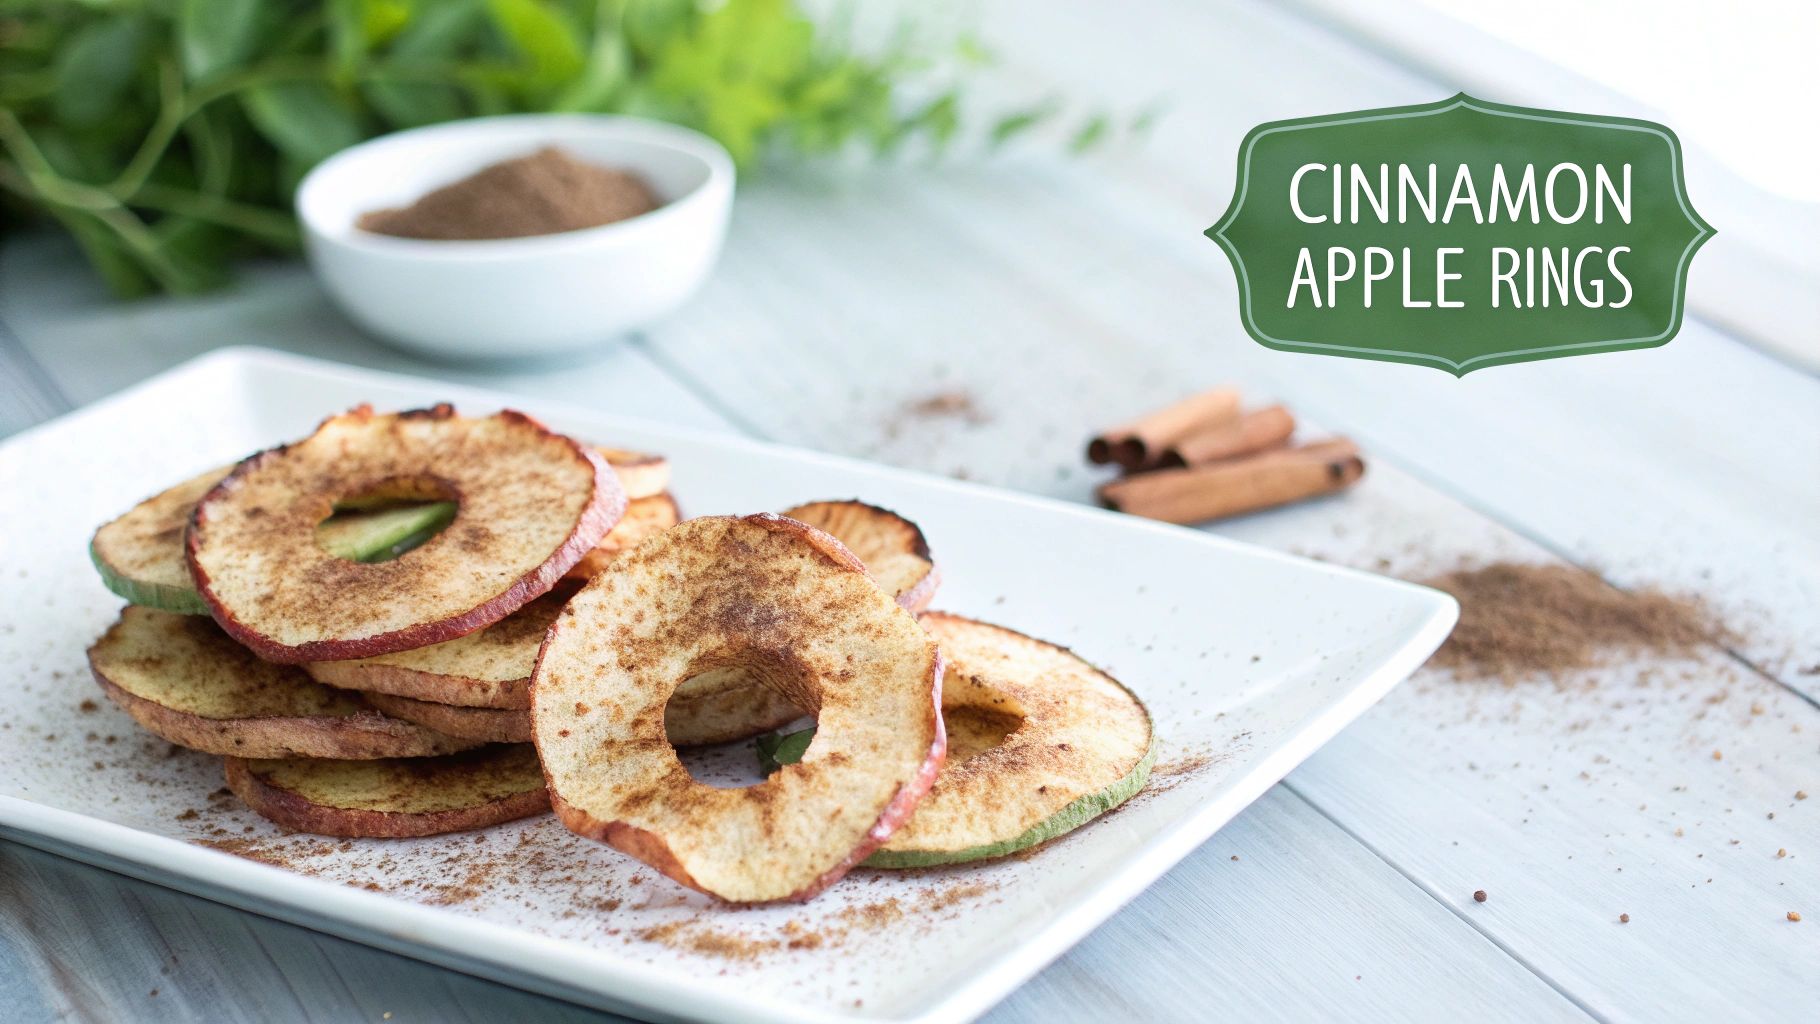
These cinnamon-dusted apple rings are a staple in many Kiwi households for good reason. They are naturally sweet, require minimal ingredients, and are adored by both kids and adults. Making them at home means you can avoid the added sugars and preservatives often found in store-bought versions, making this one of the most wholesome and easy food dehydrator recipes for Kiwi homes.
Ingredients & Method
-
Ingredients:
- 4-5 large, firm apples (Gala, Fuji, or Braeburn are excellent choices)
- 1 tablespoon lemon juice
- 1 cup water
- 1-2 teaspoons ground cinnamon
-
Instructions:
- Wash and core the apples. You can peel them if you prefer, but leaving the skin on adds colour and fibre.
- Slice the apples into uniform 6mm thick rings. A mandoline slicer is great for consistency.
- In a small bowl, mix the lemon juice and water. Briefly dip the apple slices into the lemon water to prevent browning.
- Pat the slices dry with a paper towel and arrange them in a single layer on your dehydrator trays.
- Lightly dust one side of the apple rings with ground cinnamon.
- Dehydrate at 55-60°C for 6-10 hours. The apples are ready when they are leathery and pliable with no moisture in the centre.
Pro Tip: For a touch of extra sweetness without adding sugar, choose naturally sweet apple varieties like Jazz or Pacific Rose. You can also experiment with other spices like nutmeg or ginger for a different flavour profile.
5. Vegetable Leather from Beetroot
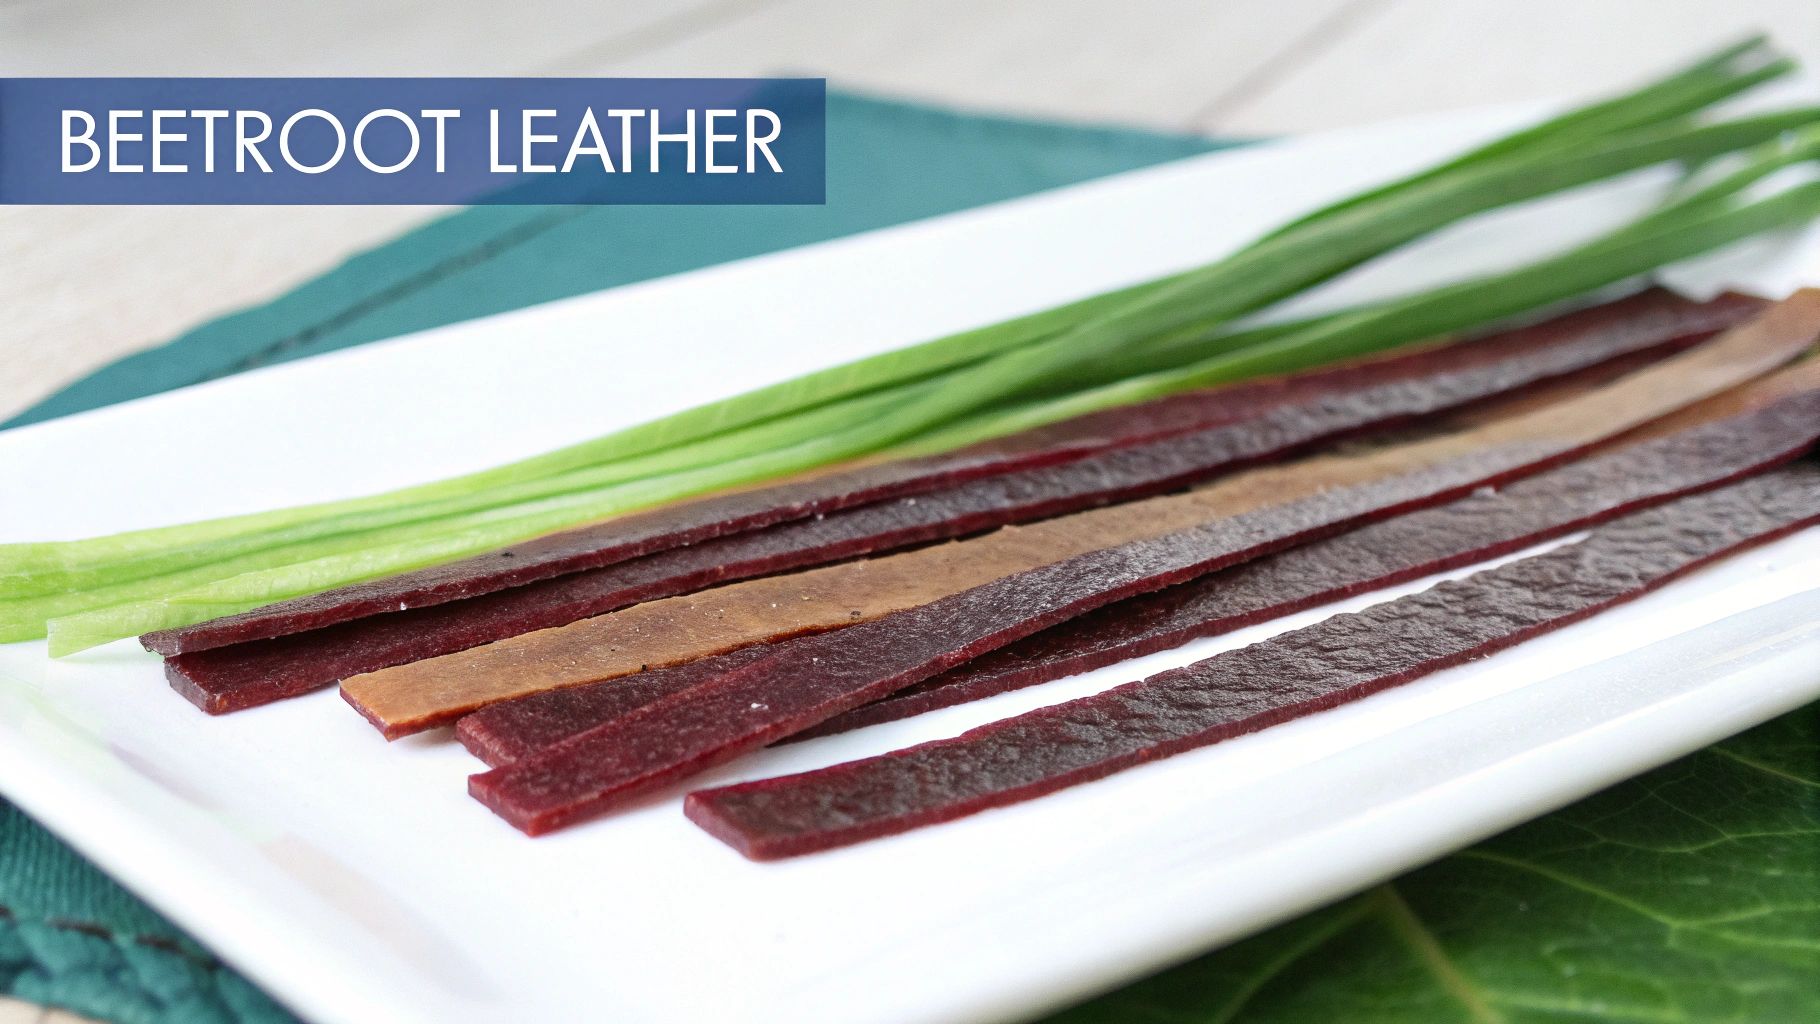
Move over, fruit roll-ups. Vegetable leather is the savoury, nutrient-dense snack you didn't know you needed. This recipe uses earthy, vibrant beetroot, a staple in many Kiwi gardens, and transforms it into a chewy, delicious, and surprisingly healthy treat. It's a fantastic way to use up a bumper crop of root vegetables and a brilliant method for getting more veggies into your kids' lunchboxes without a fuss.
This is one of the most creative food dehydrator recipes for Kiwi homes, offering a unique alternative to the usual sweet snacks. The deep, rich colour is stunning, and the flavour is a delightful surprise. By blending beetroot with a touch of apple, you get a perfect balance of earthy and sweet, creating a wholesome snack that’s ideal for school, work, or outdoor adventures.
Ingredients & Method
-
Ingredients:
- 3 medium-sized beetroots (about 500g), cooked and peeled
- 1 large apple, peeled, cored, and chopped
- 1 tablespoon lemon juice
- 1 tablespoon honey or maple syrup (optional, to taste)
- Pinch of salt
- Optional: 1/2 teaspoon ginger powder or cinnamon for a warm spice note.
-
Instructions:
- Cook the beetroots until tender. You can either roast them (which deepens the flavour) or boil them. Once cooked and cool enough to handle, peel the skins off.
- Combine the cooked beetroot, chopped apple, lemon juice, salt, and optional sweetener/spices in a high-speed blender.
- Blend until the mixture is completely smooth. You are aiming for a thick, lump-free purée.
- Line your dehydrator's fruit leather trays or solid sheets with baking paper. Pour the purée onto the sheets and spread it into a thin, even layer, about 3-5mm thick.
- Dehydrate at 55-60°C for 6-10 hours. The leather is ready when it is no longer sticky to the touch but is still flexible.
- Once cool, you can cut the leather into strips with scissors and roll it up in baking paper for easy storage.
Pro Tip: For the smoothest texture, ensure your purée is perfectly blended. If you have any doubts, press the mixture through a fine-mesh sieve before spreading it on the dehydrator sheets to remove any fibrous bits.
6. Banana Chips
There's no better way to rescue bananas on the brink of becoming too ripe than by turning them into delightfully crispy banana chips. While bananas aren't grown commercially across most of New Zealand, they are a staple in every fruit bowl. This recipe transforms them into a sweet, crunchy snack that’s perfect for school lunchboxes, adding to trail mix, or sprinkling over your morning cereal for extra texture and flavour.
Making your own banana chips is one of the most rewarding food dehydrator recipes for Kiwi homes because it's a fantastic zero-waste solution. You can capture that peak sweetness of a ripe banana and turn it into a healthy, long-lasting pantry item, avoiding the added sugars and oils found in many store-bought versions. It’s a simple process that yields a surprisingly addictive treat.
Ingredients & Method
-
Ingredients:
- 4-6 ripe but still firm bananas
- 2 tablespoons lemon juice
- 1 cup water
- Optional: a pinch of cinnamon or nutmeg for a spiced version.
-
Instructions:
- In a small bowl, mix the lemon juice with the water. This will be your pre-treatment solution to prevent the banana slices from browning.
- Peel the bananas and slice them into uniform 5-6mm thick rounds. A mandoline slicer works wonders for consistency.
- Briefly dip each banana slice into the lemon water solution. Don't let them soak; a quick dip is all that's needed.
- Arrange the slices in a single layer on your dehydrator trays, ensuring they do not touch or overlap.
- Dehydrate at 60°C for 6-10 hours. The chips are ready when they are crispy and snap easily. If they are chewy, they need more time.
- Let the chips cool completely before storing them in an airtight container.
Pro Tip: For an even tastier treat, try a light sprinkle of cinnamon or a mix of cinnamon and sugar over the slices just before dehydrating. This adds a warm, comforting flavour that pairs beautifully with the natural sweetness of the banana.
7. Versatile Tomato Powder
Imagine capturing the intense, sun-ripened flavour of summer tomatoes in a shelf-stable powder. That's the magic of homemade tomato powder, a secret weapon for any Kiwi kitchen. This versatile ingredient adds a concentrated burst of umami and rich tomato essence to everything from soups and stews to rubs and sauces, without adding extra liquid. It’s perfect for boosting flavour in a winter mince dish or adding depth to a homemade spice blend.
Making tomato powder is a fantastic way to preserve a bumper crop from the garden or make the most of a good deal on tinned tomato paste. It’s one of the most efficient dehydrator recipes for Kiwi homes, transforming a pantry staple into a powerhouse flavour enhancer that saves space and reduces waste.
Ingredients & Method
-
Ingredients:
- 1 large tin (approx. 800g) of good-quality tomato paste OR 1.5kg of fresh, ripe tomatoes (e.g., Roma)
- Optional: a pinch of salt or a sprinkle of dried basil or oregano for a pre-seasoned powder.
-
Instructions:
- If using fresh tomatoes, blend them into a smooth, thick purée.
- Line your dehydrator trays with solid fruit leather sheets or non-stick baking paper.
- Spread the tomato paste or purée in a very thin, even layer across the sheets. The thinner the layer, the faster it will dry.
- Dehydrate at 55-60°C for 6-10 hours. The tomato will turn into a dark, brittle sheet that snaps easily when dry. It must be completely free of any moisture or stickiness.
- Break the dried tomato leather into smaller pieces and place them in a high-powered blender or spice grinder.
- Blitz until you have a fine, consistent powder. You may need to sift it to remove any larger pieces and re-grind them.
Pro Tip: For the absolute best results, use tomato paste instead of fresh tomatoes. It has a lower water content, meaning it dehydrates much faster and yields a more intensely flavoured powder. Store the finished powder in an airtight jar with a food-safe moisture absorber to prevent clumping.
8. Kumara (Sweet Potato) Chips
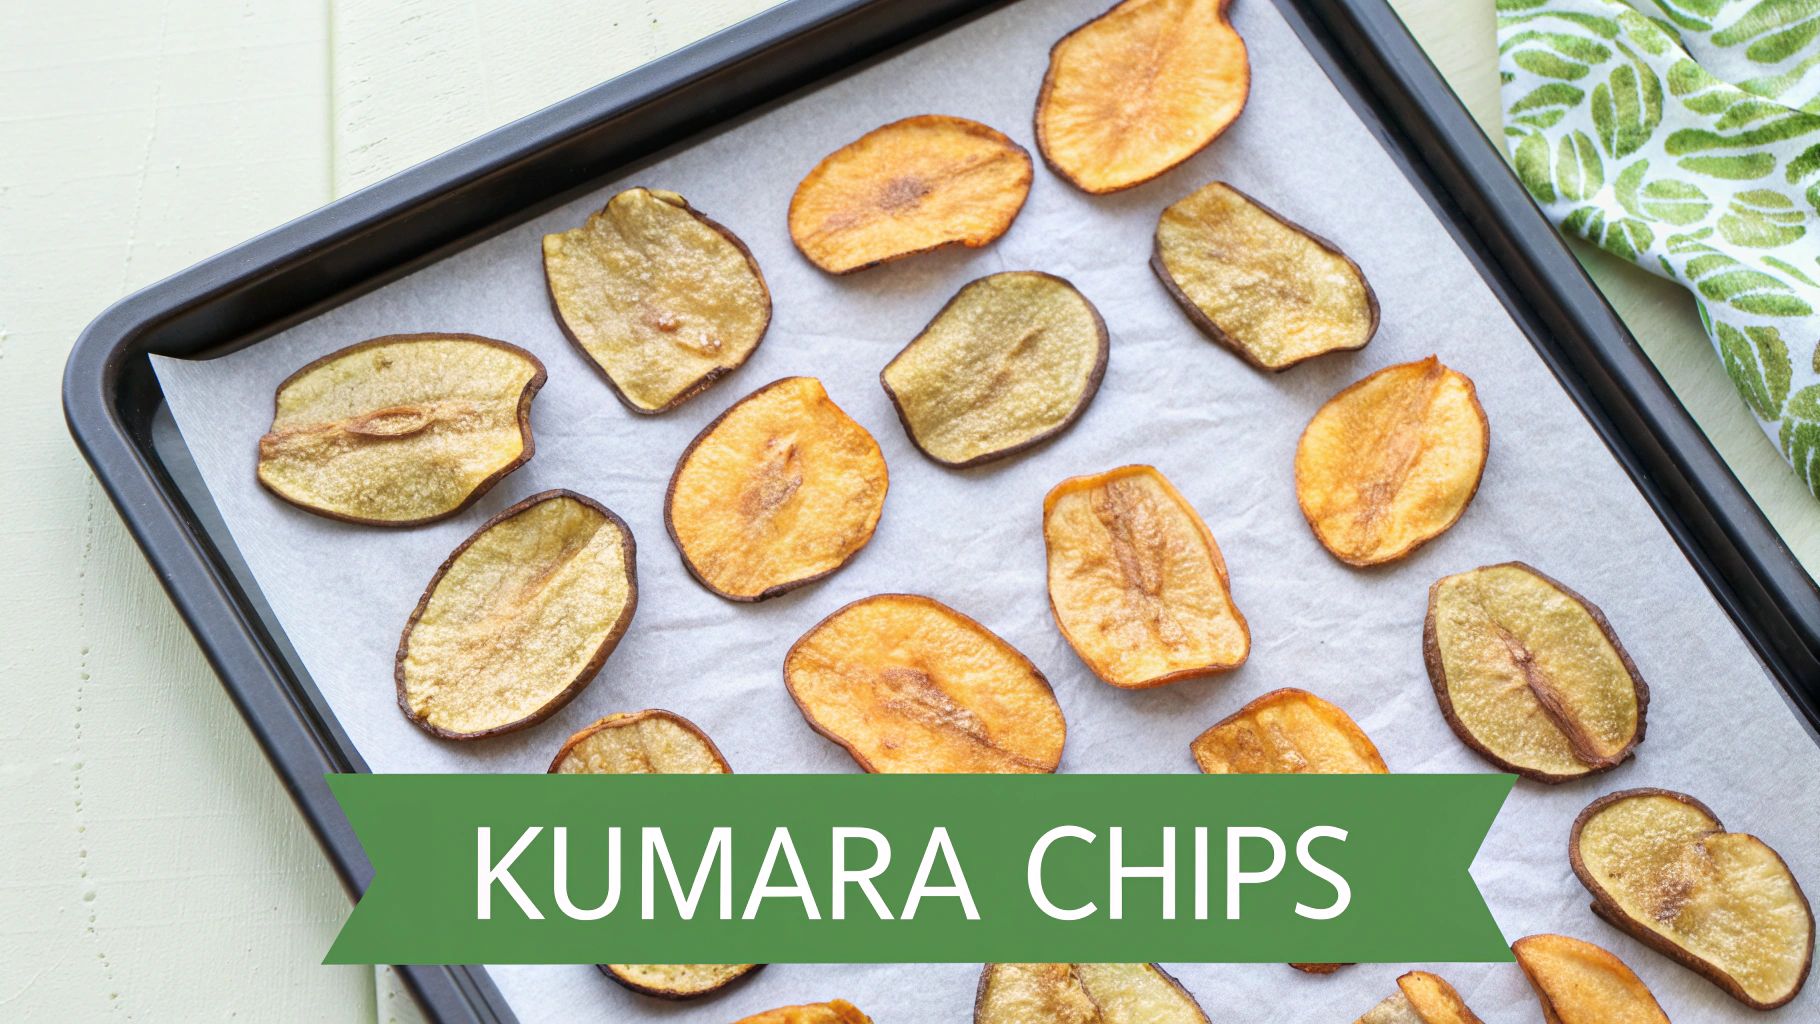
Kumara is a true Kiwi treasure, deeply embedded in our culinary heritage and a staple in many households. Transforming this versatile root vegetable into crispy, dehydrated chips is a brilliant way to create a healthy, home-grown snack. These chips are a fantastic alternative to greasy, store-bought potato crisps, offering a natural sweetness and a satisfying crunch that appeals to all ages.
Making your own kumara chips is one of the simplest and most rewarding dehydrator recipes for Kiwi homes. It’s a perfect method for using up any extra kumara you might have, turning them into a delicious, shelf-stable treat that's ideal for school lunches, after-work nibbles, or as a colourful garnish for soups and salads. You get to control the seasoning, from a simple sprinkle of salt to more adventurous spice blends.
Ingredients & Method
-
Ingredients:
- 3-4 medium-sized kumara (any variety works, but orange is classic)
- 1 tablespoon olive oil (optional, for flavour)
- 1/2 teaspoon flaky sea salt
- Optional: Pinch of smoked paprika, cumin, or cinnamon for a different flavour profile.
-
Instructions:
- Wash and scrub the kumara well. You can peel them or leave the skin on for extra texture and nutrients.
- For best results, briefly blanch the whole kumara in boiling water for 5-7 minutes, then plunge into an ice bath. This step helps to speed up dehydration and improves texture.
- Once cool, slice the kumara as thinly as possible, aiming for uniform 3-4mm thick rounds. A mandoline slicer is excellent for this.
- In a large bowl, toss the slices with olive oil (if using) and your chosen seasonings until they are lightly coated.
- Arrange the slices in a single layer on your dehydrator trays, ensuring they don’t overlap. Good airflow is key for even crisping. If you need to store your fresh kumara before use, knowing how to organise your fridge properly can keep them in top condition.
- Dehydrate at 55-60°C for 6-10 hours. The chips are ready when they are completely dry and snap easily.
Pro Tip: For an extra crispy finish, turn the heat up to 65°C for the last hour of dehydration. Let the chips cool completely before storing them in an airtight container, as they will become even crispier once at room temperature.
9. Mushroom Chips
Forget potato crisps; dehydrated mushroom chips offer a savoury, umami-rich crunch that is intensely satisfying and surprisingly healthy. This recipe is a fantastic way to preserve a bountiful harvest, whether from a foraging trip in our native bush or a good deal at the local grocer. The dehydrating process concentrates the earthy flavour of the mushrooms, turning them into a crispy, protein-packed snack.
As interest in mycology and gourmet ingredients grows across New Zealand, these chips have become a favourite among foodies and health-conscious snackers. They’re a brilliant, low-carb alternative to traditional snacks and can also be crushed and used as a powerful seasoning powder for soups, stews, and sauces. This is one of those easy food dehydrator recipes for Kiwi homes that feels both rustic and gourmet at the same time.
Ingredients & Method
-
Ingredients:
- 500g fresh mushrooms (button, Swiss brown, or portobello work well)
- 1 tablespoon olive oil
- 1/2 teaspoon garlic powder
- 1/2 teaspoon salt
- 1/4 teaspoon black pepper
- Optional: a pinch of smoked paprika, thyme, or nutritional yeast for a cheesy flavour.
-
Instructions:
- Gently clean the mushrooms with a damp cloth or a soft brush. Avoid soaking them, as they will absorb water and take longer to dehydrate.
- Slice the mushrooms evenly, about 5mm thick. Consistent thickness is key for even drying.
- In a large bowl, toss the mushroom slices with olive oil, garlic powder, salt, pepper, and any optional seasonings until lightly coated.
- Arrange the slices in a single layer on your dehydrator trays, ensuring they don’t overlap.
- Dehydrate at 55-60°C for 4-8 hours.
- The chips are ready when they are completely dry and crispy. They should snap easily. Let them cool completely before storing.
Pro Tip: Store your mushroom chips in a truly airtight container with a food-safe desiccant packet if you have one. Any exposure to moisture will cause them to lose their crispness, so proper storage is essential to keep them perfect.
9-Item Dehydrator Recipe Comparison
| Item | Implementation Complexity 🔄 | Resource Requirements 💡 | Expected Outcomes 📊 | Ideal Use Cases 💡 | Key Advantages ⭐ |
|---|---|---|---|---|---|
| Classic Beef Jerky | Moderate (6-12 hrs drying, safety needed) 🔄 | Meat, marinades, dehydrator | High protein, long shelf life 📊 | Outdoor activities, hiking | Cost-effective, preservative-free ⭐ |
| Dehydrated Kiwi Fruit Chips | Moderate (8-12 hrs drying) 🔄 | Ripe kiwis, dehydrator | High vitamin C, healthy snack 📊 | School lunchboxes, healthy snacking | Uses local fruit, no added sugar ⭐ |
| Herb Mix from Garden Herbs | Low (2-6 hrs drying) 🔄 | Fresh herbs, dehydrator | Long shelf life seasoning 📊 | Cooking, sustainable living | Uses surplus herbs, retains oils ⭐ |
| Apple Rings with Cinnamon | Moderate (6-10 hrs drying) 🔄 | Apples, cinnamon, dehydrator | Sweet, fiber-rich snack 📊 | Family snacks, fundraisers | No added sugar, gluten-free ⭐ |
| Vegetable Leather from Beetroot | Moderate (8-12 hrs drying, blending) 🔄 | Beetroot, blender, dehydrator | Nutritious, natural color 📊 | Health food, kids' nutrition | Highly nutritious, natural energy ⭐ |
| Banana Chips | Moderate (8-12 hrs drying) 🔄 | Ripe bananas, dehydrator | Crispy, potassium rich 📊 | Using overripe bananas, trail mix | Long shelf life, no added sugars ⭐ |
| Tomato Powder | Moderate (6-10 hrs drying + grinding) 🔄 | Tomatoes/paste, grinder, dehydrator | Concentrated flavor, long shelf life 📊 | Soups, stews, camping | Intense flavor, reduces food waste ⭐ |
| Kumara (Sweet Potato) Chips | Moderate (8-12 hrs drying, optional blanch) 🔄 | Kumara, mandoline, dehydrator | Crispy, vitamin-rich 📊 | Healthy snacking, Māori cuisine | Uses local produce, gluten-free ⭐ |
| Mushroom Chips | Moderate (6-10 hrs drying) 🔄 | Mushrooms, dehydrator | Umami-rich, low calorie 📊 | Gourmet cooking, vegetarian snacks | Long shelf life, healthy snack ⭐ |
Embrace the Flavour: Your Dehydrating Journey Starts Here
From the rugged, savoury satisfaction of homemade beef jerky to the sweet, tangy crunch of dehydrated kiwi fruit chips, your food dehydrator is a gateway to a world of flavour and preservation. We've explored a vibrant collection of recipes designed specifically with the Kiwi pantry in mind, transforming everyday ingredients into long-lasting, delicious treasures. This journey through 10 easy food dehydrator recipes for kiwi homes has hopefully demystified the process, showing you just how simple and rewarding it can be.
The real beauty of dehydrating lies in its versatility and its power to reduce food waste. That handful of herbs from the garden, the last few apples in the fruit bowl, or the surplus of summer tomatoes can all be given a new, flavourful life. By mastering these foundational recipes, from kumara chips to versatile tomato powder, you unlock a new level of culinary creativity and self-sufficiency right in your own kitchen.
Your Path to Dehydrating Mastery
As you move forward, remember the core principles we've covered. Temperature control is your most crucial tool; lower temperatures preserve delicate enzymes and nutrients, while higher ones are needed for safety with items like meat. Uniform slicing is the secret to even drying, ensuring every piece reaches that perfect texture simultaneously. Don’t be afraid to experiment, either. These recipes are just the beginning.
Key Takeaway: The true value of a food dehydrator is not just in preserving food, but in transforming it. It's about concentrating flavours, creating healthy snacks, and taking control of the ingredients you and your family consume.
Actionable Next Steps for Your Kitchen
To truly integrate dehydrating into your routine, start small and build confidence.
- Pick One Recipe: Choose the recipe from our list that excites you the most. Whether it's the simple banana chips or the earthy mushroom chips, start with one success.
- Plan for Preservation: Next time you see seasonal produce on special at the supermarket, think about how you could dehydrate it. Buy that larger bag of carrots or apples with a plan.
- Create Your 'Flavour Station': Dedicate a small space in your pantry for your dehydrated creations. Keep airtight jars ready for your finished jerky, fruit leathers, and vegetable powders.
Embracing these techniques empowers you to create healthy, preservative-free snacks and pantry staples. It’s a sustainable practice that honours the food you bring into your home, saving you money and delighting your taste buds. Your dehydrating adventure has just begun; happy creating!
Ready to take your home organisation to the next level? A quality food dehydrator is a fantastic start, and at Folders, we have a curated selection of appliances to fit every Kiwi kitchen. Explore our range of food dehydrators and other essential home solutions at Folders to continue your journey toward a more organised and flavourful home.