
How to Make Beef Jerky with a Food Dehydrator – NZ Guide
Making beef jerky with a food dehydrator is a straightforward and seriously rewarding process. It really just comes down to four main stages: starting with the right cut of lean beef, letting it soak up a flavour-packed marinade, drying it low and slow, and finally, storing it properly to keep it fresh. This guide will walk you through everything you need to know, with plenty of Kiwi-specific tips to make sure your first batch is an absolute winner.
Your Guide to Amazing Homemade Beef Jerky in NZ
Welcome! You've just found your go-to resource for making incredible beef jerky, right here in New Zealand. There’s a special kind of satisfaction that comes from making your own food from scratch, and jerky is a perfect example. You get to control everything, from the cut of meat you choose to the exact flavour profile. Forget those generic, overly-salty options from the supermarket—this is your chance to create something uniquely yours.
This guide is all about showing you how to make beef jerky with a dehydrator, with practical steps that make sense for us here in New Zealand. We reckon the best jerky comes from the best ingredients, so we’ll lean into using our world-class Kiwi beef to get unbelievable results.
The Rewarding Journey of Homemade Jerky
It’s no surprise that making jerky at home has become a huge hobby for Kiwis. It’s a brilliant way to whip up high-protein, easy-to-carry snacks for tramping adventures, school lunches, or just to have in the pantry for when cravings hit. And honestly, it’s a lot easier on the wallet in the long run.
The real fun, though, is in the flavour. You can stick with the classics or get creative with some proper Kiwi twists. Think about a marinade infused with mānuka honey, or maybe a spicy one using a splash of your favourite local craft beer. The possibilities are pretty much endless.
Key Takeaway: The single biggest advantage of making your own jerky is having total control. You dictate the salt, the sweet, and the heat, and you know for sure there are no weird preservatives or additives.
What to Expect From This Guide
We've laid this out to take you from being a bit curious to feeling like a seasoned pro. Consider it your complete roadmap for the jerky-making journey.
Here’s a sneak peek at what’s inside:
- Choosing the Best Meat: We'll point you to the perfect lean cuts at your local butcher or supermarket and explain why fat is the enemy of good jerky.
- Perfecting Your Marinade: You'll get some of our tried-and-true recipes and learn the secrets to a marinade that really sinks in for maximum flavour.
- Mastering Your Food Dehydrator: We’ll cover the ideal temperature and timing, how to lay out the strips for even drying, and the all-important signs that your jerky is done.
- Storing for Freshness: The job isn't finished when it comes out of the dehydrator. We’ll go over conditioning and storage to keep your jerky tasting great for weeks, or even months.
This is the only guide you'll need to get started. Let’s dive in.
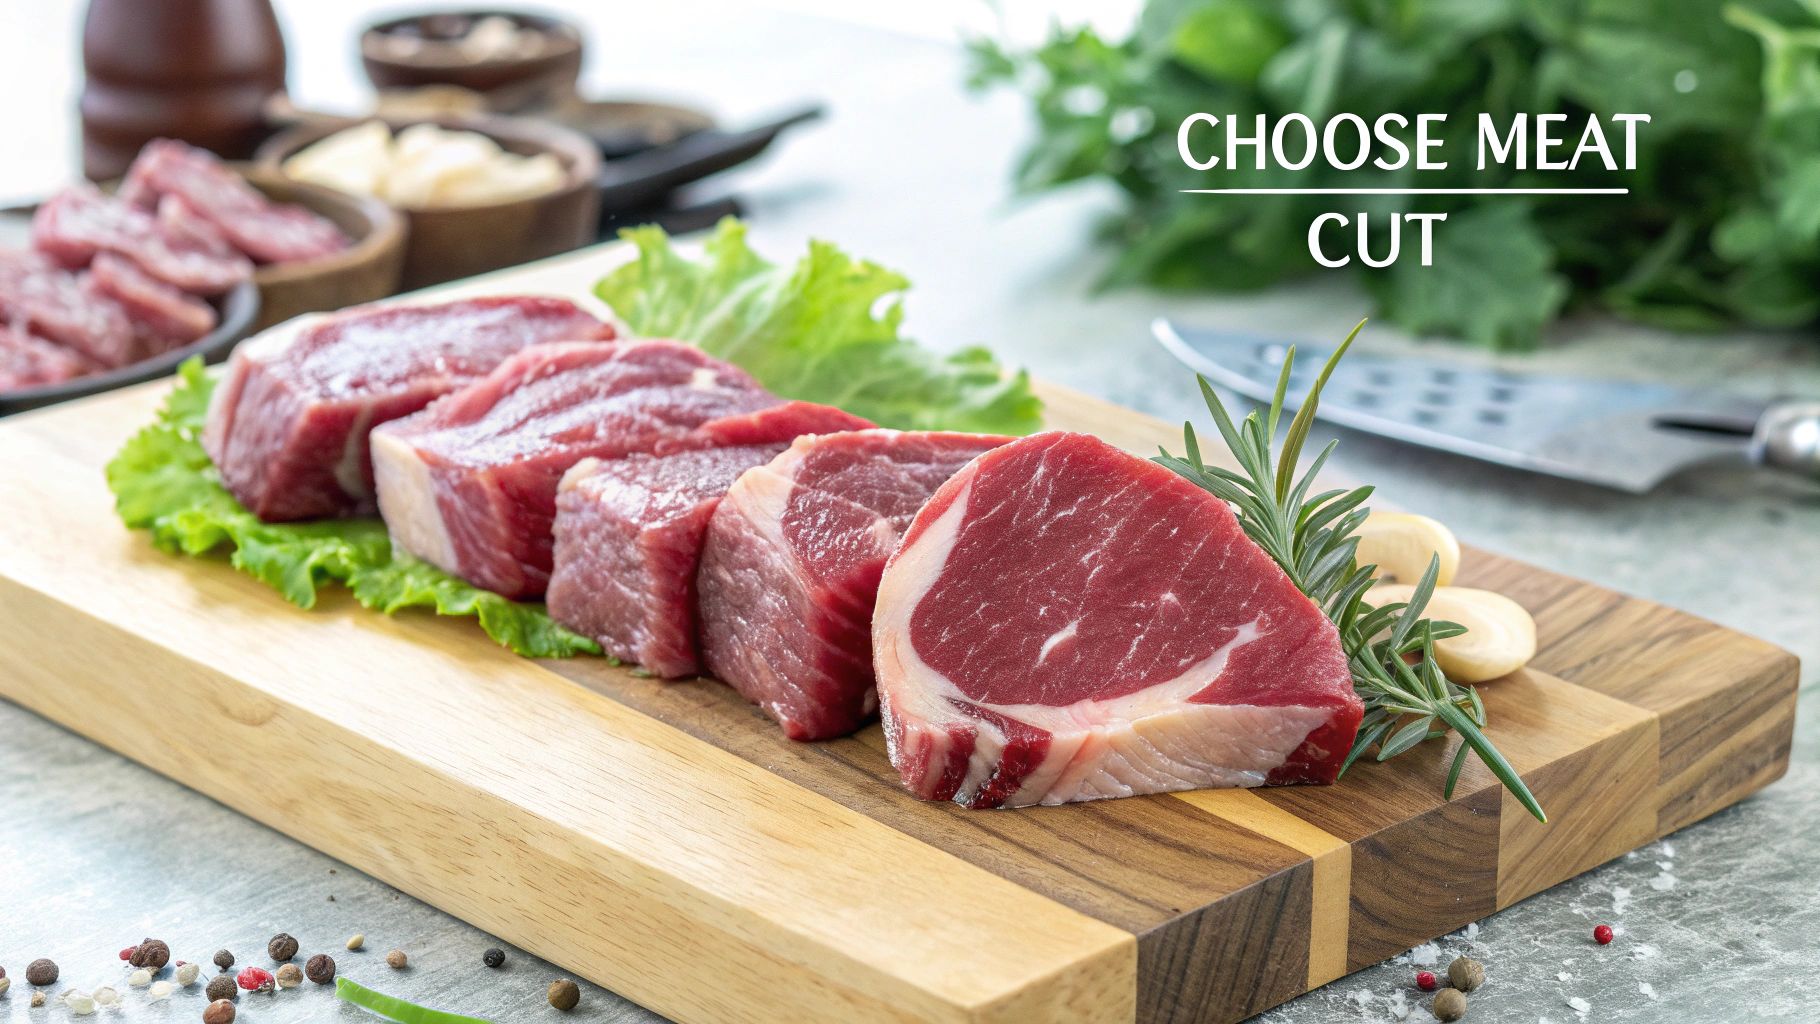
How to Choose the Right NZ Beef for Your Jerky
The secret to truly phenomenal beef jerky doesn't start with the marinade or the Food dehydrator—it all begins with the beef itself. Getting this first step right is probably the most important decision you'll make. If you're learning how to make beef jerky with a dehydrator, remember this one rule: lean is non-negotiable.
So, what's all the fuss about lean meat? Simple. Fat doesn't dehydrate. Instead, it goes rancid over time, which will ruin your beautiful jerky, shorten its shelf life, and give it a greasy, unpleasant texture. We're aiming for chewy and flavourful, not oily. That means we're on the hunt for cuts with as little intramuscular fat (marbling) as possible.
When you're at the supermarket or your local Kiwi butcher, look for those long, lean muscles. They're perfect for slicing into uniform strips, which is absolutely vital for even drying.
Top Beef Cuts for Jerky in New Zealand
Here in New Zealand, we're spoiled for choice with some of the best beef in the world. The good news for us jerky makers is that you don't need the most expensive cuts. In fact, it's often the cheaper, tougher cuts that shine because they're naturally lean and packed with that classic beefy flavour.
To help you choose, here's a quick rundown of what I look for at the butcher.
Comparison of Top Beef Cuts for Jerky in NZ
| Beef Cut | Typical NZ Price Range (per kg) | Leanness Rating (1-5) | Best For |
|---|---|---|---|
| Topside | $18 - $25 | 4 | A fantastic, budget-friendly all-rounder. Great balance of flavour and chew. |
| Silverside | $17 - $24 | 4.5 | Very lean and economical. Can be a bit tougher, so it loves a long marinade. |
| Eye of Round | $20 - $28 | 5 | My personal favourite. Exceptionally lean, uniform grain, easy to slice perfectly. |
Getting friendly with your local butcher can be a real game-changer. Don't be shy—tell them you're making jerky! A good butcher will happily trim off the thick fat cap for you and might even slice the meat to your preferred thickness. This can save you a whole lot of prep time at home.
Pro Tip: Ask your butcher to slice the meat for you, about 3-5mm thick. You'll need to tell them if you want it sliced "with the grain" for a classic, chewy jerky, or "against the grain" for a more tender, almost brittle result. It's a simple request that makes your life so much easier.
It's also interesting to see how local market trends can affect our choices. While New Zealand is a major beef producer, you might be surprised to learn that as of 2024, only about 9.5% of the beef we produce is actually eaten here. With many Kiwis switching to chicken due to household budget pressures, the price of beef can fluctuate. This makes those economical cuts like topside even more attractive for us home jerky makers. You can explore more about these market trends to get a better sense of local beef prices.
Preparing Your Chosen Cut
Once you've got your beautiful slab of NZ beef, there's one last prep step before it hits the marinade: trimming. Even the leanest cuts will have a "fat cap" or some slivers of external fat. Your mission is to carefully trim off as much of this visible white fat as you can with a sharp knife.
The thickness of your slices is the next critical factor, as it directly impacts your drying time. Consistency is everything if you want a perfect batch.
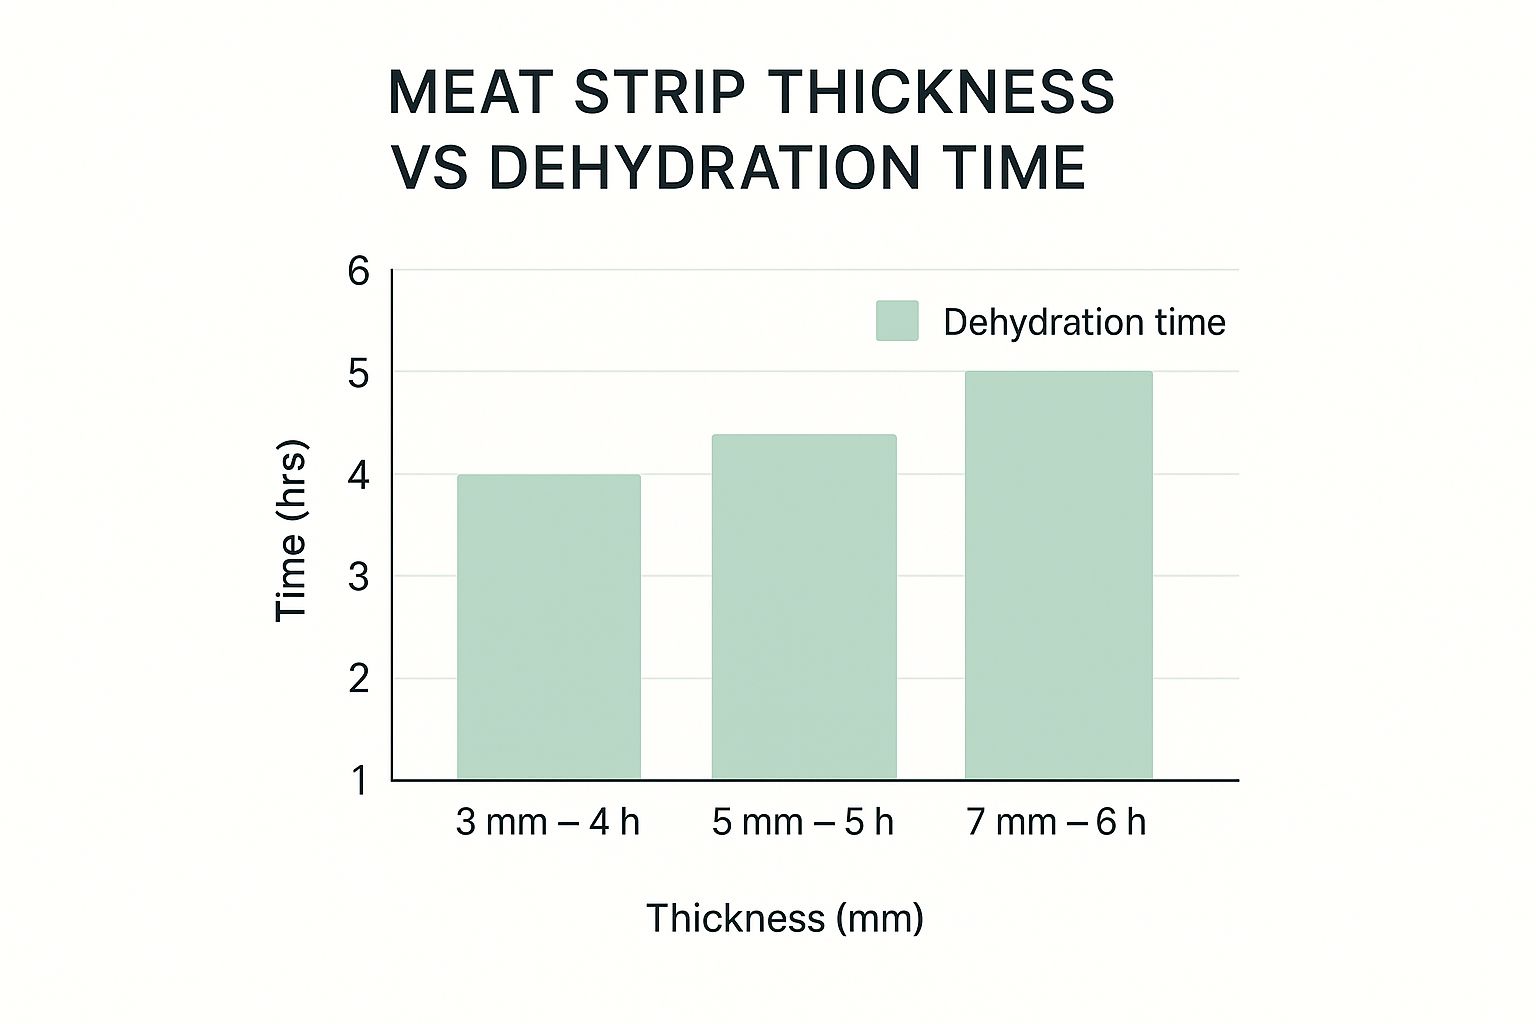
As you can see, even a couple of millimetres can add hours to the process. Take your time slicing, or better yet, get your butcher to do the hard work for you
Getting Your Beef Ready for Maximum Flavour
This is where the magic really happens. Prepping and marinating is the creative heart of making jerky, the stage where you give it a unique personality. A brilliant marinade does more than just add taste; it tenderises the meat and helps preserve it, making this step absolutely essential for a top-notch final product.
Before we even touch the marinade, we need to talk about the slice. How you cut the beef dramatically changes the final texture, so it’s a decision worth making before you start.
- Slicing with the grain: This keeps the long muscle fibres intact. The result? A classic, satisfyingly chewy jerky you can really tear into. It's the traditional style many of us know and love.
- Slicing against the grain: This method cuts through those long muscle fibres, creating shorter sections. This gives you a much more tender, almost brittle jerky that’s easier to chew. It's a great choice if you prefer a softer bite.
Honestly, there's no right or wrong answer here—it's all about what you like. My advice is to try both ways on your first couple of batches to see which one you prefer.
Slicing and Food Safety Basics
Once you've picked your cutting style, aim for a consistent thickness of about 3-5mm. Go any thicker, and your drying time will shoot up. Any thinner, and you might end up with crispy beef chips instead of chewy jerky.
Here’s a fantastic tip I picked up years ago: pop your beef in the freezer for about 1-2 hours before slicing. You're not looking to freeze it solid, just get it nice and firm. This makes the meat so much easier to handle and helps you slice beautifully uniform strips.
Food Safety First: Always start with clean hands, a clean chopping board, and a sharp knife. To prevent cross-contamination, use a dedicated board for your beef that you don't use for anything else. While the marinade helps cure the meat, good hygiene is always your first line of defence.
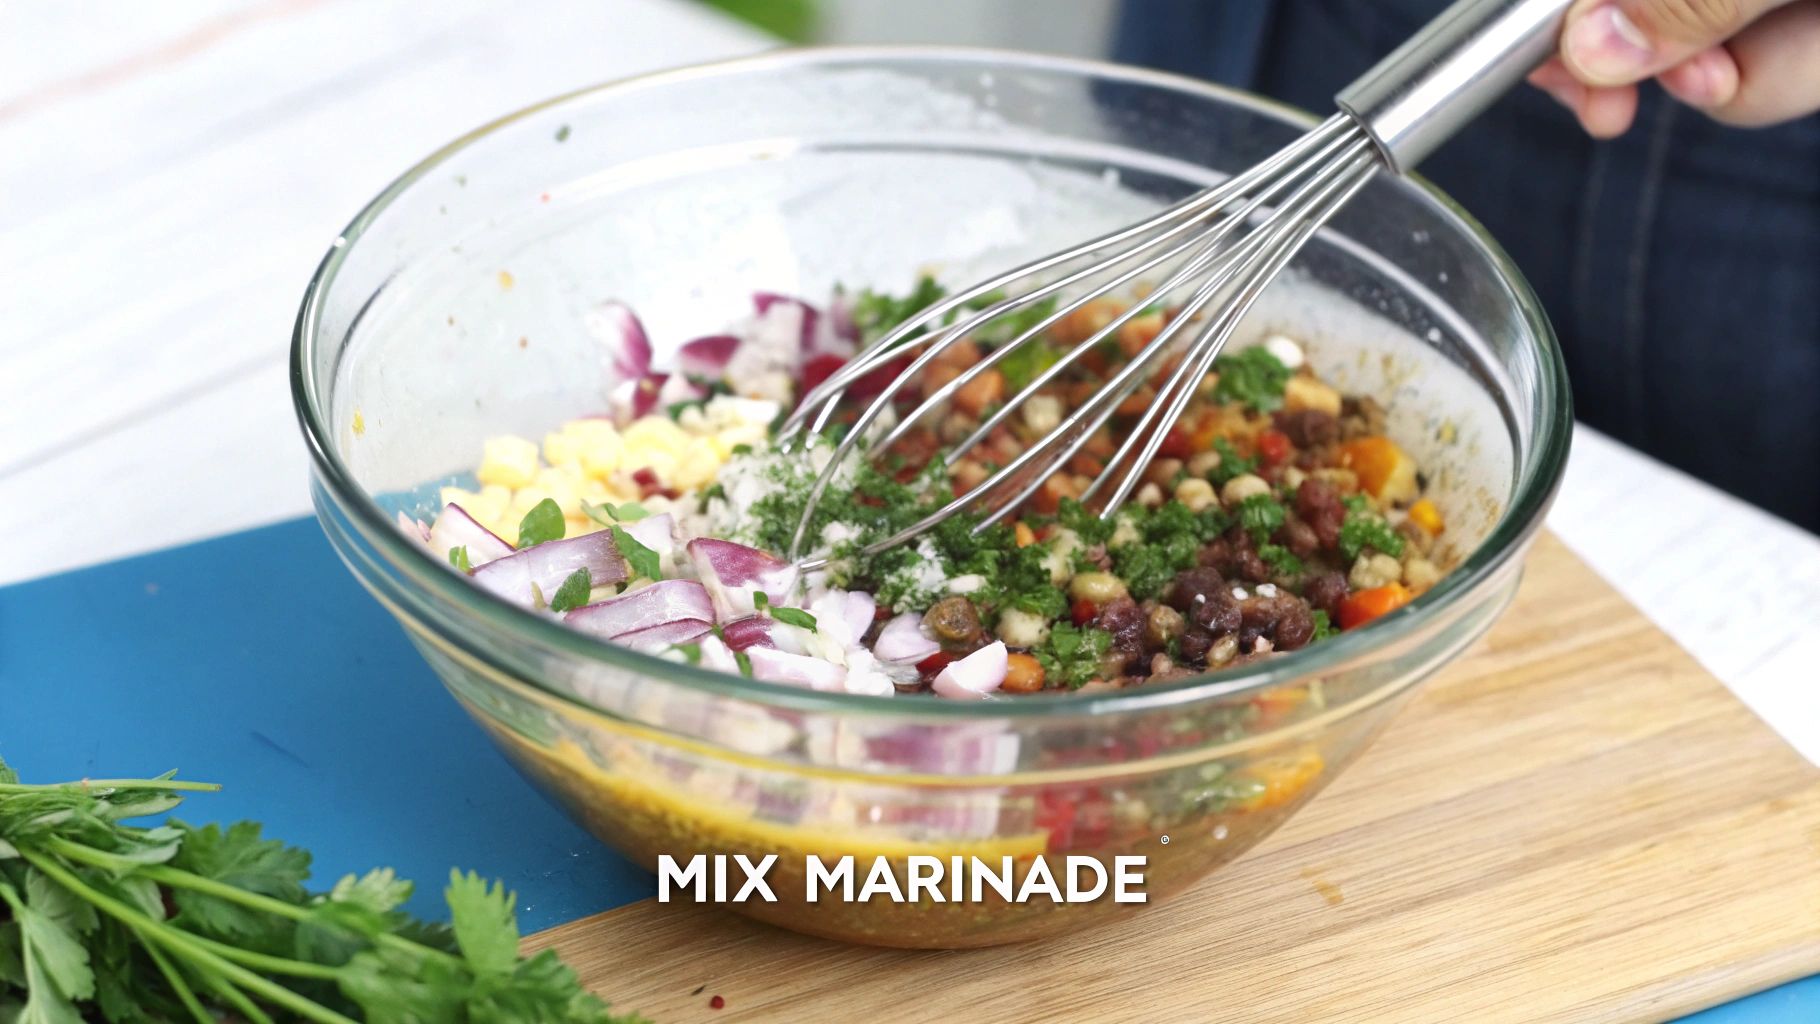
My Favourite Kiwi-Inspired Marinade Recipes
Now for the best bit. A good marinade strikes a perfect balance between salty, sweet, savoury, and acidic flavours. The salt (usually from soy sauce) is key for preservation, while sugar helps develop that delicious texture and taste.
Here are three of my personal, tried-and-true recipes that give a nod to some classic Kiwi flavours. Each recipe is designed for about 1kg of prepared beef strips.
1. The Classic Smoky BBQ
This one's always a crowd-pleaser. It’s savoury with a touch of sweetness and a deep smoky flavour that feels right at home on a good piece of New Zealand beef.
- ½ cup soy sauce
- ¼ cup Worcestershire sauce
- 2 tablespoons brown sugar
- 1 tablespoon liquid smoke
- 2 teaspoons smoked paprika
- 1 teaspoon garlic powder
- 1 teaspoon onion powder
- ½ teaspoon black pepper
2. Sweet and Spicy Mānuka Honey Sriracha
For those who enjoy a bit of a kick, this marinade beautifully balances the unique sweetness of mānuka honey with the lively heat of sriracha.
- ½ cup soy sauce
- 3 tablespoons mānuka honey
- 2 tablespoons sriracha (or more, if you’re brave!)
- 1 tablespoon rice vinegar
- 1 teaspoon grated fresh ginger
3. Savoury Soy and Ginger
This marinade is beautifully simple and clean, letting the rich flavour of the beef really shine through. The ginger and garlic provide a fragrant, savoury base that is incredibly moreish.
- ½ cup soy sauce
- ¼ cup water
- 2 tablespoons brown sugar
- 2 cloves garlic, minced
- 1 tablespoon grated fresh ginger
- 1 teaspoon black pepper
The Art of the Marinade
After you've whisked your chosen marinade together, pour it over your beef strips in a large zip-top bag or a non-reactive container. Squeeze as much air out as you can before sealing it, then give the bag a good massage to make sure every single strip is coated.
Now comes the test of patience. Pop the bag in the fridge and let it marinate for at least 12 hours, though I find 24 hours is the sweet spot. This really allows the flavours to penetrate deep into the meat. It helps to give the bag a shake and a massage every few hours to move the marinade around.
It's also worth thinking about how the wider market can affect our home-cooking projects. For example, New Zealand's beef exports are forecast to hit record highs, thanks to strong international demand. While that’s great for the economy, it can sometimes tighten the domestic supply of the lean cuts we prefer for jerky and nudge prices up. This pressure is a key reason why knowing how to get the most from every batch is so valuable. You can read more about how NZ's beef exports impact the local market on TheBeefSite.com.
Once the marinating time is up, you're ready for the dehydrator. Pull the strips out of the bag and let any excess marinade drip off. Resist the urge to pat them dry—that thin, flavour-packed coating is exactly what you want to keep.
Firing Up the Food Dehydrator: The Final Stretch to Perfect Jerky
Right, you've done the hard yards with the slicing and marinating. Now for the magic. This is where those flavour-soaked strips of beef transform into the chewy, delicious jerky you've been dreaming of. Getting this part right isn't about fiddling with complex settings; it's all about understanding the interplay between airflow, temperature, and time.
Nailing this final stage is what separates a decent batch of jerky from a truly exceptional one. With a few simple techniques, you'll be turning out consistently fantastic jerky every single time.
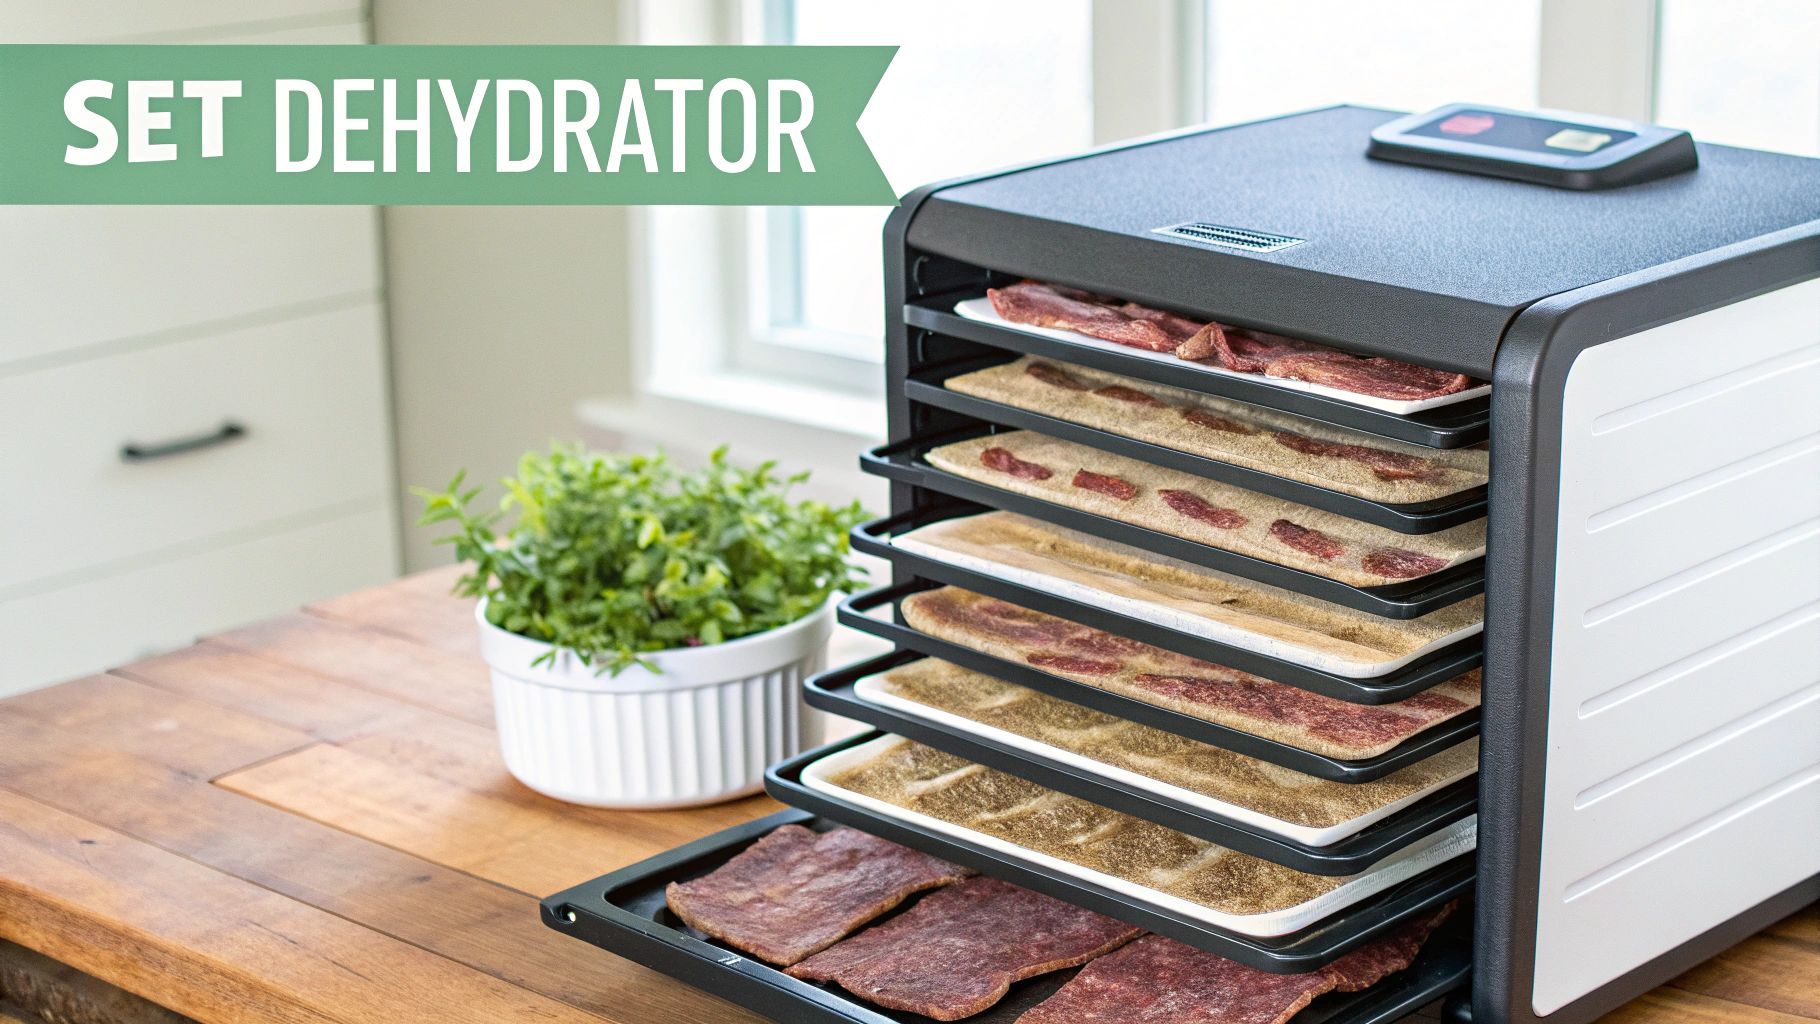
Give Your Beef Some Breathing Room
If there's one mistake I see beginners make over and over again, it's cramming the food dehydrator trays too full. I get it, you want to make as much as possible in one go, but overcrowding is the fastest way to ruin a batch. Airflow is everything.
Every single strip of meat needs its own space for that warm air to work its magic. This is non-negotiable for even drying.
- Single layer only: Never, ever overlap the strips. When they touch, moisture gets trapped, creating damp spots that just won't dry properly and can lead to spoilage.
- Leave a wee gap: I aim for at least a centimetre between each piece. Think of it as giving each strip its own personal drying zone. That little gap is crucial for letting air circulate freely above, below, and all around.
Honestly, taking an extra two minutes to lay out your trays properly is one of the best investments you can make. The payoff in quality is huge.
Dialling in the Right Temperature
Finding the sweet spot for your food dehydrator's temperature is a bit of a balancing act. You need enough heat to safely deal with any nasty bacteria, but not so much that you actually cook the meat. Go too hot, and you risk "case hardening"—where the outside becomes a hard, dry shell while the inside stays moist. That's a one-way ticket to mouldy jerky.
For beef, the ideal range is 65-75°C (150-165°F). This is why I always tell people to get a dehydrator with an adjustable thermostat. It gives you the control you need to hit that perfect balance between food safety and achieving that classic chewy texture.
My Go-To Setting: I almost always set my machine to 70°C. For the 3-5mm strips I typically make, it's the perfect middle ground. It gives me peace of mind that it’s hot enough to be safe, without being so aggressive that it cooks the meat.
The Art of Knowing When It's Done
Forget what the timer says. This part is more art than science. The thickness of your slices, the humidity on the day, and even the sugar content of your marinade will all impact the final drying time. You could be looking at anywhere from 4 to 8 hours.
The only reliable way to know for sure is the "bend test."
- Grab one of the thicker-looking pieces from the machine.
- Let it cool on the bench for 5-10 minutes. It's important to let it cool, as jerky always feels more pliable when it's warm.
- Now, bend the cooled strip to a 90-degree angle.
You'll know it's perfect when it bends and cracks, but doesn't snap in two. You should see fine, white muscle fibres appear at the crack. If it breaks cleanly, you've gone too far. If it just bends without any cracking, it needs more time.
It's also worth keeping an eye on the bigger picture. With New Zealand's beef production forecast to drop by about 6% through 2025, getting our hands on those perfect lean cuts might get trickier and a bit more expensive. This forecast, driven by tough farming conditions and high export demand, just makes it all the more important to perfect our technique. We don't want to waste a single gram of that precious Kiwi beef. You can read more about these production forecasts on Rabobank's report.
Once you think you're getting close, start checking a piece every half hour. That little bit of extra attention is the secret to a flawless batch, every time.
Storing Jerky and Solving Common Problems
So, you've pulled your first batch of homemade jerky from the dehydrator. Brilliant! Before you hide it all away, there’s one quick but crucial step that I never skip: conditioning. It's the secret to getting a consistent texture and making sure your jerky lasts.
Conditioning is really just about letting the jerky "sweat" a little to even out any leftover moisture. All you do is pack the completely cooled jerky loosely into an airtight container—a big glass jar or a zip-top bag works great. Let it sit on your kitchen bench for about 24 hours, giving it a good shake every now and then.
If you spot any condensation forming inside the container, your jerky isn’t quite dry enough. No drama. Just slide it back into the food dehydrator for another hour or two. Let it cool completely, then give the conditioning step another go. Once that’s done, you're ready to store it properly.
How to Store Your Homemade Jerky
Good storage is all about protecting your jerky from its three biggest enemies: oxygen, moisture, and light. Get this right, and your delicious creation will stay that way for much longer.
- Airtight Jars: For short-term storage (1-2 months), I find glass jars with solid seals are perfect. They keep the air out and you get to admire your handiwork. Just tuck them away in a cool, dark pantry.
- Vacuum Sealing: This is the gold standard for long-term storage, hands down. Pulling all the air out massively extends the shelf life. Vacuum-sealed jerky can easily last for 6-12 months, especially if you keep it in the fridge or freezer.
- Oxygen Absorbers: This is a great little trick. Tossing a small, food-safe oxygen absorber packet into your jars or bags mops up any leftover oxygen, which helps stop spoilage and keeps the flavour fresh.
Keeping your jerky safe after it's made is one thing, but you also need to keep things hygienic while you're making it. If you need some solid tips, this guide on how to keep flies away from food is a great resource.
Common Jerky Problems and How to Fix Them
Even after years of making jerky, I still have batches that don't turn out perfectly. It happens. Don't get discouraged; just think of it as a learning experience. Over time, you'll run into most of these common problems and learn how to solve them for next time.
A common mistake is thinking a bad batch is a failure. In reality, it’s just feedback. Each issue, whether it's too-brittle jerky or case hardening, tells you exactly what to adjust for your next attempt, helping you perfect your personal technique.
To help you figure out what went wrong, I've put together a quick troubleshooting table. It covers the most common issues you're likely to face when making beef jerky with a dehydrator.
Jerky Troubleshooting Guide
| Problem | Likely Cause | How to Fix It |
|---|---|---|
| Jerky is too brittle and snaps | It was dehydrated for too long or the temperature was too high. | Start checking your jerky earlier next time. The "bend-but-not-break" test is your best friend. |
| Jerky is too moist or bendy | It wasn't dehydrated for long enough. | Put it back in the dehydrator for another 1-2 hours and test again. Always condition it to check for hidden moisture. |
| Outside is hard, inside is soft | This is 'case hardening,' caused by the food vdehydrator temperature being too high. The outside cooked before the inside could dry. | Lower the dehydrator temperature to the recommended 65-75°C range. A lower, slower drying process is always better. |
| Jerky has a greasy feel | The beef cut was too fatty, or visible fat wasn't trimmed properly before marinating. | Be extra diligent with trimming next time. Choose leaner cuts like eye of round or silverside for best results. |
Use this guide to diagnose any hitches, and you'll be well on your way to making your next batch a roaring success.
Got Questions? Let's Talk Jerky
Even when you've got a solid recipe, a few questions always crop up on the first few jerky-making adventures. I've been there! Let's run through some of the most common queries to make sure you're feeling confident from the get-go.
Do I Need to Pre-Cook the Beef Before Dehydrating?
Nope, you can skip that step. There's a common misconception that you need to cook the meat first, but a good quality dehydrator does all the work for you.
As long as your dehydrator can reliably hold a temperature of 65-70°C, it’s more than capable of safely drying the meat and killing off any nasty bacteria. The real safety heroes here are the salt in your marinade, which acts as a cure, and the slow, steady heat from your machine.
Can I Just Use My Oven Instead of a Food Dehydrator?
Technically, yes, but I wouldn't recommend it. A food dehydrator will give you far better, more consistent results every single time. Making jerky in an oven is a real balancing act—you have to prop the door open to let moisture out and hope the thermostat at its lowest setting is even remotely accurate. It rarely is.
A food dehydrator, on the other hand, is built for this exact job. It provides that perfect combination of low, consistent heat and constant airflow. That's the magic formula for achieving that classic, chewy texture without accidentally cooking the meat.
A food dehydrator removes all the guesswork. Its controlled environment ensures a consistent, safe, and delicious product every time, making it a worthwhile investment for any serious jerky maker.
How Long Will My Homemade Jerky Actually Last?
When it's properly dried, conditioned, and stored, homemade jerky can last a surprisingly long time. How you store it is the key factor.
- In the pantry: Tucked away in an airtight container like a glass jar, your jerky will be good for 1-2 months.
- Vacuum sealed: This is a game-changer. Removing all the oxygen dramatically extends its life, keeping it fresh for 6 months or even longer.
- In the freezer: For ultimate long-term storage, especially with our humid Kiwi weather, the freezer is your best friend. Vacuum-sealed and frozen, your jerky stash will easily last for over a year.
At Folders, we have a wide range of kitchen appliances to help you create delicious homemade treats. Explore our selection of dehydrators and vacuum sealers to perfect your jerky-making setup. Find the right gear for your kitchen at https://folders.co.nz.