
Top Kitchen Layout Ideas to Transform Your Space in 2025
Ready to Revamp Your Kitchen?
Choosing the right kitchen layout is key to a functional and stylish space. This listicle explores 10 popular kitchen layout ideas, from galley and L-shaped kitchens to double islands and broken-plan designs. Discover the perfect layout to maximise your NZ kitchen's potential, whether you have a small apartment or a spacious home. Find inspiration for your renovation and learn how these different kitchen layout ideas can transform your cooking experience.
1. The Galley Kitchen Layout
The galley kitchen layout, a popular choice for kitchen layout ideas, is a highly efficient design characterised by two parallel countertops with a walkway in between. This layout takes its name from the compact kitchens found on ships, maximising functionality within a limited space. Galley layouts place all components within easy reach, promoting a linear workflow for cooking and food preparation, making them a favourite for home cooks seeking quality appliances and efficient use of space.
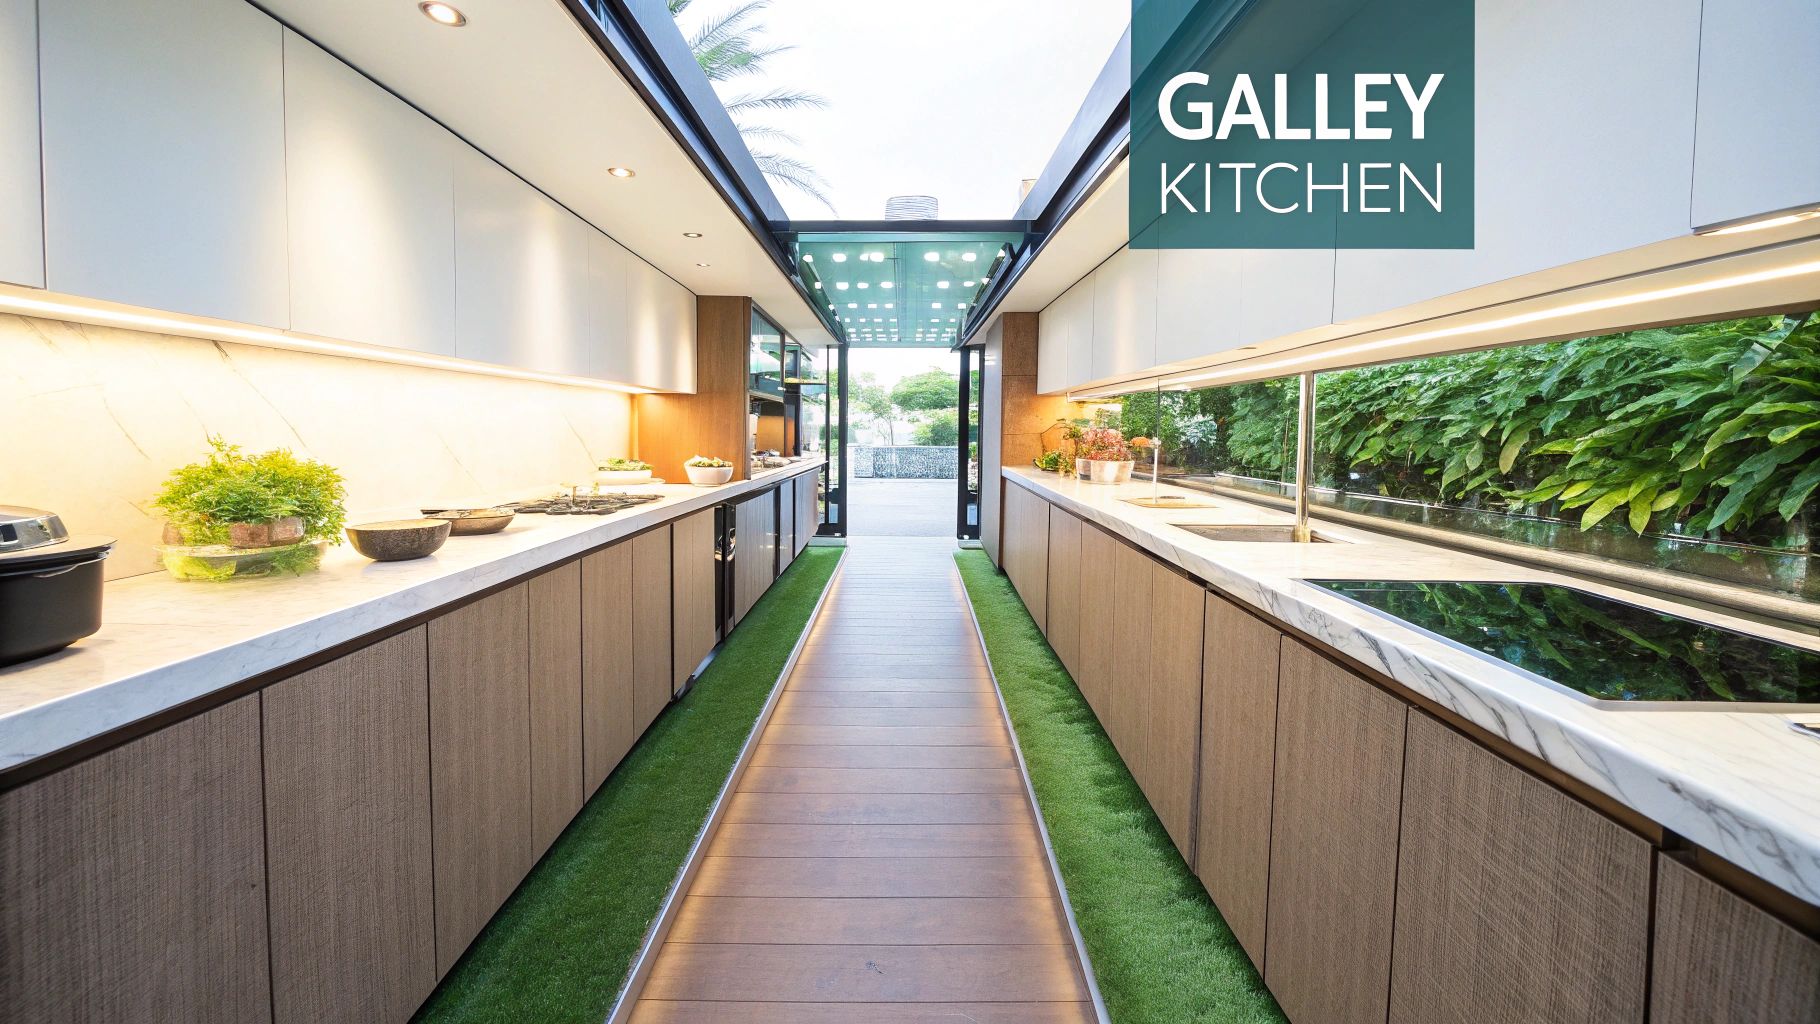
Typically, galley kitchens feature 1.2m-1.8m of space between counters, offering enough room to manoeuvre comfortably while keeping everything within arm's reach. This linear workflow design is ideal for serious home cooks and kitchen enthusiasts who value efficiency. From New York City apartment renovations featuring upscale galley kitchens showcasing high-end appliances, to celebrity chef Jamie Oliver's first London apartment’s classic galley layout, this design proves its adaptability across various styles and budgets. Even The Standard Hotel's residences in Miami demonstrate how modern interpretations of galley designs can incorporate on-trend aesthetics while maintaining functionality. This layout's enduring appeal, championed by figures like Julia Child, who appreciated the efficient workflow, and embraced by minimalist designers like John Pawson and Scandinavian design firms, highlights its practicality and timeless elegance. For Kiwi homeowners and renters, especially those in smaller spaces like apartments, a galley kitchen can be a smart solution.
This layout earns its spot on our list of kitchen layout ideas thanks to its efficient use of space and clear workflow pattern. It's a cost-effective choice for new homeowners and budget-conscious shoppers due to the straight runs of cabinetry and countertops, minimising installation costs. This makes it an excellent choice for those outfitting kitchens and laundries on a budget.
Features and Benefits:
- Compact and Space-Efficient: Maximises functionality in limited spaces, perfect for small-space dwellers in NZ needing compact and multi-functional products.
- Linear Workflow: Minimises movement required during cooking, appealing to those seeking efficiency and practicality.
- Cost-Effective: Straightforward design often translates to lower installation costs.
Pros:
- Extremely efficient for cooking
- Cost-effective
- Makes excellent use of small spaces
- Clear workflow pattern
Cons:
- Can feel cramped with multiple people
- Limited counter space compared to other layouts
- May have resale challenges if too narrow
- Not ideal for eat-in kitchen arrangements
Tips for Optimising a Galley Kitchen:
- Install sliding or pocket doors to save space.
- Use light colours and reflective surfaces to create the illusion of spaciousness, a great tip for smaller NZ homes.
- Consider a single line of overhead cabinets to avoid a tunnel effect.
- Incorporate pull-out storage solutions, like those available at many NZ appliance retailers, to maximise space efficiency.
Whether you're a home cook, a renovation professional sourcing supplies, or simply looking to upgrade your kitchen, the galley layout deserves consideration. Its blend of efficiency and style makes it a practical and appealing choice for a wide range of Kiwi homeowners and renters.
2. L-Shaped Kitchen Layout
The L-shaped kitchen layout is a popular choice for Kiwi homeowners, and for good reason. It's a highly functional and adaptable design that efficiently utilises space, making it suitable for both small and medium-sized kitchens. This layout earns its name by utilising two adjacent, perpendicular walls for cabinetry and appliances, creating a distinct "L" shape. This configuration naturally establishes a practical work triangle between the sink, stove, and refrigerator, minimising wasted steps while cooking. It's a classic choice that seamlessly blends functionality with style.
This layout shines in its ability to create a defined work zone without through-traffic, meaning no more family members wandering through your cooking space while you’re preparing dinner. It also generally provides ample counter space for food preparation and appliance placement, allowing for a smooth and efficient workflow. Unlike linear kitchens, the L-shape can comfortably accommodate multiple cooks, making it ideal for families who enjoy cooking together.
Furthermore, the L-shaped layout often lends itself well to open-plan living, seamlessly connecting the kitchen to adjoining dining or living areas, a feature increasingly popular in modern NZ homes. If space allows, an island can be incorporated into the design, further enhancing functionality and providing a social hub for the household. Learn more about L-Shaped Kitchen Layout
While the L-shaped layout offers many advantages, it’s important to be aware of potential drawbacks. Corner cabinets, while offering storage solutions, can be notoriously difficult to access without specialised fittings. Without careful planning, these corners can become wasted space. In very large kitchens, the L-shape can sometimes feel inefficient, with appliances spread too far apart, disrupting the ideal work triangle. Finally, compared to U-shaped designs, the L-shape provides less wall space for cabinetry.
Examples of Successful Implementation:
From classic to contemporary, the L-shaped kitchen’s versatility is evident in a range of styles: think Martha Stewart's elegant farmhouse kitchen with custom cabinetry, or the modern L-shaped kitchens frequently showcased in Dwell Magazine's mid-century renovations. Even popular home renovation shows like HGTV's 'Fixer Upper', 'Property Brothers', and 'Love It or List It' frequently utilise L-shaped designs for their open-concept renovations. This speaks volumes about the layout's enduring appeal and adaptability.
Tips for Optimising Your L-Shaped Kitchen:
- Conquer Corner Cabinets: Install lazy Susans, pull-out shelves, or magic corner units to maximise accessibility and prevent dead space.
- Strategic Appliance Placement: Place the sink and dishwasher on one leg of the "L" and the cooking zone (stove and oven) on the other to optimise workflow.
- Island or Nook Integration: Consider leaving one end of the "L" open to incorporate a breakfast nook or a kitchen island for added functionality and social space.
- Define Zones with Lighting: Use pendant lighting above the island or dining area to visually separate the kitchen from adjoining living spaces within an open-plan layout.
The L-shaped kitchen layout deserves its place on this list due to its inherent practicality and adaptability. Its efficient work triangle, combined with its capacity for both open-plan living and potential island integration, makes it an excellent choice for a wide range of kitchen sizes and design preferences. Pioneered by architects like Frank Lloyd Wright and regularly recommended by services like IKEA's kitchen planning, the L-shaped kitchen layout remains a timeless and highly effective kitchen layout idea for Kiwi homes.
3. U-Shaped Kitchen Layout
The U-shaped kitchen layout is a highly efficient and popular choice for kitchen layout ideas, especially for serious home cooks and those who value ample storage and workspace. This design utilises three adjoining walls for workspaces and cabinetry, creating a distinct "U" shape. Its enclosed nature and clever configuration make it a powerhouse for culinary creativity and practical functionality. This layout deserves its place on this list due to its maximised storage, efficient workflow, and classic appeal.
How it Works: The U-shape creates a dedicated cooking zone where everything is within easy reach. This layout naturally establishes an ideal work triangle between the sink, refrigerator, and stove, minimising steps and maximising efficiency. Typically boasting 3m+ of counter space, the U-shaped kitchen offers abundant room for food preparation and multiple cooks to work comfortably.
Features and Benefits:
- Maximum Storage: Three walls of cabinetry provide unparalleled storage capacity for all your kitchen essentials, from pots and pans to pantry staples.
- Abundant Counter Space: Prepare elaborate meals, bake to your heart's content, or simply enjoy having ample space for everyday kitchen tasks.
- Efficient Workflow: The U-shape minimises movement between key work areas, streamlining your cooking process.
- Multiple Cooks: The layout comfortably accommodates more than one cook, making it perfect for collaborative cooking or entertaining.
- Contained Cooking Zone: The enclosed design helps keep children and guests safely out of the primary cooking area.
Pros and Cons:
Pros:
- Maximum storage capacity.
- Abundant counter space.
- Extremely efficient workflow.
- Allows multiple cooks to work simultaneously.
- Enclosed design.
Cons:
- Can feel cramped if the U is too narrow (less than 8 feet across).
- May feel closed off from the rest of the home.
- Two corner cabinets can be challenging to utilise effectively.
- Not ideal for very small kitchens.
- Limited eat-in options without an island or peninsula.
Examples of Successful Implementation:
- Ina Garten's (Barefoot Contessa) Hamptons kitchen showcases a beautifully functional U-shaped design.
- Many restaurant prep kitchens rely on the efficiency of the U-shape.
- Julia Child's iconic Cambridge kitchen, preserved in the Smithsonian, features a classic U-shaped layout.
Tips for a Successful U-Shaped Kitchen in NZ Homes:
- Maintain Space: Ensure at least 10 feet between opposing counters for comfortable movement.
- Strategic Placement: Place the sink at the base of the U with the cooking range and refrigerator on either side.
- Corner Solutions: Maximise corner cabinet space with clever solutions like magic corners, Lazy Susans, or diagonal cabinets.
- Peninsula Extension: Consider adding a peninsula to create a casual dining area or additional workspace. This is particularly useful in open-plan kiwi homes where the kitchen flows into living spaces.
- Uniform Cabinetry: Use uniform cabinetry height to maintain visual continuity and a streamlined look around the U.
- Lighting: Pay attention to lighting, especially under cabinets, to avoid shadows in the work zones.
When and Why to Use a U-Shaped Layout:
This layout is ideal for medium to large-sized kitchens where maximising storage and efficiency are top priorities. It's a perfect fit for passionate home cooks, families who enjoy cooking together, and anyone who appreciates a well-organised and functional kitchen space. If you frequently entertain or simply desire a kitchen that makes cooking a joy, the U-shaped layout is an excellent choice. While perhaps less suited to compact NZ villas or bungalows, it can be brilliantly incorporated into larger homes, open-plan designs, and even apartments with the right planning.
4. Island Kitchen Layout
The island kitchen layout is a popular choice for homeowners seeking both functionality and a social hub in their kitchens. This layout centres around a freestanding workspace in the middle of the room, offering additional counter space, storage, and often seating. It's a highly adaptable design that can enhance both L-shaped and U-shaped kitchens, turning them into dynamic and inviting spaces. Island kitchens are a great option for those who enjoy cooking and entertaining, creating a natural flow for both activities.
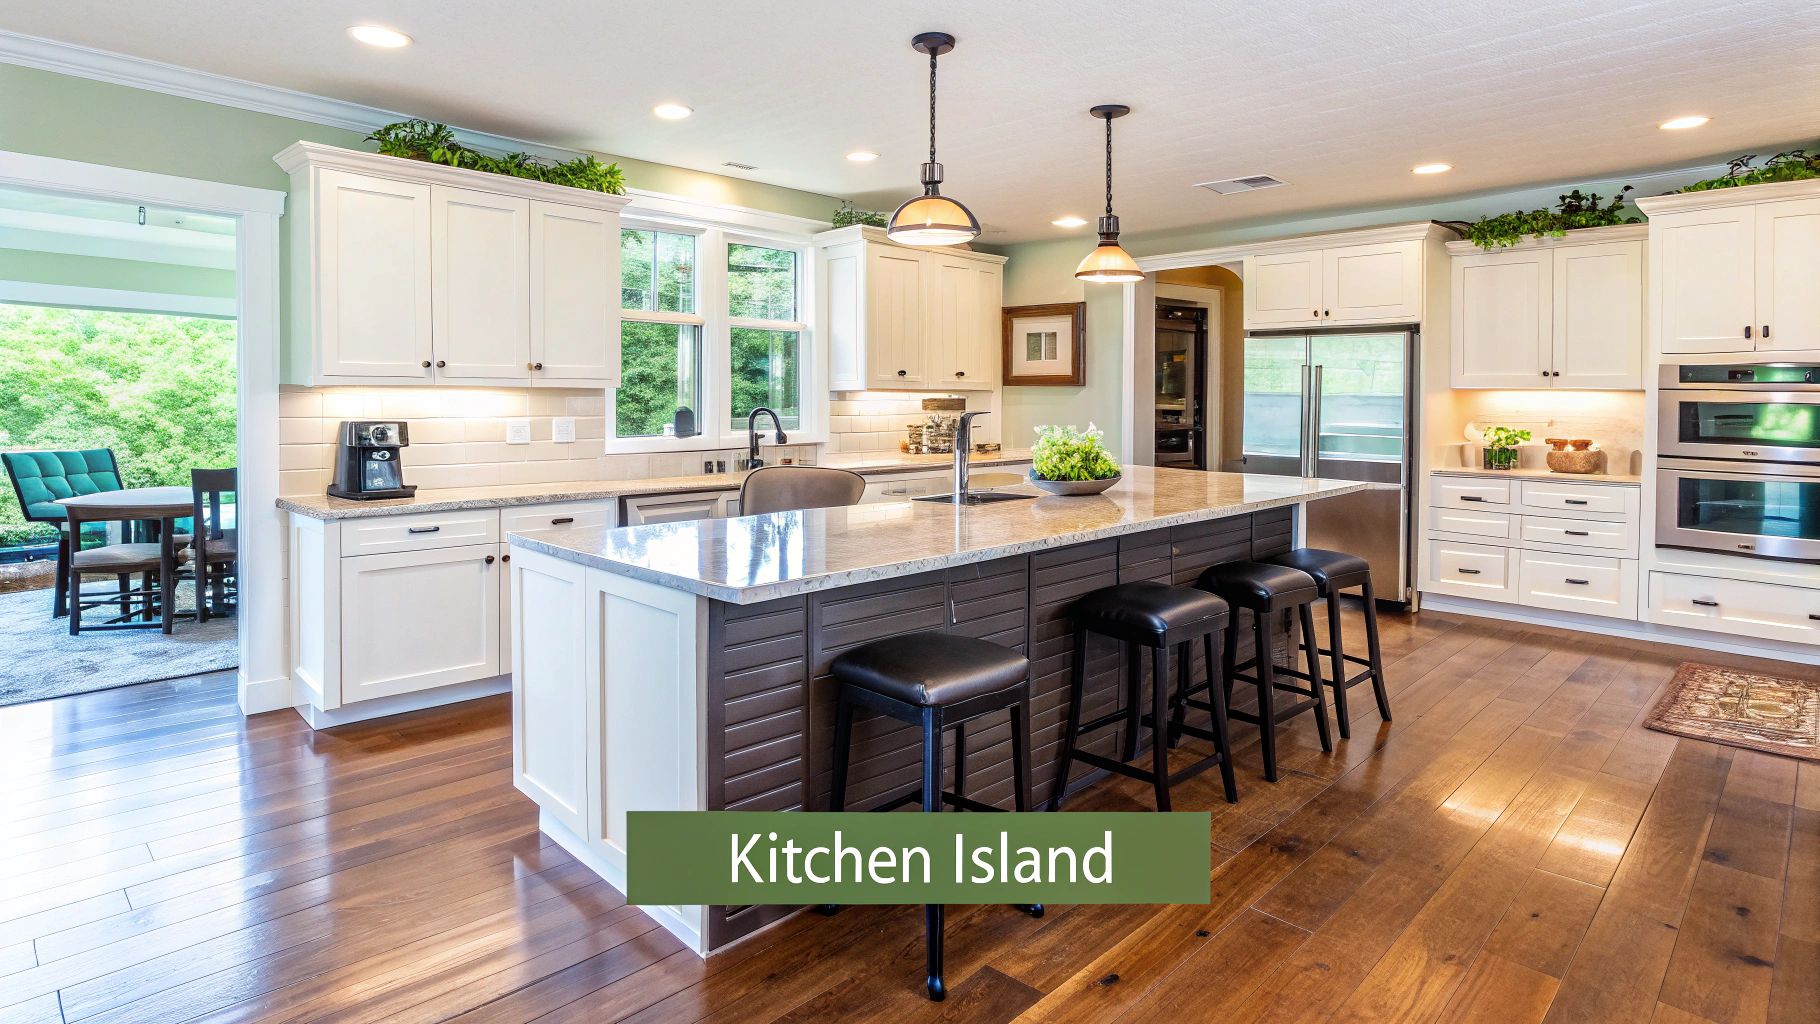
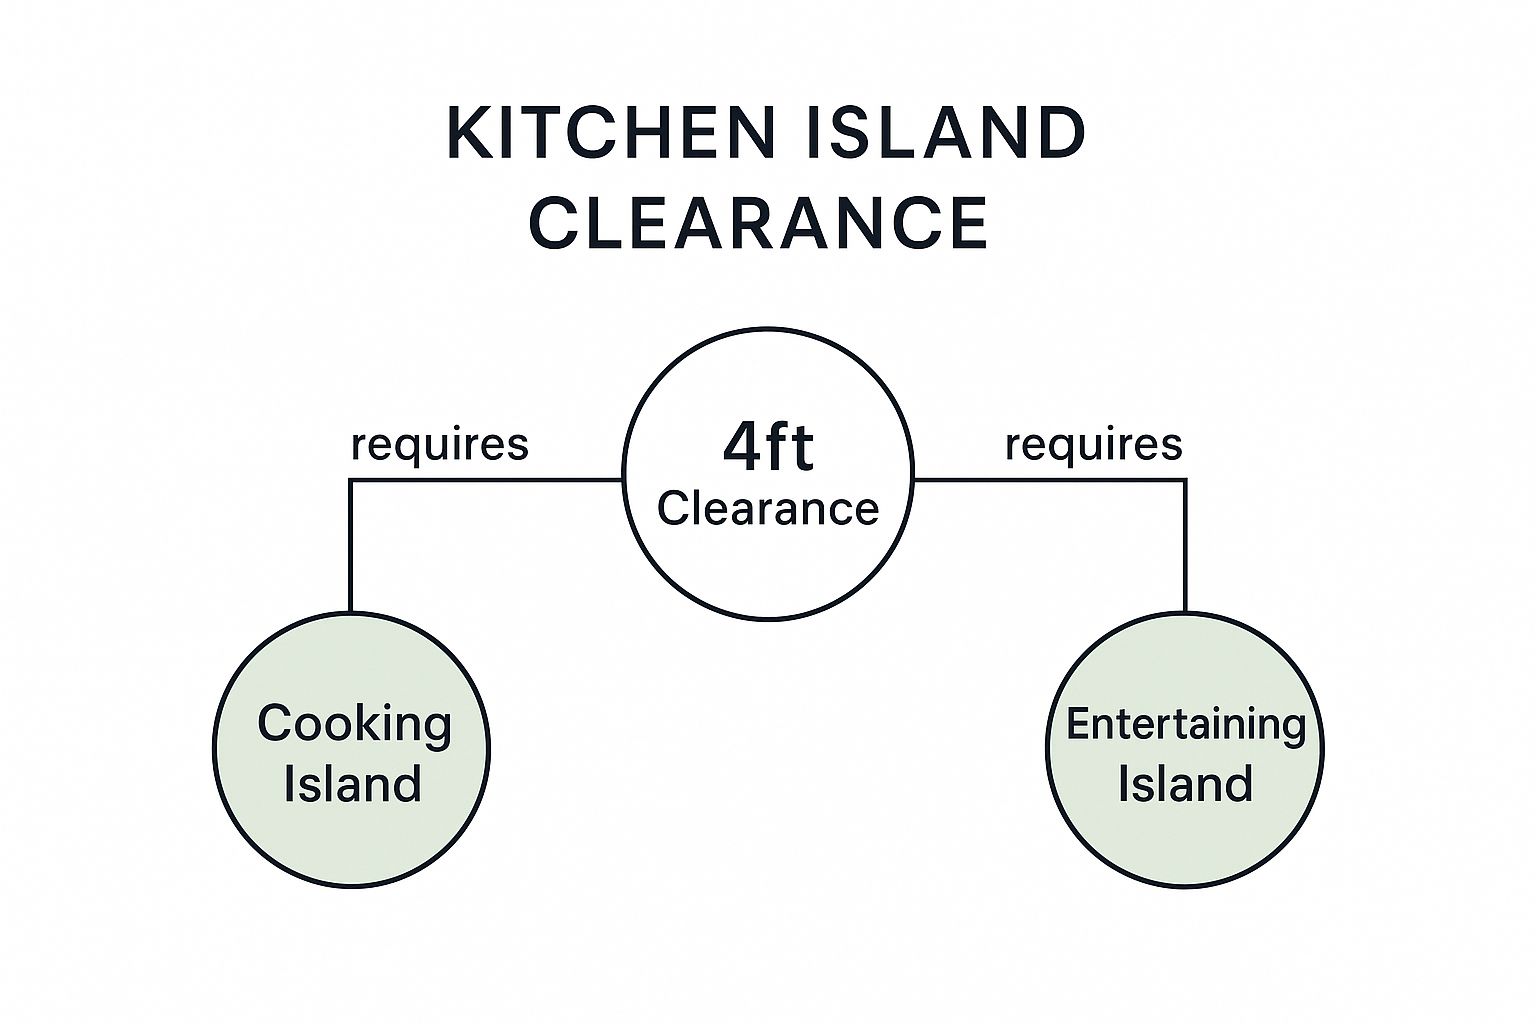
Modern kitchen islands have evolved beyond simple workspaces. They often house major appliances, like sinks, cooktops, and dishwashers, effectively optimising the kitchen work triangle. This integration creates a multipurpose hub for cooking, dining, and socialising, making it the heart of the home. Islands typically range from 1.2-3m long and 0.6-1.2m wide, and require a minimum of 0.9-1.05m of clearance on all sides for comfortable navigation. When designing an island kitchen layout, consider how the space will be used and how it will look in listing photos. Well-placed furniture and decor can make a big difference. For more ideas and inspiration, check out these home staging tips for kitchens. This is especially valuable for NZ homeowners looking to maximise their kitchen's appeal.
Features and Benefits:
- Increased Functionality: Adds valuable counter and storage space, improving workflow and creating another work zone.
- Social Hub: Creates a natural gathering spot, perfect for entertaining guests while preparing meals.
- Multipurpose Design: Serves various functions, from prep space and dining area to a homework station or casual workspace.
- Appliance Integration: Can house major appliances, streamlining the cooking process and optimising the work triangle.
Pros and Cons:
Pros:
- Adds valuable counter and storage space
- Creates a natural gathering spot for social interaction
- Improves workflow by adding another work zone
- Can house major appliances to improve the work triangle
- Serves multiple functions (prep space, dining, homework area, etc.)
Cons:
- Requires substantial kitchen space (minimum 10x12 feet)
- Can create traffic flow issues if poorly placed
- Additional cost for plumbing and electrical if housing appliances
- May reduce cabinet wall space in smaller kitchens
- Permanent islands limit layout flexibility
Examples of Successful Implementations:
From celebrity chef kitchens to popular home renovation shows, the island kitchen layout has become a staple in modern design. Bobby Flay's New York apartment features a chef-grade island with built-in cooking surfaces, showcasing the professional appeal of this layout. The iconic kitchen island in Nancy Meyers' film "Something's Gotta Give" serves as a testament to its timeless appeal. Furthermore, Chip and Joanna Gaines frequently incorporate farmhouse-style islands in their Magnolia designs, adding a touch of rustic charm. These examples, and the influence of figures like Giada De Laurentiis, Ina Garten, HGTV shows, and prominent architectural firms, demonstrate the widespread popularity and adaptability of the island kitchen layout.
Tips for Designing Your Island Kitchen:
- Ensure at least 1.05m of clearance for primary walkways around the island.
- Allow 0.6m of counter space per person for comfortable seating.
- Consider a two-tier island to separate work areas from dining spaces.
- Install outlets on the sides of the island for convenient appliance use.
- Use contrasting materials or colours to make the island a focal point.
Learn more about Island Kitchen Layout
The island kitchen layout deserves its place among the top kitchen layout ideas because it offers a winning combination of functionality, aesthetics, and social appeal. By carefully considering the space available and incorporating these tips, you can create an island kitchen that truly becomes the heart of your home.
5. Peninsula Kitchen Layout
The peninsula kitchen layout offers a clever compromise between the openness of a kitchen island and the space-saving efficiency of a simple L-shaped design. It's a fantastic kitchen layout idea for Kiwi homes, particularly those with open-plan living or smaller kitchens that want to maximise functionality without feeling cramped. Essentially, a peninsula is a connected extension of your existing countertop or cabinetry, creating a three-sided work area. This effectively transforms an L-shaped kitchen into a more versatile G-shape. It earns its spot on this list for its clever use of space, affordability, and ability to enhance both functionality and flow.
This layout works by adding an extra "arm" to your existing kitchen layout. Typically extending 1.2-2.4m from an existing counter run, the peninsula is connected to a wall or cabinetry on one end and open on the remaining three sides. This allows for easy access and movement around the peninsula, while still providing a sense of separation from adjacent living or dining areas.
Features and Benefits:
- Added Counter Space and Storage: Peninsulas offer valuable extra workspace for food preparation, serving, or even casual dining. The underside can house cabinets and drawers for additional storage, a crucial benefit for smaller NZ kitchens where space is often at a premium.
- Defined Zones in Open Floor Plans: In open-plan homes popular in NZ, a peninsula subtly delineates the kitchen area from the living or dining space without closing it off entirely, maintaining a sense of connection and flow.
- Casual Seating Option: The outward-facing side of the peninsula often incorporates a raised bar counter, providing a casual seating area for quick meals, entertaining, or simply chatting with the cook. This is a great option if you don't have space for a dedicated dining table in your kitchen.
- Enhanced Accessibility: Compared to closed-off kitchens, peninsulas encourage interaction and make it easier to move between the kitchen and adjoining rooms, a feature that suits the Kiwi lifestyle of open and connected living.
- Cost-Effective Alternative to an Island: Peninsulas are generally less expensive to install than islands as they require less extensive plumbing and electrical work, making them an attractive option for budget-conscious renovators.
Pros:
- Maximises counter and storage space without the four-sided access requirements of an island.
- Creates definition between kitchen and living areas.
- Offers casual seating.
- Enhances accessibility.
- More affordable than a full island.
Cons:
- Can create bottlenecks in traffic flow if poorly positioned.
- Less flexible than a freestanding island.
- Potential to block natural light.
- Can feel dated if not designed well.
- Limited seating compared to larger islands.
Examples of Successful Implementation:
- Sarah Richardson's cottage renovations often feature updated peninsula designs, showcasing how this layout can be modernised for a contemporary feel.
- Many mid-century modern California homes, which share architectural similarities with some NZ homes, showcase the original peninsula kitchens, demonstrating their timeless appeal.
- HGTV's 'Good Bones' regularly updates peninsulas in smaller home renovations, offering practical inspiration for Kiwi homeowners.
Tips for Designing a Peninsula Kitchen:
- Maintain Clearance: Ensure at least 42 inches of walkway space around the peninsula to avoid creating a bottleneck.
- Raised Bar Counter: Consider a raised bar height on the dining side to hide kitchen clutter and create a visual distinction.
- Pendant Lighting: Use pendant lighting to define the peninsula space and add a stylish touch.
- Electrical Outlets: Install electrical outlets on the sides of the peninsula for convenient appliance use.
- Open Shelving: Consider open shelving on the outward-facing side for displaying cookbooks or decorative items.
Popularised By:
Mid-century architects like Joseph Eichler, 1960s and 70s kitchen designers, contemporary designers like Emily Henderson, and IKEA kitchen planning services. These influences have helped establish the peninsula kitchen as a versatile and practical layout option.
By carefully considering these factors, you can determine whether a peninsula kitchen layout is the right fit for your NZ home renovation or new build and create a stylish and functional heart of your home.
6. One-Wall Kitchen Layout
The one-wall kitchen layout, also known as a single-line kitchen, is a highly efficient design that positions all cabinets, appliances, and countertops along a single wall. This streamlined arrangement maximises open floor space, making it a popular choice for smaller homes, apartments, and studios in NZ, particularly in urban areas like Auckland and Wellington where space is at a premium. While originating as a necessity in compact spaces, the one-wall kitchen has become a stylish, minimalist statement in modern open-concept homes, offering a clean and uncluttered aesthetic.
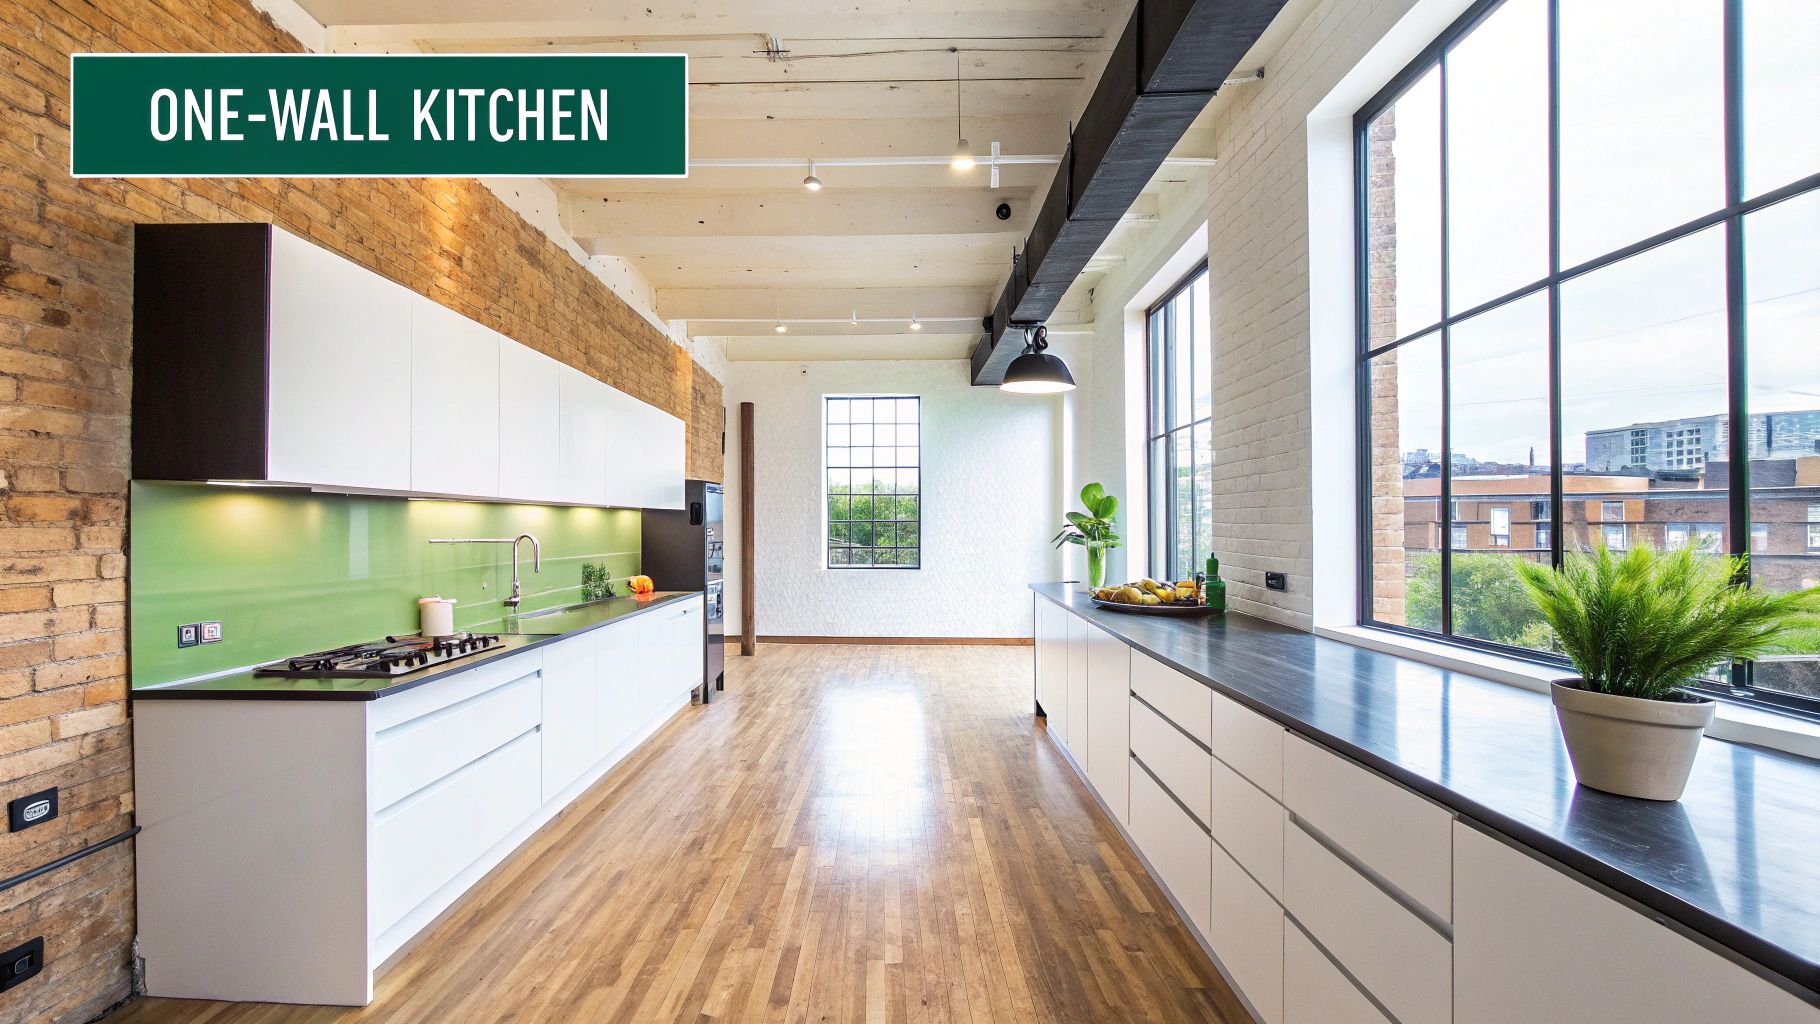
This kitchen layout idea works by creating a linear workflow. Instead of the traditional kitchen work triangle, you move along a single line, from the refrigerator to the sink to the cooking area. This layout typically spans 2.4-3.6m and often incorporates floor-to-ceiling cabinetry to maximise vertical storage. This makes it incredibly space-efficient, a key advantage for smaller Kiwi homes. Modern iterations often incorporate a kitchen island or dining table parallel to the work wall, extending the functionality without sacrificing the clean, linear aesthetic. This addition can provide much-needed extra counter space for food preparation and casual dining, creating a more practical and sociable kitchen environment.
One-wall kitchens have found their way into diverse settings, from sleek, high-end apartments designed by the likes of Karim Rashid to charming Parisian pied-à-terres. Dwell Magazine, a leading source of modern design inspiration, regularly features minimalist one-wall kitchens as innovative solutions for compact living. This design resonates with the minimalist philosophies of architects like John Pawson and Tadao Ando, and is a staple of the tiny house movement, championed by pioneers like Jay Shafer.
Pros:
- Maximises Space: Ideal for small apartments and studios, maximizing every square metre.
- Cost-Effective: Generally requires less cabinetry and simpler installation compared to other layouts.
- Open and Airy Feel: Creates a sense of spaciousness, particularly beneficial in smaller NZ homes.
- Flexible Furniture Arrangement: Allows for greater flexibility in arranging furniture in the remaining open space.
- Modern Aesthetic: Aligns with contemporary design trends popular in NZ.
Cons:
- Limited Counter Space: Can feel cramped for serious home cooks, particularly when preparing elaborate meals.
- Restricted Storage: Less storage space compared to U-shaped or L-shaped kitchens.
- Linear Workflow: Can be less efficient than the traditional work triangle, requiring more steps.
- Cramped for Multiple Cooks: Can feel congested with more than one person working in the kitchen.
- Appliance Spacing: Appliances and the sink might be spaced further apart, potentially affecting workflow efficiency.
Tips for Optimising a One-Wall Kitchen Layout:
- Strategic Placement: Place the sink between the refrigerator and stove for a more efficient workflow.
- Added Workspace: Incorporate a rolling kitchen cart or a freestanding island for extra counter and storage space.
- Vertical Storage: Maximise vertical space with wall-mounted shelves, magnetic knife strips, and hanging utensil racks.
- Compact Appliances: Consider slimline or compact appliances specifically designed for small spaces, readily available in NZ appliance stores.
- Under-Cabinet Lighting: Install under-cabinet lighting to enhance both functionality and ambiance.
This layout earns its place amongst the best kitchen layout ideas due to its space-saving design and minimalist aesthetic, perfect for modern Kiwi living. Its adaptability and affordability make it an attractive option for a range of homeowners and renters, particularly those seeking stylish and functional solutions for compact spaces.
7. G-Shaped Kitchen Layout
The G-shaped kitchen layout offers a compelling option for those seeking maximum storage and counter space within a defined cooking zone. As an extension of the U-shaped design, the G-shape adds a fourth wall or peninsula, creating a G-like configuration. This design shines in larger kitchens, providing ample room for multiple cooks and serious culinary endeavours. This earns its spot on our list of kitchen layout ideas because it truly maximises functionality and efficiency in larger kitchen spaces.
How it Works: The G-shape utilises three full walls of cabinetry and a partial fourth wall or peninsula, effectively wrapping the cook in a highly functional workspace. This creates a semi-enclosed cooking area with a single entry/exit point. Think of it as a horseshoe shape with an added appendage. This layout typically requires a minimum of 3.0x3.0m offering a generous 4.8+ linear metres of counter space.
Features and Benefits:
- Maximum Storage: Cabinetry on nearly four sides provides unparalleled storage capacity for cookware, pantry items, and small appliances.
- Extensive Counter Space: Enjoy ample room for food preparation, appliance placement, and even a dedicated baking area.
- Efficient Workflow: Everything is within easy reach, minimising steps and maximising efficiency during cooking.
- Casual Dining Option: The peninsula often incorporates seating, creating a casual dining space or a spot for guests to gather.
- Multiple Cook Friendly: The spacious layout allows multiple people to work comfortably without crowding.
Pros and Cons:
- Pros: Maximum storage, extensive counter space, efficient workflow, peninsula seating, ideal for multiple cooks.
- Cons: Can feel enclosed in smaller spaces, limited entry/exit point can create bottlenecks, corner cabinets require specialised storage solutions, less suited to open-concept living, can feel overwhelming if not properly designed.
Examples of Successful Implementation:
- Chef-Inspired Kitchens: Renowned chefs often favour G-shaped layouts in their home kitchens, prioritising efficiency and functionality. Think of a professional-grade setup like Chef Tyler Florence might use.
- Luxury Homes: Custom homes, particularly in areas like the Hamptons, often showcase luxury G-shaped kitchens equipped with commercial-grade appliances.
- Architectural Digest Features: High-end G-shaped kitchens are regularly featured in publications like Architectural Digest, demonstrating their popularity in larger homes.
Actionable Tips for NZ Homeowners:
- Walkway Clearance: Maintain at least 1.05m of clearance in walkways to ensure comfortable movement.
- Visual Heaviness: Use glass-front cabinets on the peninsula to reduce visual bulk and create a sense of openness.
- Corner Cabinet Solutions: Optimise corner cabinet storage with lazy Susans, pull-out shelves, or other specialised organisers.
- Peninsula Bar Height: Consider raising the bar height on the peninsula to conceal kitchen clutter and create a cleaner aesthetic.
- Consistent Lighting: Install consistent lighting throughout the kitchen, including under-cabinet lighting, to prevent dark corners and ensure adequate illumination.
When and Why to Use a G-Shaped Layout:
A G-shaped kitchen is an excellent choice for homeowners in NZ who:
- Love to cook and entertain: This layout provides ample space for preparing large meals and hosting gatherings.
- Have a large family: The spacious design accommodates multiple cooks and minimises traffic jams during busy meal times.
- Desire maximum storage: If storage is a top priority, the G-shape offers an abundance of cabinetry.
- Have a dedicated kitchen space: This layout is best suited for a dedicated kitchen area rather than an open-concept design.
By carefully considering the pros, cons, and design tips, NZ homeowners can create a G-shaped kitchen that perfectly suits their lifestyle and culinary aspirations. This layout truly offers a powerful combination of functionality, storage, and style for the serious home cook.
8. Kitchen Zone Layout
Looking for innovative kitchen layout ideas? The Kitchen Zone Layout is a contemporary approach that prioritises functionality over the traditional work triangle. Instead of focusing on the geometric relationship between the sink, stove, and refrigerator, this layout divides your kitchen into specific zones dedicated to different tasks: food storage, preparation, cooking, cleaning, and entertaining. This method offers a highly customisable and efficient way to organise your kitchen, making it a worthwhile consideration for your next renovation or new build.
This layout works by thoughtfully equipping each zone with the appropriate appliances, tools, and storage solutions to optimise workflow. For example, your food storage zone might house your refrigerator, pantry, and spice rack, while your prep zone boasts ample counter space, a chopping board, and easy access to knives and other utensils. This targeted approach streamlines the cooking process and minimises wasted movement.
Several successful examples demonstrate the effectiveness of kitchen zone layouts. The 'Test Kitchen' by Bon Appétit magazine, known for its innovative culinary creations, utilises strategic zone design to maximise efficiency. Culinary schools also frequently implement this layout for teaching, allowing multiple students to work simultaneously without interfering with each other. Even celebrity chef Nigella Lawson's personal kitchen features well-defined cooking and entertaining zones.
Actionable Tips for Implementing a Kitchen Zone Layout:
- Logical Food Retrieval: Place your refrigeration and pantry storage within the same zone for easy access to ingredients.
- Ample Prep Space: Ensure your prep zones have plenty of counter space and are situated adjacent to storage zones for quick retrieval of ingredients.
- Separate Cleaning Zone: Position your cleaning zone, including the sink and dishwasher, away from the main cooking and entertaining areas to maintain hygiene and minimise disruption.
- Dedicated Appliance Spaces: Create dedicated spaces for small appliances used regularly, such as coffee makers, toasters, and blenders, keeping countertops clutter-free.
- Traffic Flow: Consider traffic patterns between zones to prevent bottlenecks and ensure smooth movement within the kitchen.
When and Why to Use a Kitchen Zone Layout:
This layout is particularly well-suited for larger, open-concept kitchens, where it helps define distinct functional areas. It's also ideal for households with multiple cooks, as it allows several people to work on different tasks simultaneously without getting in each other's way. If you entertain frequently, a dedicated entertaining zone can seamlessly integrate with your kitchen while maintaining a separate workspace. Learn more about Kitchen Zone Layout
Pros:
- Highly customisable to individual cooking habits and needs.
- Accommodates multiple users working on different tasks simultaneously.
- Adapts well to larger, open-concept kitchens.
- Creates intuitive organisation systems.
- Works effectively with modern appliances and cooking technologies.
Cons:
- Requires more thoughtful planning than traditional layouts.
- May demand more square footage to implement effectively.
- Can be challenging to retrofit into existing standard layouts.
- May increase costs with specialised storage solutions.
- Potentially less efficient for solo cooks working across multiple zones.
The Kitchen Zone Layout deserves its place on this list of kitchen layout ideas because it offers a modern and adaptable solution to the challenges of contemporary cooking and entertaining. This approach, popularised by professional kitchen designers like Susan Serra and European cabinet manufacturers like Bulthaup and Poggenpohl, reflects a shift towards prioritising functionality and workflow in the heart of the home. It's a particularly relevant approach for the NZ market, where open-plan living and entertaining are increasingly popular. Whether you’re a passionate home cook, a busy family, or simply looking to optimise your kitchen space, the Zone Layout offers a dynamic and personalised approach to kitchen design.
9. Double Island Kitchen Layout
For those with the space, a double island kitchen layout offers a luxurious and highly functional approach to kitchen design. This layout incorporates two separate island units, creating distinct zones for cooking, prepping, dining, and entertaining. This setup enhances workflow efficiency and provides ample counter and storage space, making it a desirable choice for serious home cooks and entertainers.
The infographic above visualises the key elements of a double island kitchen layout. The central concept, "Double Island," connects to related concepts such as "Workflow Efficiency," "Increased Storage," and "Social Hub." The connection between "Double Island" and "Workflow Efficiency" is highlighted by the separation of cooking and prepping zones. Similarly, the relationship between "Double Island" and "Social Hub" is emphasised by the inclusion of seating and serving areas. The visualisation also underscores the importance of ample space and strategic placement of the islands for optimal functionality. As the infographic shows, successful implementation requires careful consideration of traffic flow and spacing.
This style has gained popularity in larger NZ homes, reflecting a global trend towards open-plan living and integrated kitchen/dining spaces. However, it's crucial to ensure the layout complements your lifestyle and the overall flow of your home. Learn more about Double Island Kitchen Layout
Features of a Double Island Kitchen Layout:
- Two freestanding islands with distinct functions (e.g., one for prep, one for serving).
- Minimum 1.2m of clearance between islands and surrounding counters/appliances.
- Typically requires at least a 3.9x3.9m kitchen space.
- May incorporate varying heights, materials, and designs for each island to further define their purpose.
Pros:
- Maximises workflow efficiency, particularly in larger kitchens.
- Creates clear separation between messy prep areas and clean entertaining/dining spaces.
- Allows multiple cooks to work simultaneously without interference.
- Provides abundant counter and storage space.
- Makes a dramatic design statement and serves as a focal point within the kitchen.
Cons:
- Requires substantial square footage, making it unsuitable for smaller kitchens.
- Represents a significant investment in cabinetry and countertop materials.
- Can create unnecessary distance between essential kitchen elements if not planned carefully.
- May feel excessive in homes that don't frequently entertain.
- More complex plumbing and electrical requirements if both islands incorporate sinks, cooktops, or other fixtures.
Examples of Successful Implementation:
Celebrity chefs and luxury home builders often showcase stunning double island kitchens. Think of Ina Garten’s East Hampton kitchen, designed with dual islands for filming and food preparation, demonstrating the layout's practical benefits. High-end designers, featured in publications like Architectural Digest, frequently incorporate this design in luxury residences.
Tips for Implementing a Double Island Kitchen Layout:
- Dedicate one island to cooking/prepping (potentially including a sink and/or cooktop) and the other to seating/serving.
- Use contrasting materials or heights to visually distinguish the islands and their functions.
- Ensure proper lighting above both islands, ideally with independent controls.
- Maintain the minimum 1.2mwalkways between all kitchen elements, including islands, counters, and appliances.
- Carefully consider the traffic flow pattern to prevent the islands from becoming obstacles.
When and Why to Use This Approach:
A double island kitchen layout is ideal for large kitchens in homes that regularly host gatherings and prioritise both cooking and entertaining. It is particularly suitable for those who desire a highly functional and visually striking kitchen design. This layout is a significant investment and requires careful planning, but the payoff is a luxurious and efficient kitchen space perfect for passionate home cooks and entertainers. This approach elevates the kitchen beyond its utilitarian function and transforms it into a social hub and design centrepiece. This makes the double island a worthwhile inclusion in our list of kitchen layout ideas, offering a premium solution for spacious, high-end kitchens.
10. Broken-Plan Kitchen Layout
The broken-plan kitchen layout is a clever response to the sometimes overwhelming nature of completely open-plan living. It offers a compelling alternative for Kiwis seeking kitchen layout ideas that balance sociability with practicality. Instead of completely merging the kitchen with the living and dining areas, the broken-plan approach uses strategic design elements to create distinct zones within a connected space. This nuanced approach makes it a worthy addition to any list of top kitchen layout ideas.
This design works by incorporating partial visual barriers, such as half-walls, glazed partitions, or even changes in floor level, to subtly divide the kitchen from adjacent living spaces. These barriers provide a sense of separation without completely closing off the kitchen. Islands, strategically placed furniture pieces like bookcases, or even variations in lighting can also act as dividers, delineating functional areas while maintaining visual connections and flow. This means you can enjoy the benefits of open-plan living – natural light, a sense of spaciousness, and ease of social interaction – while mitigating some of the downsides, such as noise transfer, cooking smells, and visual clutter.
Examples of Successful Implementation:
- Designers like Ilse Crawford have championed broken-plan concepts in their residential projects, demonstrating how to achieve a sense of intimacy within larger spaces.
- The popular 'Kinfolk' aesthetic often features broken-plan kitchens, using rustic elements like open shelving and wooden dividers to create a warm and inviting atmosphere.
- Grand Designs UK frequently showcases stunning examples of broken-plan kitchens in renovation projects, illustrating how this layout can be adapted to various architectural styles and home sizes, providing inspiration for NZ homeowners.
When and Why to Use a Broken-Plan Kitchen:
This layout is ideal for those who:
- Enjoy entertaining but prefer a degree of separation between cooking and socialising.
- Want to contain cooking mess and odours within a defined area.
- Need a quieter kitchen space, separated from the noise of living and dining areas.
- Desire a more flexible space that can adapt to different family needs throughout the day.
Features and Benefits:
- Semi-open design: Maintains sightlines and social connection while providing visual separation.
- Distinct zones: Clear delineation of functions for cooking, dining, and relaxing.
- Flexibility: Accommodates multiple work centres or mini-kitchens within the overall layout.
- Improved acoustics: Reduces noise transfer between zones.
- Odour control: Contains cooking smells more effectively than fully open layouts.
Pros:
- Balances openness with practical separation.
- Contains cooking mess and odours.
- Creates acoustic barriers to reduce noise.
- Allows simultaneous activities without complete separation.
- Offers flexibility for different family needs.
Cons:
- More complex to design and construct than simple open plans.
- May reduce natural light in some areas if not carefully planned.
- Requires careful planning to maintain an effective workflow.
- Can create awkward transitions if poorly executed.
- Potentially more expensive than basic open-plan solutions.
Tips for Implementing a Broken-Plan Kitchen in your NZ Home:
- Consistent Flooring: Use consistent flooring throughout the space to maintain visual continuity and a sense of flow.
- Glass Partitions: Consider glass partitions or interior windows to maximise natural light and maintain visual connection between zones.
- Split Levels: Implement split levels to subtly define zones without requiring solid barriers. This works particularly well in renovations.
- Furniture as Dividers: Strategically place furniture like bookcases or console tables to create visual separation and additional storage.
- Lighting Zones: Create psychological barriers with distinct lighting zones rather than relying solely on physical walls. This can be a cost-effective way to delineate spaces.
The broken-plan kitchen layout is a versatile and practical solution for modern Kiwi living, offering a thoughtful balance between open-plan living and the need for defined, functional zones. By carefully considering the tips and examples provided, you can create a beautiful and functional kitchen that truly meets the needs of your household.
Top 10 Kitchen Layouts Comparison
| Layout | Implementation Complexity 🔄 | Resource Requirements ⚡ | Expected Outcomes 📊 | Ideal Use Cases 💡 | Key Advantages ⭐ |
|---|---|---|---|---|---|
| Galley Kitchen Layout | Moderate: Straightforward but narrow space planning | Low to moderate: Simple cabinetry & counters | Efficient workflow, compact space use | Small apartments, narrow kitchens | Efficient cooking workflow, cost-effective |
| L-Shaped Kitchen Layout | Moderate: Corner management and open flow planning | Moderate: More cabinetry, corner solutions | Good counter space, versatile flow | Small to medium kitchens, open plans | Versatile, good for multiple cooks, adaptable |
| U-Shaped Kitchen Layout | High: Requires 3-wall design and corner solutions | High: Extensive cabinetry and counters | Maximum storage and workspace, efficient triangle | Serious cooks, medium to large kitchens | Ample storage, efficient, multiple users |
| Island Kitchen Layout | High: Requires space and utilities for island | High: Plumbing/electrical for island appliances | Additional workspace, social interaction focal point | Medium to large kitchens, social cooking spaces | Adds counter/storage space, social hub |
| Peninsula Kitchen Layout | Moderate: Extension off wall, careful space planning | Moderate: Less cabinetry than islands | Extra workspace, partial separation | Small to medium kitchens, open layouts | Adds space without full island footprint |
| One-Wall Kitchen Layout | Low: Simple linear design | Low: Minimal cabinetry and appliances | Space-saving, open feel | Small apartments, studios | Most space-efficient, cost-effective |
| G-Shaped Kitchen Layout | Very High: Requires 4 walls and peninsula | Very High: Extensive cabinetry, counters | Maximum storage/counter space, semi-enclosed area | Large kitchens, serious cooks | Maximum workspace, multiple cooks, seating option |
| Kitchen Zone Layout | High: Complex task-based planning | High: Specialised zones and storage | Customised workflow for multiple users | Large/open kitchens, modern cooking needs | Highly customisable, efficient multitasking |
| Double Island Kitchen Layout | Very High: Two islands with utilities | Very High: Substantial cabinetry, plumbing | Distinct zones, high functionality and social interaction | Very large kitchens, entertaining, multi-user homes | Maximises efficiency, dramatic design statement |
| Broken-Plan Kitchen Layout | High: Complex spatial division and partial walls | High: Structural elements and detailed design | Balanced openness and separation, noise & odour control | Open-plan alternative, multi-activity households | Balances openness with practical separation |
Creating Your Dream Kitchen
From the compact efficiency of the one-wall kitchen to the expansive luxury of a double island layout, the perfect kitchen layout is the cornerstone of a functional and stylish home. This article has explored ten diverse kitchen layout ideas, each offering unique advantages for different lifestyles and spaces. Whether you gravitated towards the classic L-shaped kitchen, the adaptable U-shaped kitchen, or the modern broken-plan concept, understanding these core layouts empowers you to make informed decisions for your own kitchen renovation or build. Mastering these kitchen layout ideas allows you to optimise workflow, maximise storage, and create a space that truly reflects your personal style and needs. The right layout transforms a simple room into the heart of your home, a place where culinary creativity flourishes and cherished memories are made.
Ready to bring your dream kitchen to life? Folders offers a wide selection of quality appliances and kitchen essentials perfect for any kitchen layout idea. Visit Folders today and discover everything you need to transform your vision into a reality, from sleek cooktops to innovative storage solutions.