
Top 6 Breadmaker Recipe NZ Favourites for 2025
Welcome to the ultimate guide for Kiwi home bakers! Nothing beats the aroma of freshly baked bread wafting through your house, and with a modern breadmaker, achieving that perfect loaf is easier than ever. This guide is curated specifically for bakers in Aotearoa, using ingredients readily available at local supermarkets. We have gathered six of the most beloved and distinctly New Zealand breadmaker recipes that celebrate our unique local flavours.
This listicle will provide everything you need for baking success. You'll find detailed ingredient lists, straightforward instructions adapted for your machine, and crucial tips to ensure a flawless bake every time. We will cover everything from a classic, comforting white loaf to unique creations like Kumara and Honey bread and even a Vogel's-style seeded loaf. Whether you're a seasoned pro or just unboxing your first machine, you'll find a breadmaker recipe nz whānau will love.
Investigate popular breadmakers available on sale HERE
Breadmakers are fantastic because they automate the entire process from mixing to baking. Let’s get started and transform your kitchen into a home bakery.
1. Basic White Bread
The quintessential Kiwi household loaf, a classic white bread is the cornerstone of any good breadmaker recipe collection. This recipe is specifically adapted for New Zealand kitchens, utilising high-grade flour readily available in local supermarkets. It delivers a reliably soft, fluffy loaf with a beautiful golden-brown crust, making it the perfect all-rounder for school lunches, morning toast, or a simple side for soup. It's a foundational breadmaker recipe nz home bakers should master first.
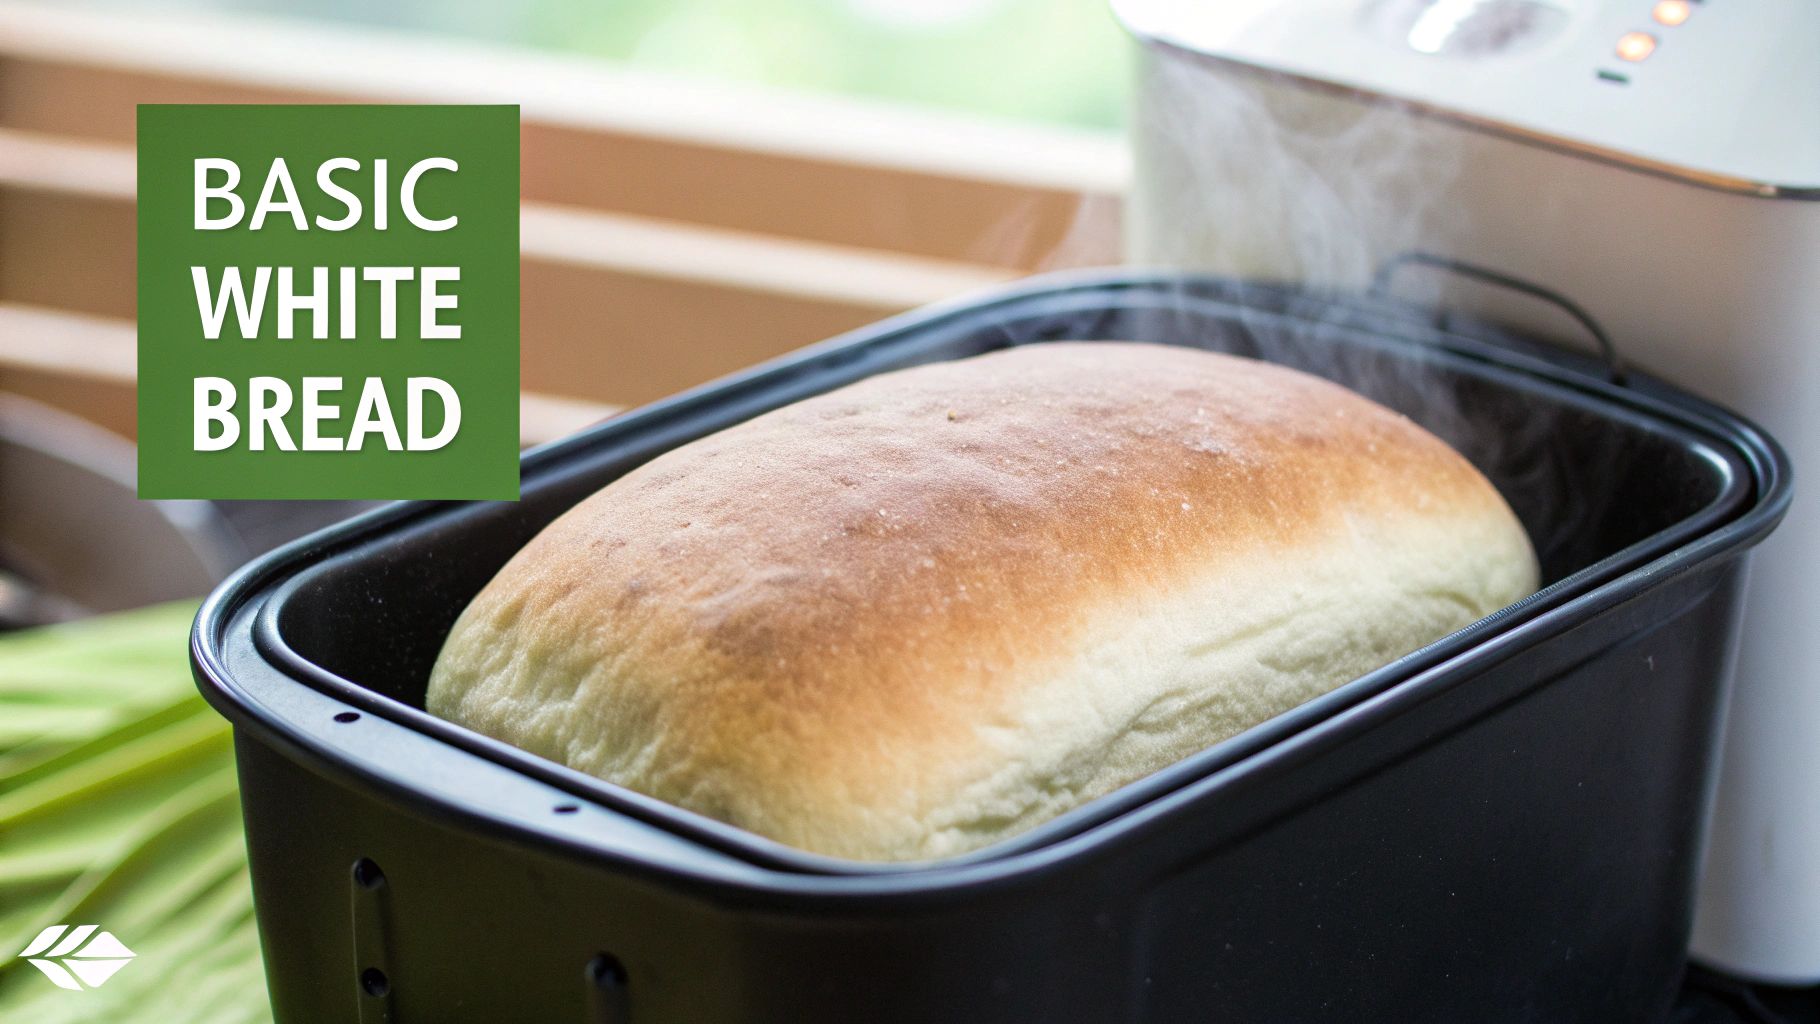
This recipe’s popularity stems from its simplicity and consistent results, reminiscent of the trusted loaves found in the iconic Edmonds Cookery Book. It's a go-to for many New Zealanders using popular machines like the Sunbeam breadmaker, delivering that nostalgic, comforting flavour and texture we all know and love. Once you've baked the perfect loaf, you can explore some gourmet ideas for quick and easy toast toppings to truly elevate your breakfast.
Key Ingredients & Tips for Success
To achieve the best possible loaf, precision and the right ingredients are crucial. Follow these tips for a foolproof outcome every time.
Ingredient Order is Key: Always add your ingredients to the breadmaker pan in the specified order. This prevents the yeast from activating prematurely by coming into contact with the salt or sugar.
- Liquids First: Pour in the lukewarm water (around 37°C is ideal for yeast).
- Dry Ingredients Next: Add the flour, sugar, and salt. Create a small well in the centre of the flour.
- Yeast Last: Place the active dried yeast into the well you created, ensuring it stays separate from the wet ingredients until the cycle begins.
Why Use High-Grade (Bread) Flour? While standard flour will work in a pinch, using high-grade flour (often labelled as 'bread flour') is non-negotiable for a superior loaf. It contains a higher protein content, which is essential for developing strong gluten strands. This gluten network traps the gasses produced by the yeast, resulting in a lighter, airier crumb and a much better rise.
Pro Tip: Let your finished loaf cool completely on a wire rack for at least an hour before slicing. Slicing into hot bread can cause it to compress and become doughy, ruining the delicate texture you worked so hard to create.
2. Vogel's-Style Seed Bread
A true Kiwi icon, Vogel's bread holds a special place in the hearts and pantries of New Zealanders. This homemade, breadmaker-friendly version captures the essence of the original, delivering a dense, moist, and incredibly nutritious loaf packed with wholesome seeds and grains. It's the ultimate breadmaker recipe nz for those who crave a healthier, heartier slice with that signature nutty flavour and satisfyingly chewy texture.
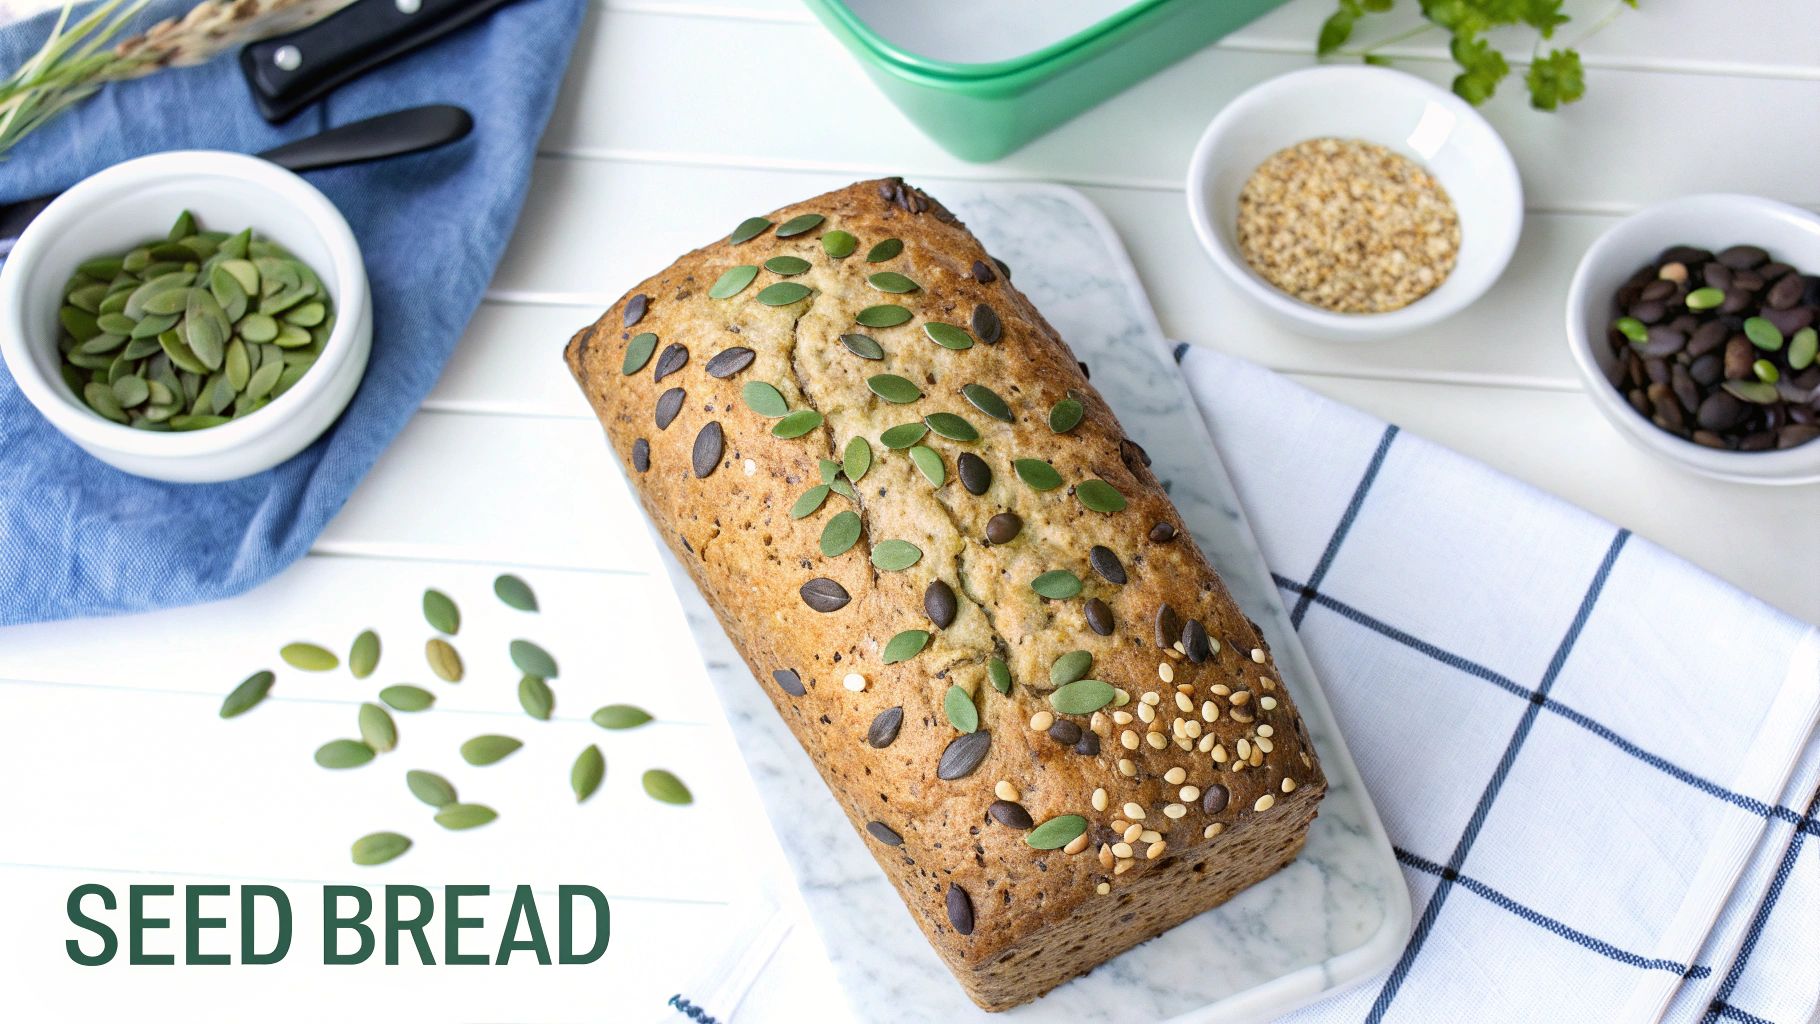
The popularity of creating a Vogel's-style loaf at home has surged, championed by publications like the Healthy Food Guide NZ and countless Kiwi food bloggers. It's a go-to for health-conscious families and a nostalgic taste of home for expats. This recipe uses wholemeal flour as a base, combined with a customisable mix of seeds like sunflower, pumpkin, and linseed to replicate that beloved loaf, perfect for avocado toast or a nourishing sandwich.
Key Ingredients & Tips for Success
Creating this dense, seedy loaf in a breadmaker requires a slightly different approach to a standard white bread. Follow these tips for a perfectly textured, flavourful outcome.
Ingredient Preparation is Crucial: Unlike a simple white loaf, the add-ins for this recipe need a little prep work to ensure the best texture and flavour infusion.
- Soak Your Seeds: Before adding them to the pan, soak your mixture of seeds (sunflower, pumpkin, linseed, etc.) in a portion of the recipe's water for at least 30 minutes. This softens them, preventing them from drawing moisture from the dough, which would result in a dry, crumbly loaf.
- Toast for Flavour: For a deeper, nuttier taste, lightly toast your seeds in a dry pan over medium heat for 3-5 minutes until fragrant. Allow them to cool completely before soaking.
- Use the 'Add-in' Function: Most modern breadmakers have a dispenser or an alert that beeps to signal when to add extra ingredients like seeds and nuts. Add them at this stage to prevent them from being crushed during the initial kneading cycle.
Why Use the Wholemeal/Wholegrain Setting? The heavier nature of wholemeal flour and the high density of seeds mean this dough requires a longer, more robust kneading and rising cycle. The 'wholemeal' or 'wholegrain' setting on your machine is specifically programmed for this, providing the necessary time and strength to develop the gluten and achieve a proper rise, which a standard 'basic' cycle might struggle with.
Pro Tip: Due to the higher oil content from the seeds, this bread is best stored in an airtight container or a dedicated bread bag. It will keep well for 3-4 days on the counter, and it also freezes exceptionally well when pre-sliced.
3. Kumara and Honey Bread
A truly iconic New Zealand creation, this Kumara and Honey Bread is a celebration of local produce. This recipe transforms the humble kumara (sweet potato) into a star ingredient, lending the loaf a beautiful golden-orange hue, a subtle sweetness, and an incredibly moist, tender crumb. Combined with rich, local honey, it creates a unique flavour profile that's a favourite at farmers markets and a standout in any breadmaker recipe nz collection.
This recipe is prized for its versatility. The natural sweetness makes it perfect for a decadent breakfast toast topped with butter, while its earthy notes complement savoury fillings for a truly gourmet sandwich. It’s a fantastic way to use up seasonal kumara and introduce a uniquely Kiwi flavour to your baking repertoire, producing a loaf that is both comforting and distinctive.
Key Ingredients & Tips for Success
To capture the authentic taste and texture of this beloved loaf, paying attention to the kumara preparation and ingredient balance is essential.
Perfecting the Kumara: The secret to a smooth, evenly textured loaf lies in how you prepare the kumara.
- Cook Thoroughly: Boil, steam, or bake the kumara until it is exceptionally soft and falls apart easily when pierced with a fork. This ensures it can be mashed into a completely smooth purée.
- Cool Completely: It is critical to let the mashed kumara cool to room temperature before adding it to the breadmaker pan. Hot kumara can prematurely activate or even kill the yeast, resulting in a dense, flat loaf.
- Adjust Liquid: Kumara adds significant moisture. You may need to slightly reduce the amount of water in your standard recipe (by about 20-30ml) to compensate and avoid a dough that is too sticky.
Choosing Your Honey: While any honey will work, using a distinctively New Zealand honey elevates the flavour. Mānuka honey adds a rich, aromatic, and slightly medicinal note that beautifully complements the earthy sweetness of the kumara, making your loaf genuinely special.
The process flow infographic below outlines the simple steps to creating this delicious bread.
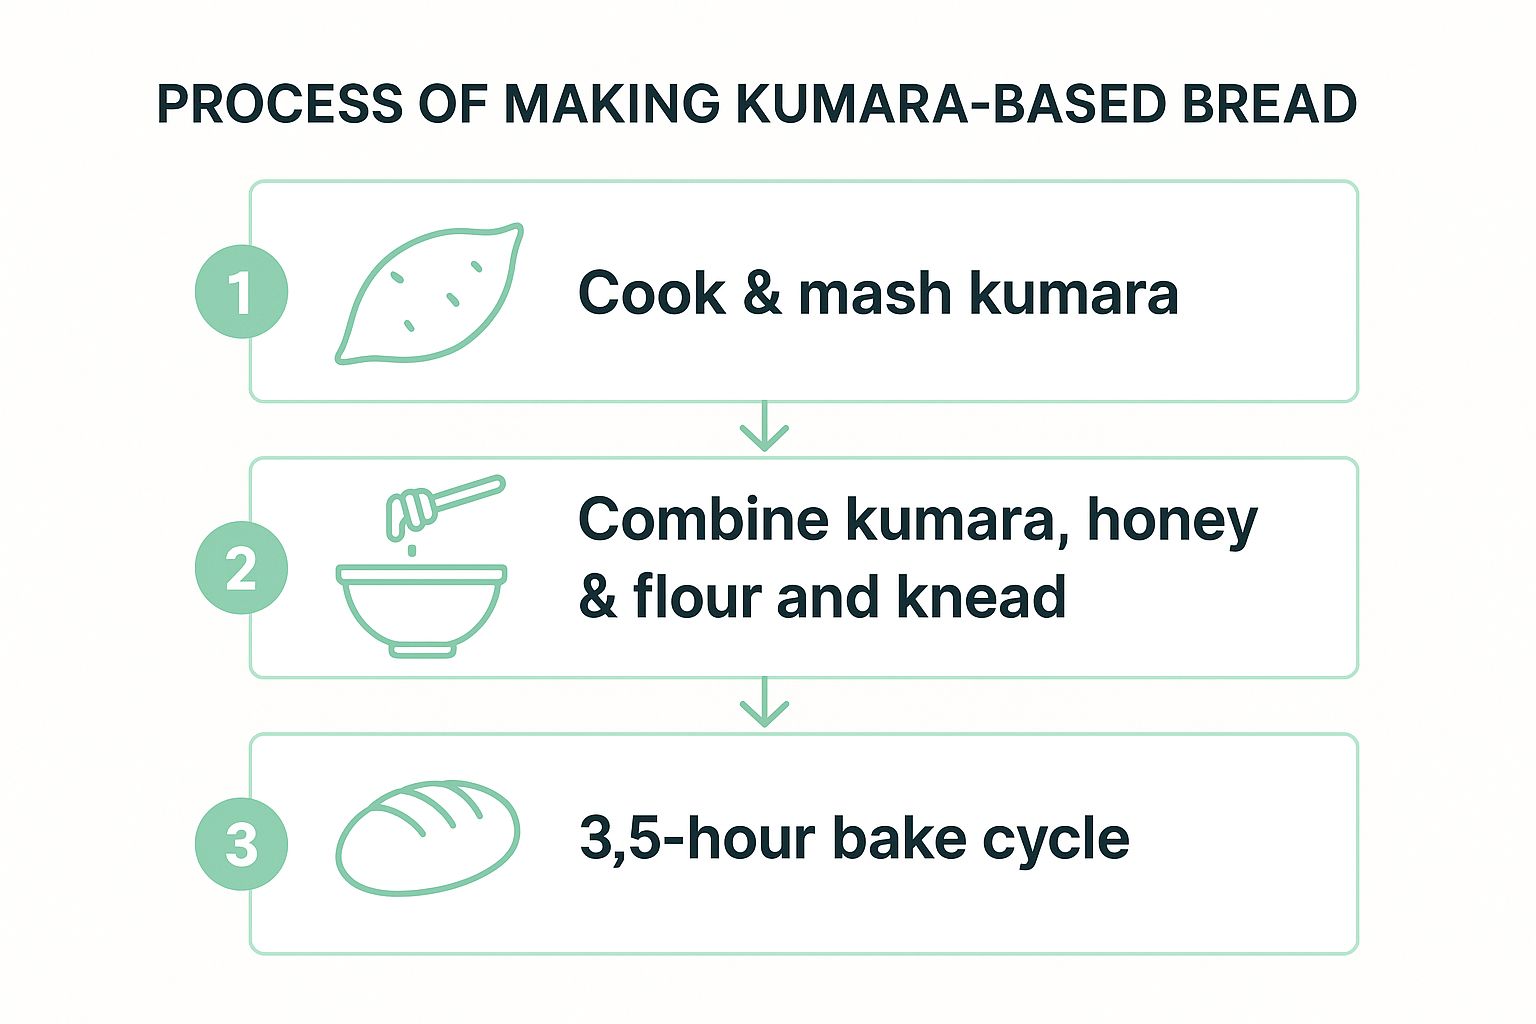
This visual guide shows that the process is straightforward, starting with preparing the kumara, then combining the ingredients, and finally letting the breadmaker handle the baking cycle.
Pro Tip: Because this bread contains a fresh vegetable, it has a shorter shelf life than a standard white loaf. Store it in a sealed bag or container in the refrigerator for up to 3-4 days to maintain its freshness. For a quick and delicious side dish, try making some easy air fryer recipes for kumara chips to serve alongside your freshly baked bread.
4. Rewena Bread (Māori Potato Bread)
A truly special loaf with deep cultural roots, Rewena Bread is a traditional Māori sourdough made using a fermented potato starter, or 'bug'. This recipe represents an iconic part of Aotearoa's culinary heritage, traditionally baked in marae kitchens and passed down through generations. Adapting it for a breadmaker brings this unique taonga (treasure) into the modern Kiwi home, producing a loaf with a distinctive tangy flavour and a dense, moist crumb that is unlike any other bread.
Making Rewena is a rewarding process that connects you to a cherished food tradition. While traditionally baked in a camp oven or a conventional oven, this breadmaker recipe nz adaptation simplifies the process while retaining the authentic character. For those who enjoy a true farm-to-table experience with their Rewena Bread, you might be interested to learn how to grow your own potatoes to use in your starter. The revival of such traditional home-cooking practices reflects a broader trend, as highlighted by a recent survey where Kiwis have embraced home cooking more than ever.
Key Ingredients & Tips for Success
The heart of Rewena bread is its living starter. Nurturing it correctly is the secret to achieving that authentic, sought-after flavour.
The Rewena Starter (Bug): The starter is a living culture and needs care. It's typically made from boiled potato, flour, and sugar, and left to ferment.
- Feeding is Crucial: Your starter needs to be 'fed' with sugar and the water from boiling potatoes regularly to keep it active and alive.
- Room Temperature: Keep the starter in a warm spot in your kitchen to encourage fermentation. A healthy, active starter will be bubbly and have a pleasant, slightly sour smell.
- Patience is a Virtue: Unlike commercial yeast, a natural starter works slowly. You may need to use a longer cycle on your breadmaker, or even let the dough prove in the pan for an hour before starting the bake cycle.
Adapting for the Breadmaker: Getting the consistency right for an automated machine is key. The dough should be soft but not overly sticky. You may need to adjust the amount of flour or liquid slightly depending on the age and activity of your starter. Always add the starter along with the other wet ingredients first.
Pro Tip: For a truly authentic flavour, always use the water you've boiled the potatoes in to make and feed your starter. This starchy water provides the perfect food for the natural yeasts to thrive, enhancing the bread's unique tangy character.
5. Hokey Pokey Bread
For a truly unique and quintessentially Kiwi sweet treat, Hokey Pokey Bread is an absolute must-try. This inventive recipe captures the essence of New Zealand's beloved honeycomb toffee flavour, transforming it into a warm, indulgent loaf. With a soft, vanilla-infused crumb studded with melting chunks of hokey pokey, this bread is a delightful surprise, perfect for a special morning tea or as a dessert served warm with a scoop of vanilla ice cream. It's a fun and creative breadmaker recipe nz bakers will love experimenting with.
Popularised by creative home bakers and often featured in novelty recipe collections for celebrations like New Zealand Day, this bread is a conversation starter. The magic lies in the caramelised honey notes that infuse the dough, creating a loaf that's part cake, part bread, and entirely delicious. While it’s a sweet creation, those who enjoy savoury bakes might want to explore other unique recipes, such as this creamy artichoke, leek, and spinach pie, to complement their baking repertoire.
Key Ingredients & Tips for Success
Creating this sweet specialty requires a few specific techniques to ensure the hokey pokey doesn't just dissolve into a sticky mess.
Timing the Hokey Pokey Addition: The most critical step is adding the honeycomb candy at the right moment.
- Initial Kneading: Allow your breadmaker to complete its initial kneading cycles with just the base dough ingredients (flour, yeast, liquids, etc.).
- Final Kneading Stage: Listen for the machine to beep, indicating the time to add mix-ins, which is usually during the last 5-10 minutes of the final knead cycle.
- Add Cold & Crushed: Add chilled, roughly crushed pieces of hokey pokey candy. Using cold candy helps it maintain its structure for longer during the baking process.
Balancing the Sweetness: Hokey pokey candy is intensely sweet, so it's vital to adjust the other sugars in your recipe. Consider reducing the standard amount of sugar or honey in the dough by about a third to a half. This prevents the final loaf from becoming overwhelmingly sweet and allows the distinct vanilla and caramelised honey flavours to shine through. You can use either store-bought hokey pokey pieces or make your own for a more rustic feel.
Pro Tip: To prevent the finished loaf from becoming sticky, store it in an airtight container at room temperature. The sugar in the hokey pokey can draw moisture from the air, so proper storage is key to maintaining its wonderful texture.
6. Feijoa and Walnut Bread
A truly unique New Zealand specialty, Feijoa and Walnut Bread captures the essence of autumn in many Kiwi gardens. This recipe transforms the abundant seasonal harvest of feijoas, also known as pineapple guavas, into a wonderfully moist and aromatic loaf. The unique, sweet-tart flavour of the feijoa pairs beautifully with the earthy crunch of walnuts, making this a standout breadmaker recipe nz enthusiasts will adore.
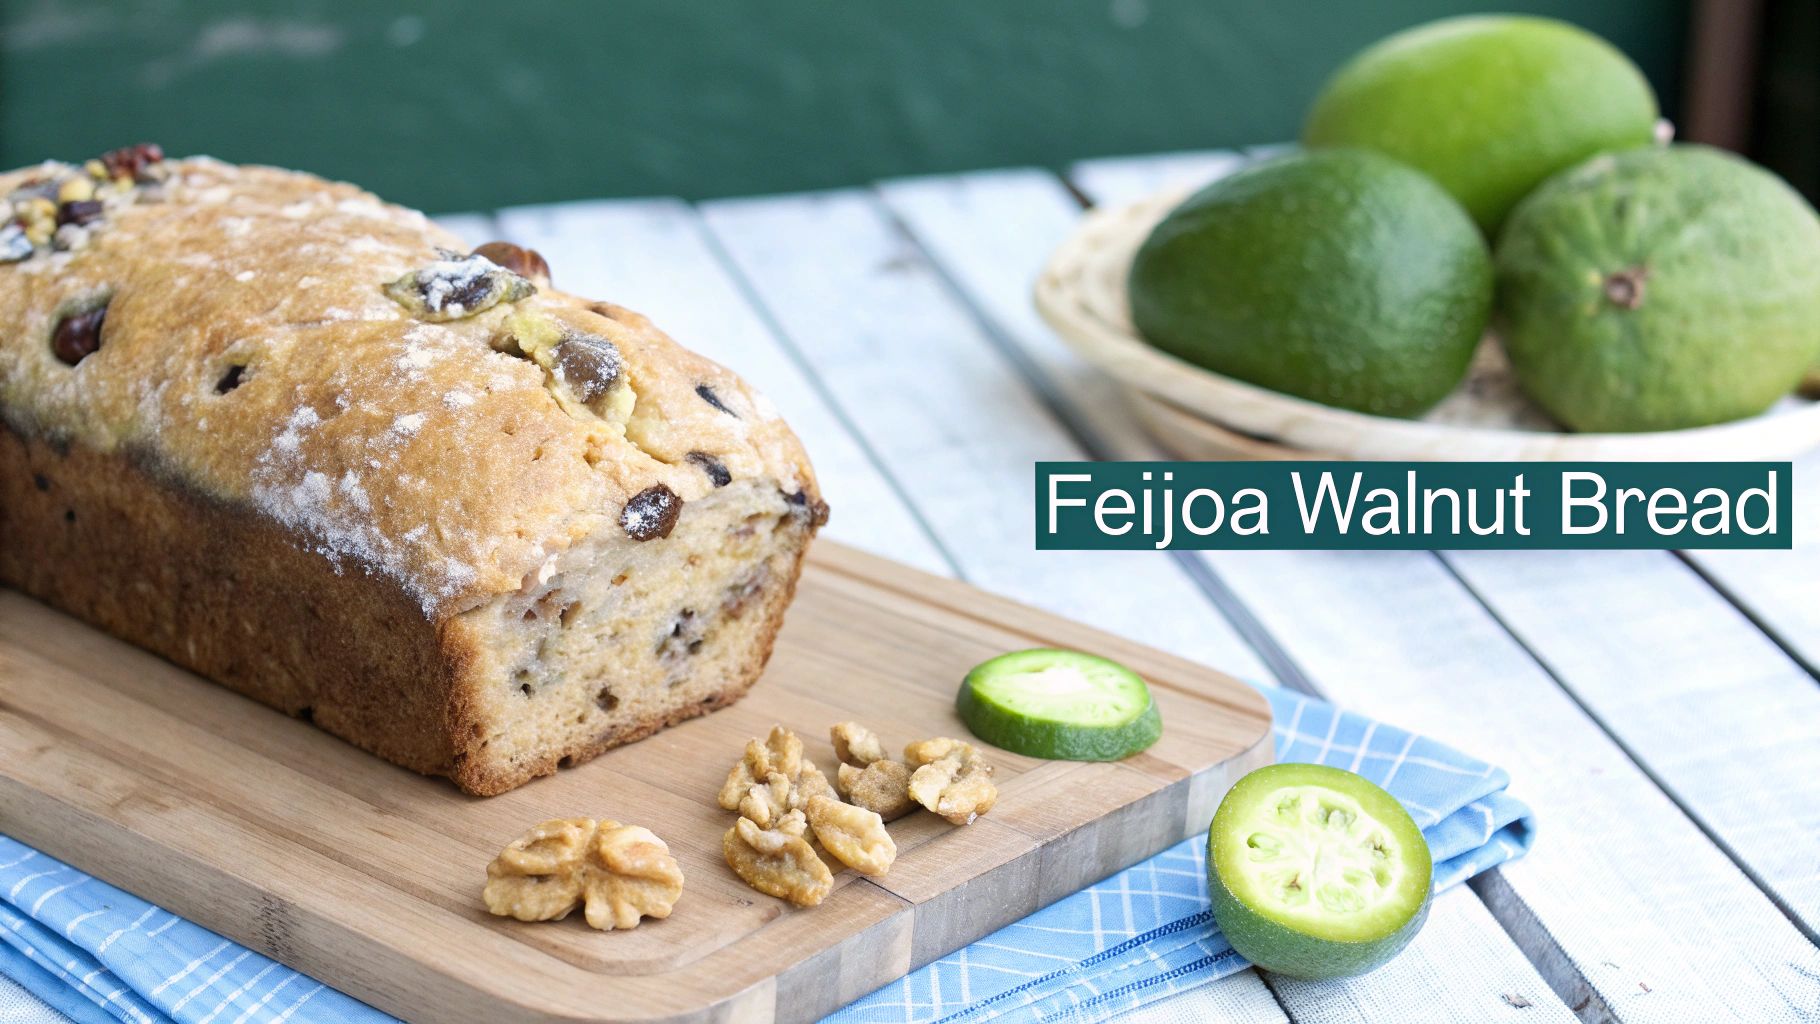
This recipe is a favourite in suburban neighbourhoods and gardening communities where feijoa trees are a common sight, often leading to a glut of fruit. Rather than a traditional yeast-risen bread, this is more of a quick bread or loaf-style cake, similar in texture to a classic banana bread. If you're a fan of fruit-based loaves, you can discover a new favourite by exploring this delicious banana bread recipe as well.
Key Ingredients & Tips for Success
Creating this seasonal treat in your breadmaker is simple, but a few key tips will ensure the perfect balance of flavour and texture.
Handling the Feijoas: Success starts with how you prepare the fruit. Timing and technique are crucial to avoid a soggy loaf.
- Use Ripe Fruit: For the best flavour, use feijoas that are very ripe, soft to the touch, and highly fragrant. Simply scoop the flesh out with a spoon.
- Drain Excess Juice: Mashed feijoas release a lot of liquid. To prevent a dense, wet crumb, place the mashed fruit in a sieve over a bowl for a few minutes to drain off some of the excess juice before adding it to the bread pan.
- Timing the Walnuts: If your breadmaker has a fruit and nut dispenser, use it. If not, add the chopped walnuts manually when the machine beeps, usually during the final kneading cycle. This prevents them from being pulverised.
Breadmaker Settings: Because this isn't a traditional yeast loaf, the setting you choose is vital. Most breadmakers have a 'Quick Bread', 'Cake', or 'Sweet' setting that uses baking powder for leavening instead of yeast. This cycle involves minimal kneading and a shorter baking time, which is ideal for this type of recipe.
Pro Tip: Feijoa season is fleeting, but this bread freezes beautifully. Bake several loaves at the peak of the season, let them cool completely, wrap them tightly, and freeze for up to three months. You'll have a delicious taste of autumn to enjoy anytime.
6 New Zealand Breadmaker Recipes Comparison
| Bread Type | Implementation Complexity | Resource Requirements | Expected Outcomes | Ideal Use Cases | Key Advantages |
|---|---|---|---|---|---|
| Basic White Bread | Low - Beginner friendly | Basic pantry ingredients, common NZ flour | Soft, fluffy, consistent loaf | Everyday household use, sandwiches, toast | Reliable, cost-effective, easy recipe |
| Vogel's-Style Seed Bread | Medium - Intermediate | Wholemeal flour, multiple seeds and grains | Dense, nutritious, high fiber | Health-conscious consumers, hearty toast | Nutritious, iconic NZ flavor, long freshness |
| Kumara and Honey Bread | Medium - Intermediate | Cooked kumara, NZ honey | Moist, sweet, beta-carotene rich | Sweet or savory versatile bread | Unique NZ ingredients, natural sweetness |
| Rewena Bread (Māori Potato Bread) | High - Advanced | Potato starter, long fermentation time | Dense, tangy sourdough | Cultural heritage baking, traditional | Authentic flavor, probiotic benefits, sustainable starter |
| Hokey Pokey Bread | Medium - Intermediate | Honeycomb candy, vanilla, honey | Sweet, crunchy, dessert style | Special occasions, gifts, novelty bread | Distinctive flavour, creative NZ concept |
| Feijoa and Walnut Bread | Medium - Intermediate | Fresh feijoa pulp, walnuts | Moist, tropical aroma | Seasonal baking, using garden surplus | Seasonal uniqueness, natural sweetness |
Start Your Kiwi Baking Adventure Today
Your journey into the aromatic world of homemade bread has officially begun. We've explored a vibrant collection of recipes, each designed to bring the unique flavours of Aotearoa directly to your kitchen, all with the incredible convenience of a modern breadmaker. From the simple, comforting perfection of a Classic White Loaf to the hearty, wholesome goodness of a Vogel's-Style Seed Bread, you now have the foundational skills to produce consistently excellent results.
Moving beyond the basics, we embraced uniquely New Zealand ingredients. You've seen how the earthy sweetness of Kumara and Honey Bread can transform a simple loaf into something truly special, and how the tangy, fragrant notes of Feijoa and Walnut Bread capture the essence of a Kiwi summer. These recipes prove that your breadmaker is not just a tool for convenience; it's a gateway to creative and localised baking.
Key Takeaways for Your Baking Success
To ensure your baking adventure is a triumph, remember these core principles we've discussed. Consistent success with any breadmaker recipe in NZ hinges on a few crucial details:
- Precision is Paramount: Always measure your ingredients accurately. Using a digital kitchen scale for flour, liquids, and even yeast will provide far more reliable outcomes than cup measurements.
- Ingredient Order Matters: Follow the manufacturer's instructions for your specific machine. Most breadmakers require liquids first, followed by dry ingredients, with the yeast added last, kept separate from the salt and liquid.
- Embrace Quality Ingredients: The final flavour of your bread is a direct reflection of what you put into it. Using high-grade New Zealand flour, fresh yeast, and quality local additions like Canterbury walnuts or golden kumara makes a noticeable difference.
- Don't Fear Experimentation: View these recipes as your starting point. Once you are comfortable, feel free to adjust the seed mix in the Vogel's-style loaf, try different sweeteners in the Hokey Pokey bread, or even add a sprinkle of cinnamon to the Feijoa loaf.
From Your Kitchen to the Table
Mastering your breadmaker is about more than just following steps; it's about understanding the "why" behind each instruction. It’s about the satisfaction of pulling a perfectly browned loaf from the pan, the incredible aroma that fills your home, and the joy of sharing a slice of warm, homemade bread with your whānau. Whether you're making a traditional Rewena Bread to connect with cultural heritage or a fun Hokey Pokey Bread for the kids, you are creating more than just food; you're creating memories.
The path to becoming a confident home baker is paved with practice and passion. Use these recipes, apply the tips, and soon the process will become second nature. Enjoy the delightful and delicious rewards of your efforts, one perfect slice at a time.
Ready to take your home baking to the next level? Explore a curated selection of high-quality breadmakers and essential kitchen appliances at Folders. Find the perfect machine to kickstart your baking adventure by visiting their website today.