

10 Fast & Easy Pressure Cooker Recipes for 2025
In our fast-paced world, finding time to cook nourishing, flavour-packed meals can feel like a challenge. The pressure cooker, a true hero of the modern Kiwi kitchen, changes the game entirely. By using high-pressure steam, it drastically cuts down cooking times, tenderises meat to perfection, and locks in nutrients and flavour that are often lost with other methods.
Forget spending hours over a hot stove; imagine a hearty beef stew ready in under an hour or a creamy risotto without the constant stirring. This listicle is your ultimate guide to mastering a wide range of pressure cooker recipes, transforming your weeknight cooking routine from a chore into a joy. We have curated a collection of 10 foolproof, family-friendly meals that deliver maximum impact with minimum fuss. Each recipe includes clear instructions, preparation times, key ingredients, and practical tips to ensure perfect results every time.
Whether you're a seasoned pressure cooking pro or just unboxing your first appliance, these recipes will demonstrate just how versatile this kitchen tool can be. For those wanting to dive deeper into cooking science and techniques, you can Explore more pressure cooker related content to continue your culinary journey. Let’s get started on unlocking incredible flavour and freeing up your valuable time.
1. Hearty Beef Stew in Under an Hour
A classic, comforting beef stew traditionally takes hours of slow simmering to achieve that perfect, melt-in-your-mouth tenderness. The pressure cooker transforms this weekend project into a weeknight possibility. By trapping steam and increasing pressure, it breaks down the tough connective tissues in stewing beef in a fraction of the time, resulting in fall-apart tender meat and a deeply flavourful broth. This one-pot wonder is the ultimate comfort food, made accessible for any night of the week.
Key to Success: Technique Matters
The magic of pressure cooker recipes like this stew lies in the technique. Following a few key steps ensures a rich, satisfying result every time.
- Maximise Flavour: Always use the 'sauté' function to brown the beef in batches before pressure cooking. This creates the Maillard reaction, adding a deep, savoury base flavour you simply can't get otherwise.
- Veggie Integrity: Cut carrots and potatoes into large, 5cm chunks. Smaller pieces can turn to mush under the high pressure, so this larger size ensures they cook through while holding their shape.
- Tenderness Tip: Use the 'natural release' method for at least 15 minutes after cooking. A quick release can cause the muscle fibres in the beef to seize up, making it chewy instead of tender.
- Finishing Touches: After releasing the pressure, turn the 'sauté' function back on. Stir in a slurry of cornflour and water to thicken the gravy to your liking, and finish with a sprinkle of fresh parsley for colour and freshness.
2. Pressure Cooker Risotto
Traditional risotto is a labour of love, demanding constant stirring and patient ladling of broth for nearly 40 minutes to coax the starch out of the rice. A pressure cooker brilliantly bypasses this entire process, delivering that same luxuriously creamy texture in about six minutes of cook time. The high-pressure environment forces the liquid into the arborio rice, causing it to release its starches rapidly and create that signature velvety consistency without the stovetop workout.
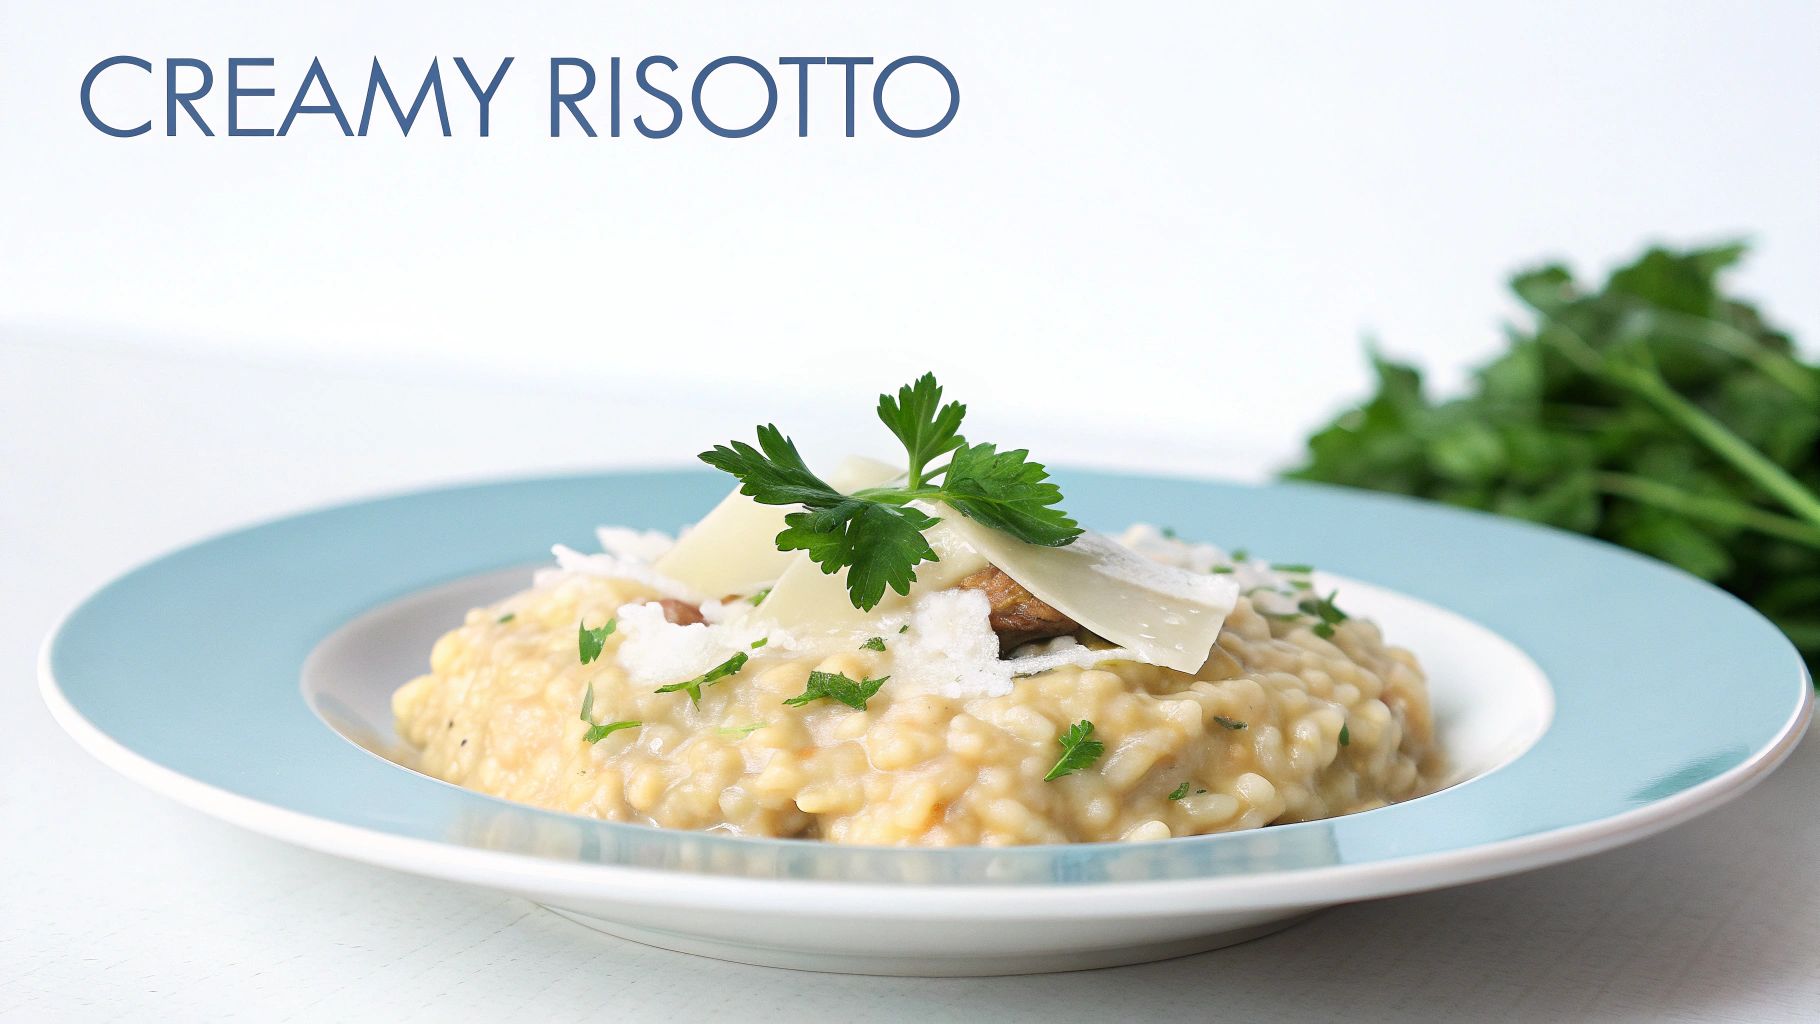
This method makes elegant meals like mushroom risotto or a bright lemon-asparagus version completely achievable on a busy weeknight. Understanding the unique process is key, as these pressure cooker recipes rely on specific steps for perfection. You can explore more tips for using your appliance with this guide to the Instant Pot in NZ.
Key to Success: Technique Matters
A few non-negotiable steps differentiate a perfect pressure cooker risotto from a starchy clump. The technique is simple but crucial for a restaurant-quality result.
- Sauté First: Never skip the initial sauté. Use the 'sauté' function to toast the dry arborio rice with aromatics like onion and garlic for a minute or two. This step gives the grains a nutty flavour and helps them maintain their integrity.
- Ratio is Key: A 1:3 ratio of arborio rice to warm liquid (broth or stock) is the standard for a perfect consistency. Using cold liquid can affect the cooking time and final texture, so warming it first is a small but impactful step.
- Quick Release: Unlike meats that need a natural release, risotto benefits from a 'quick release' of pressure. This immediately stops the cooking process and prevents the rice from becoming overcooked and mushy.
- Finish with Flair: The creaminess is finalised after the pressure cooking is done. Vigorously stir in parmesan cheese, butter, and any fresh ingredients like herbs or lemon zest only after the lid is off. The residual heat will melt everything beautifully.
3. Pressure Cooker Whole Chicken
Roasting a whole chicken can seem like a major undertaking, often reserved for a Sunday dinner. The pressure cooker changes that by delivering an incredibly moist, fall-off-the-bone tender chicken in a remarkably short time. This method locks in moisture and flavour, guaranteeing juicy meat every time, making it one of the most versatile pressure cooker recipes for meal prep or a fast family meal.

Key to Success: Technique Matters
A few simple techniques are all it takes to master the art of the pressure-cooked whole chicken, a method popularised by culinary experts like The Pioneer Woman.
- Elevate the Bird: Always place the chicken on the metal trivet that came with your pressure cooker. This prevents the bottom from sitting in the cooking liquid, which can lead to sticking and a soggy texture.
- Season Generously: Don't be shy with seasonings. Pat the chicken dry and rub your favourite herb and spice blend all over the outside and inside the cavity for maximum flavour penetration.
- Juiciness is Key: Use the 'natural release' method for at least 15 minutes. This allows the juices to redistribute throughout the meat, preventing it from drying out and ensuring a tender result.
- Crispy Skin Finish: For that classic roast chicken look, transfer the cooked chicken to an oven tray and place it under a hot broiler for 3-5 minutes, watching closely until the skin is golden brown and crispy.
4. Pressure Cooker Mac and Cheese
Forget the boxed stuff and the multi-pot mess of traditional macaroni and cheese. The pressure cooker delivers an impossibly creamy, rich, and flavourful version in one pot with zero babysitting. The pasta cooks directly in its own sauce base, releasing starches that create a velvety texture you just can't replicate by simply boiling pasta and stirring in cheese. This method makes homemade mac and cheese one of the fastest and most satisfying pressure cooker recipes for a weeknight family dinner.
Key to Success: Technique Matters
The secret to perfectly creamy, never-gummy mac and cheese is all in the process. A few specific steps prevent common pitfalls and guarantee a decadent result.
- Maximise Creaminess: Use evaporated milk as part of your cooking liquid. Its lower water content and concentrated milk solids prevent the cheese sauce from breaking or becoming grainy, ensuring a silky smooth finish.
- Pasta Integrity: Let the pressure release naturally for 5 to 10 minutes before performing a quick release. This gentle depressurisation allows the pasta to finish absorbing the liquid evenly, preventing a sticky, starchy mess.
- Cheese Tip: After cooking, turn the pressure cooker off. Stir in the shredded cheese gradually and off the direct heat to prevent it from clumping or becoming oily. This ensures it melts beautifully into the sauce.
- Finishing Touches: If the sauce is too thick, stir in a splash of the starchy cooking water or some warm milk until it reaches your desired consistency. For a complete meal, consider adding crispy bacon or leftover cooked chicken. While the pressure cooker handles the main dish, you can use other countertop gadgets for sides; find out more about them in this air fryer showdown.
5. Pressure Cooker Steel-Cut Oats
Steel-cut oats, with their superior chewy texture and nutty flavour, often require up to 40 minutes of constant stirring on the stovetop. This makes them impractical for busy mornings. The pressure cooker completely changes the game, cooking them to creamy perfection in just four minutes under pressure. This transforms a weekend-only breakfast into a speedy, nourishing option for any day of the week and is a fantastic method for weekly meal prep.
Key to Success: Technique Matters
Achieving that perfect balance of creamy and chewy in your pressure cooker recipes for oats depends on a few simple, but crucial, techniques.
- Prevent Sticking: Before adding any ingredients, give the inner pot a light coating of cooking spray. Steel-cut oats are starchy and can stick to the bottom, so this small step makes cleanup significantly easier.
- The Golden Ratio: For consistently creamy results, use a 1:4 ratio of steel-cut oats to liquid (e.g., one cup of oats to four cups of water, milk, or a combination). This ensures they are fully hydrated without becoming too thick or too thin.
- Embrace Natural Release: A quick release can cause a starchy, foamy mess to sputter out of the valve. Allowing the pressure to release naturally for 10-15 minutes prevents this and gives the oats time to finish absorbing the liquid.
- Customise Consistency: After cooking, if the oats seem too thick for your liking, simply stir in a splash of milk or water using the 'sauté' function until you reach your desired consistency. This is also the perfect time to add flavourings like cinnamon or vanilla.
6. Pressure Cooker Chili
A robust, flavourful chili often requires hours of slow simmering to develop its signature deep, complex taste. The pressure cooker achieves this same depth in a fraction of the time, making rich, satisfying chili a perfect weeknight meal. It works by intensifying the flavours of spices, aromatics, and tomatoes while creating exceptionally tender meat. It can even cook beans perfectly from dry, eliminating the need for an overnight soak and making it one of the most versatile pressure cooker recipes available.
Key to Success: Technique Matters
Crafting a memorable chili in the pressure cooker relies on a few core techniques that build flavour at every stage.
- Maximise Flavour: Just like a stew, browning the ground meat using the 'sauté' function is crucial. This step creates a rich, meaty foundation that pressure cooking alone cannot replicate.
- Layer the Spices: Don't just dump all your spices in at once. 'Bloom' the spices by toasting them in the hot oil for about 30 seconds after sautéing the onions and garlic. This awakens their essential oils and deepens their flavour.
- Bean Integrity: For perfectly cooked beans that don't split or turn to mush, use a 'natural release' for at least 15-20 minutes. This gradual depressurisation is much gentler on the delicate beans than a quick release.
- Finishing Touches: After cooking, you can easily adjust the chili's consistency. Stir in a tablespoon or two of tomato paste on 'sauté' mode to thicken it, or add a splash of beef broth to thin it out to your desired texture. This method is an excellent addition to your collection of quick dinner recipes. For more ideas on fast meals, you can explore quick dinner recipes on folders.co.nz.
7. Pressure Cooker Hard-Boiled Eggs
Peeling hard-boiled eggs can be frustrating, especially when stubborn shells take chunks of the white with them. The pressure cooker solves this common kitchen problem with surprising efficiency. By using steam instead of boiling water, the pressure gently separates the egg's membrane from the shell, making them consistently easy to peel every single time, even with very fresh eggs. This method is a game-changer for anyone who relies on hard-boiled eggs for meal prep, salads, or snacks like devilled eggs.
Key to Success: Technique Matters
This simple technique is one of the most beloved pressure cooker recipes because it delivers flawless results. Following a specific, popularised method ensures creamy yolks, tender whites, and stress-free peeling.
- Elevate for Success: Always place the eggs on the metal trivet that comes with your pressure cooker, never directly in the water. You only need about one cup of water to create the steam required for cooking.
- The 5-5-5 Method: This is the most crucial tip for perfect eggs. Cook on high pressure for 5 minutes, let the pressure release naturally for 5 minutes (then quick release any remaining pressure), and immediately transfer the eggs into an ice bath for at least 5 minutes.
- Shock for Easy Peeling: Do not skip the ice bath. This step is critical as it stops the cooking process instantly, preventing overcooked, grey yolks and causing the egg to contract slightly, further aiding in easy shell removal.
- No Need for Old Eggs: While older eggs are traditionally recommended for easier peeling when boiling, this pressure cooker method works wonders even on the freshest eggs from the farm or supermarket.
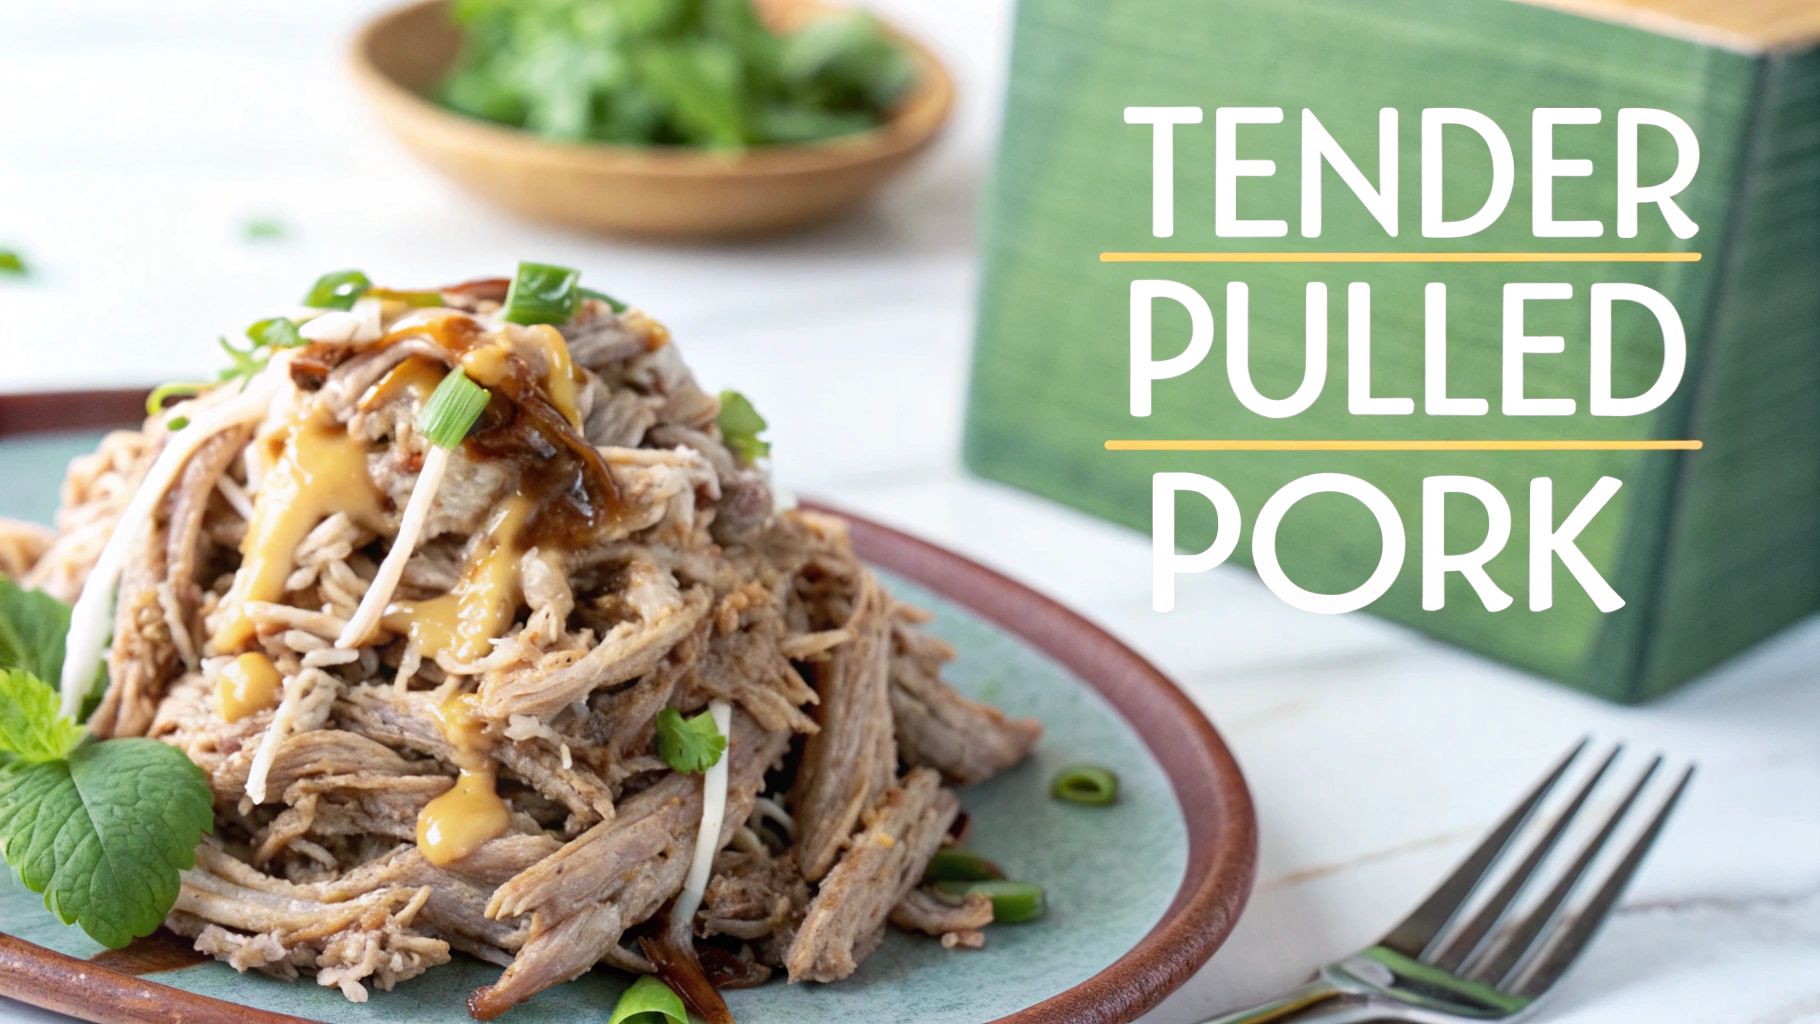
8. Pressure Cooker Pulled Pork
Authentic pulled pork, known for its succulent texture, typically demands a long, slow cook of eight hours or more. The pressure cooker slashes this time, delivering that same tender, shreddable result in about 90 minutes. It works by using high-pressure steam to rapidly break down the tough collagen and connective tissues in a pork shoulder, creating incredibly moist meat that falls apart with the gentle nudge of a fork. This makes it perfect for everything from classic BBQ pulled pork sandwiches to flavourful tacos.
Key to Success: Technique Matters
Achieving barbecue joint-quality pulled pork at home is all about the details. These key steps will ensure your pressure cooker recipes for pork are a guaranteed success.
- Choose the Right Cut: Opt for a pork shoulder, also known as a Boston butt. This cut has the ideal fat content to keep the meat juicy and flavourful under pressure.
- A Deeper Flavour: For the best results, apply a generous amount of your favourite dry rub to the pork at least a few hours, or even up to 24 hours, ahead of time. This acts as a dry brine, seasoning the meat deeply.
- The Tenderness Trick: Always use the 'natural release' method for at least 15 minutes. A quick pressure release can shock the muscle fibres, leading to tougher meat. Patience here is crucial for that signature tenderness.
- Finishing with Flair: After shredding the pork, place it on a baking tray. Toss it with a little of your favourite barbecue sauce and broil it for a few minutes until the edges become deliciously caramelised and crispy.
9. Pressure Cooker Bone Broth
Nutrient-rich bone broth, which traditionally simmers for up to 24 hours, can be transformed into a simple 2 to 3-hour task with a pressure cooker. The intense pressure and high heat work together to efficiently break down bones and connective tissue. This process extracts maximum collagen, gelatin, minerals, and nutrients, creating a deeply flavourful and nourishing broth that's perfect for sipping on its own or using as a superior base for other pressure cooker recipes.
Key to Success: Technique Matters
Making a gelatinous, clear broth is all about the process. A few strategic steps will ensure you get a high-quality result that rivals the slow-cooked version.
- Maximise Flavour: For a deeper, richer flavour profile, roast your beef or chicken bones in the oven until golden brown before adding them to the pressure cooker. This caramelisation adds a savoury depth that boiling alone cannot achieve.
- Mineral Extraction: Add a splash of apple cider vinegar to the pot with your bones and water. The acid helps to break down the bones further, drawing out more valuable minerals like calcium and magnesium into the broth.
- Safety First: Never fill your pressure cooker more than two-thirds full when making broth. This prevents the liquid from boiling up and potentially clogging the pressure release valve, ensuring safe operation.
- Finishing Touches: For a crystal-clear final product, strain the finished broth through a fine-mesh sieve or a colander lined with cheesecloth. This will remove any small solids, leaving you with a pure, clean liquid.
10. Pressure Cooker Cheesecake
Baking a cheesecake in the oven often involves a fussy water bath to prevent cracks. The pressure cooker elegantly solves this problem by creating a steamy, humid environment that cooks the cheesecake gently and evenly. This method results in a stunningly creamy, dense, and crack-free dessert every time, transforming a typically intimidating baking project into a straightforward success. It's an ideal technique for achieving professional-quality results for special occasions or even just a decadent weeknight treat.
Key to Success: Technique Matters
A flawless pressure cooker cheesecake relies on a few specific steps to manage the moist environment and ensure a perfect set.
- Seal Tightly: Before cooking, cover your cheesecake pan very tightly with foil. This is crucial to prevent condensation from the lid from dripping onto the surface of your cheesecake, which can ruin its smooth top.
- Room Temperature is a Must: For the smoothest possible batter, ensure your cream cheese, eggs, and sour cream are all at room temperature. This allows them to blend together seamlessly, preventing lumps.
- Embrace the Natural Release: A sudden temperature drop is the enemy of cheesecake. Always use a full natural pressure release. This gradual cooling process helps prevent the centre from sinking and maintains a perfect, even texture.
- Patience is Key: The final, most important step is chilling. The cheesecake must be chilled, uncovered, in the refrigerator for at least four hours, but preferably overnight. This allows it to fully set and for the flavours to deepen.
Pressure Cooker Recipes Comparison Table
| Item | Implementation Complexity | Resource Requirements | Expected Outcomes | Ideal Use Cases | Key Advantages |
|---|---|---|---|---|---|
| Pressure Cooker Beef Stew | Beginner-friendly, moderate timing | Minimal, one-pot | Tender meat, nutrient retention | Comfort meals, quick hearty stews | Fast cooking, tender meat, rich flavour |
| Pressure Cooker Risotto | Intermediate, precise liquid ratios | Moderate: sauté + pressure cooker | Creamy, consistent texture | Quick risotto, hands-off cooking | No stirring, consistent perfect texture |
| Pressure Cooker Whole Chicken | Beginner-friendly, simple steps | Minimal, trivet recommended | Moist, tender whole chicken | Sunday dinners, meal prep protein | Fast cooking, moist meat, broth creation |
| Pressure Cooker Mac and Cheese | Beginner-friendly, liquid precision | Minimal, one-pot | Creamy, customisable mac & cheese | Kid-friendly comfort food, quick meals | Fast, fewer dishes, creamy texture |
| Pressure Cooker Steel-Cut Oats | Beginner-friendly, requires natural release | Minimal sauce and liquid | Creamy with chewy texture | Meal prep, busy breakfasts | Hands-off, consistent, nutritious |
| Pressure Cooker Chili | Intermediate, careful layering | Moderate: multiple ingredients | Deep flavours, tender meat & beans | Crowd feeding, diverse dietary needs | Fast, uses dried beans, rich flavour |
| Pressure Cooker Hard-Boiled Eggs | Beginner-friendly, setup time | Minimal: trivet, ice bath | Perfect peel, consistent doneness | Meal prep, easy snacks | Easy peeling, perfect every time |
| Pressure Cooker Pulled Pork | Intermediate, requires natural release | Moderate: seasoned pork shoulder | Tender, shreddable pork | BBQ dishes, meal prep | Drastically reduced time, tender meat |
| Pressure Cooker Bone Broth | Intermediate, long pressure cooking | Minimal bones & veggies | Nutrient-rich, gelatinous broth | Immune support, cooking base | Fast nutrient extraction, hands-off |
| Pressure Cooker Cheesecake | Advanced, special pan & technique | Requires compatible pan | Crack-free, smooth cheesecake | Small desserts, oven-free baking | Even heating, crack-proof, shorter bake |
Make Mealtime Easier with Your Pressure Cooker
The journey through these ten diverse pressure cooker recipes reveals a powerful truth about modern home cooking: speed and convenience do not have to come at the expense of flavour or quality. From the rich, slow-simmered taste of our Beef Stew, achieved in under an hour, to the impossibly creamy Risotto that sidesteps constant stirring, your pressure cooker is far more than just a gadget. It is a true kitchen ally, organised to reclaim your time and revolutionise your weeknight meals.
We have explored how this single appliance can handle everything from a succulent Whole Chicken for a Sunday roast to perfectly cooked Hard-Boiled Eggs for lunchbox prep. It masters comforting family favourites like Mac and Cheese and hearty Chili, while also simplifying traditionally time-consuming basics like nutrient-dense Bone Broth and wholesome Steel-Cut Oats. Perhaps most surprisingly, it even ventures into the world of delicate desserts with a flawless, crack-free Cheesecake. Each recipe demonstrates the core principle of pressure cooking: intensifying flavours while dramatically reducing cooking times.
Key Takeaways for Your Culinary Journey
Mastering your pressure cooker is about embracing a new mindset in the kitchen. Here are the most important insights to carry forward:
- Trust the Process: The initial learning curve involves understanding the sealing, pressurising, and release functions. Once you are comfortable with these basics, you will realise how hands-off the entire process is, freeing you up to focus on other tasks.
- Layer Your Flavours: The sauté function is your best friend. Always take a few extra minutes to brown your meats and soften your aromatics like onions and garlic directly in the pot before sealing the lid. This simple step builds a deep, savoury foundation that pressure cooking locks in.
- Liquid is Essential: A pressure cooker works by creating steam, which means sufficient liquid is non-negotiable. Always ensure you have at least the minimum amount of liquid (usually around one cup) required by your specific model to prevent scorching and allow the pot to pressurise correctly.
- Embrace Natural Release: For recipes like Pulled Pork, Beef Stew, or Bone Broth, using a natural pressure release (NPR) allows the muscle fibres in the meat to relax and reabsorb moisture. This results in exceptionally tender and juicy results that a quick release (QR) simply cannot replicate.
By applying these techniques, you will move beyond simply following recipes and start to truly understand the science and art of pressure cooking. This will empower you to adapt your own favourite slow-cooker or stovetop recipes, opening up a world of culinary possibilities. The ultimate benefit is clear: more delicious, home-cooked meals shared with your whānau, and more precious time saved every single day.
Ready to unlock the full potential of your kitchen and make these incredible pressure cooker recipes a part of your regular routine? Explore the extensive range of modern, easy-to-use pressure cookers and kitchen appliances at Folders. We have the perfect tools to help you create delicious meals and make your home feel great.