

Master Home Renovation Project Management Today
So, you’ve spent countless hours scrolling through Pinterest, saving dreamy interiors to your “Future Home” board. That’s a brilliant place to start, but the first real step in home renovation project management is turning those gorgeous pictures into a practical plan. Experienced renovators will tell you that the true foundation of a project isn't laid with concrete, but with a solid understanding of time, cost, and the inevitable disruption to your life. Before you even think about paint swatches, it’s time for an honest chat about your property's potential and its very real limitations.
Planning Your Renovation: Setting Realistic Expectations

Breaking Down the Dream
The idea of a "full house reno" can feel huge and overwhelming. The trick is to break it down into manageable chunks. Instead of one giant project, think of it as a series of connected smaller ones. For example, you could focus on the kitchen and dining area first, then tackle the bathrooms, and save the outdoor landscaping for last. This phased approach offers some serious advantages:
- Financial Control: It lets you fund the work in stages, which is much easier on the wallet.
- Reduced Disruption: You can often continue living in the house by sectioning off the area under construction.
- Clearer Focus: Zeroing in on one space at a time helps you make smarter decisions without feeling snowed under.
Think about which changes will give you the most bang for your buck and improve your day-to-day life right away. A well-executed kitchen update, for instance, can completely change how you use your home. This is also the stage for making smart compromises. Do you absolutely need that imported Italian marble, or could a high-quality local alternative deliver 90% of the look for 50% of the cost? If you need some inspiration for affordable updates, our guide on top kitchen renovation ideas on a budget for 2025 is a great resource.
Understanding the Broader Context
Your renovation doesn't happen in a bubble; it's affected by everything from local council rules to the national economic climate. For example, recent data shows a slowdown in the building sector, which can impact material availability and how busy tradies are. In New Zealand, new home consents dropped by 17% in April 2025 compared to the previous year. This kind of market shift directly influences project timelines and costs. You can read more on the latest home building consent trends on mpamag.com to get a feel for the current environment.
It’s also vital to think about the practicalities of the job itself. Do you need specialised equipment? If your project involves working at height—like painting a two-storey exterior or replacing upstairs windows—then understanding scaffold tower hire tips and costs becomes a crucial part of your initial planning. Sorting out these details early helps build a realistic budget and schedule, preventing nasty surprises later. This groundwork might not be the most exciting part, but it’s what turns a renovation dream into a successful reality.
Budgeting Like a Pro: Beyond the Initial Quote
A solid budget is the absolute backbone of any successful home renovation project management. It's all too common for homeowners to get a few quotes, pick the cheapest one, and think they're all set. But in reality, that initial figure is just the starting line. A truly robust budget anticipates the unexpected and acts as a clear financial roadmap, stopping you from panicking when surprises inevitably pop up.
The real skill in budgeting isn't just tracking what you spend; it's about building in financial resilience from day one. You need to think beyond the builder's main estimate and create a detailed, line-item budget. This should cover everything from the big-ticket items like appliances and materials down to the smaller details like new light fixtures, drawer handles, and even the cost of a professional clean once the dust settles. Thinking through these costs beforehand can be a real project-saver, and resources on budgeting for major home-related expenses can offer valuable principles, even if they're for a different purpose like moving house.
The All-Important Contingency Fund
One of the biggest blunders renovators make is not planning for the unknown. No matter how perfectly you plan, there will be surprises. You might knock down a wall and discover outdated wiring that needs a full replacement, find hidden water damage, or learn that the tiles you fell in love with have been discontinued, forcing you to choose a more expensive alternative.
This is exactly what your contingency fund is for. This isn't a slush fund for a last-minute decision to upgrade your tapware; it's your project's insurance policy. A good rule of thumb is to set aside 15-20% of your total project cost specifically for these unforeseen issues.
So, if your renovation is estimated at $80,000, your contingency fund should be at least $12,000. Having this buffer means you can tackle problems head-on without derailing your timeline or having to cut corners on quality elsewhere. This is especially vital for older homes, where the chances of unearthing historical quirks and issues are much higher.
To give you a clearer picture of how a budget is typically divided, here’s a breakdown of where the money goes for different types of renovations.
| Expense Category | Kitchen Renovation | Bathroom Renovation | Full House Renovation | Typical Range |
|---|---|---|---|---|
| Labour Costs | 20-35% | 20-40% | 25-40% | 20-40% |
| Cabinetry & Benchtops | 30-40% | 10-15% (Vanity) | 15-25% | 10-40% |
| Appliances & Fixtures | 10-20% | 15-30% | 10-15% | 10-30% |
| Materials & Finishes | 10-15% | 15-25% | 15-20% | 10-25% |
| Permits & Fees | 1-5% | 1-5% | 3-7% | 1-7% |
| Contingency Fund | 15-20% | 15-20% | 15-20% | 15-20% |
This table shows how costs shift depending on the project. Labour is a consistently large portion, while the big-ticket items like cabinetry are dominant in a kitchen reno but less so in a bathroom. The contingency fund, however, remains a non-negotiable 15-20% across the board.
Understanding Cost Variations and Market Trends
The final price tag on your renovation is a mix of labour rates, material costs, and current market conditions. It's really helpful to understand where your money is going. While recent data in New Zealand shows that construction cost inflation is slowing down, projects are still a significant investment. The CoreLogic New Zealand Cordell Construction Cost Index (CCCI) reported that annual cost growth slowed to just 0.9% by the first quarter of 2025, one of the slowest rates recorded. This might bring some stability to material prices, but labour costs can still vary a lot between regions and trades. You can discover more about the value of building work in NZ on stats.govt.nz to get a sense of the broader trends.
To get a handle on your specific project costs, make sure you get at least three detailed quotes from different contractors. The key is to ensure they are all quoting on the exact same scope of work—a true "like-for-like" comparison. This level of detail is crucial. One quote might look cheaper on the surface, but it could be because it excludes rubbish removal or specs lower-grade materials.
Dig into the quotes and understand the differences. Is one plumber's estimate significantly higher? Don't be afraid to ask why. They might have a better reputation, offer a longer warranty on their work, or include services the others don't. For anyone navigating these big financial decisions for the first time, our first-time homeowner checklist offers more advice on managing all the expenses that come with owning a home.
By building a detailed budget with a healthy contingency, you shift from someone just crossing their fingers and hoping for the best into a savvy project manager who is in full control of their financial destiny.
Finding and Managing Your Dream Team
Once your budget is locked in, the success of your renovation really comes down to the people you hire. This isn't just about finding a builder; it's about putting together a team of pros—architects, designers, plumbers, and electricians—who are skilled, reliable, and genuinely invested in making your vision a reality. Your entire project lives or dies by the quality of this team.

This part of the process can feel especially tough right now. The New Zealand construction sector has faced some real challenges, with employment in the industry dropping by 2.6% between 2023 and 2024. This smaller labour pool means finding top-notch, available tradies is harder than ever, which makes doing your homework absolutely essential. You can get more insights into the NZ construction sector on BusinessWire.com to understand the current climate.
Vetting Your Team: Beyond the Quote
The best professionals are often found through word-of-mouth. Chat with friends, family, or colleagues who have recently renovated. A personal recommendation gives you a look into not just the quality of their work, but also their communication style and reliability—things a quote will never tell you.
When you start meeting potential contractors, look past the price tag and ask questions that reveal their professionalism:
- "Can I see a recent, similar project and speak to the homeowners?" A confident professional will be proud of their work and should have happy clients who are willing to chat with you.
- "How do you handle unexpected problems and changes?" Their response will give you a good sense of their problem-solving approach and how they communicate when things don't go to plan.
- "What does your payment schedule look like?" Be cautious of anyone asking for a massive deposit upfront. A standard schedule usually involves a small deposit, with progress payments linked to specific, completed milestones.
- "Who will be my main point of contact on-site each day?" It's vital to know who is running the day-to-day operations for clear and direct communication.
The same level of care applies when hiring specialists like electricians and plumbers. A poor choice in plumbing, for example, can result in leaks and costly water damage later on. Knowing how to choose the right plumber is critical for a stress-free project. While this particular guide is from Denver, the advice on checking licenses, insurance, and references is universal and incredibly useful.
Building a Partnership Through Clear Contracts and Communication
A detailed, written contract is your most important tool. It’s not about creating conflict; it's about making sure everyone is on the same page. Your contract should clearly define the full scope of work, a payment schedule, an estimated timeline, and a process for handling any changes, often called change orders. This document protects both you and your contractor.
Once the work starts, good communication becomes your main job. Many homeowners find that a quick, regular check-in—whether it's a 10-minute chat on-site each morning or a weekly email update—stops small misunderstandings from turning into expensive problems. Treat it like a partnership. You provide the vision and the funds; they provide the expertise and the skill. When your team feels respected, they're more likely to go the extra mile. A strong working relationship might even lead to great advice on fixtures and fittings. If you're hunting for a new appliance, have a look at our guide on choosing rangehoods in New Zealand for some ideas.
By creating a collaborative atmosphere, you’re not just managing a project; you’re leading a team toward a shared goal: a beautifully finished home.
Creating Schedules That Actually Work
A renovation timeline that assumes everything will go perfectly is a work of fiction. In the real world of home renovation project management, your schedule needs to be a robust, flexible document that anticipates reality. Forget simply listing tasks in order; a truly effective schedule is about choreographing a complex dance between different trades, material deliveries, and the inevitable curveballs life throws at you.
Successful project management isn't about being rigidly attached to a timeline, but about understanding the critical path—the sequence of tasks that directly impacts the final completion date. You can’t install kitchen cabinets before the plasterboard is up, and you can’t have the electrician wire for new downlights after the ceiling has been painted. It sounds simple, but juggling these dependencies is where many projects go off the rails.
Sequencing Work and Managing Dependencies
Imagine your renovation as a relay race. The plumber can't start their work until the framing is done, and the tiler can't begin until the waterproofing is fully cured. Each trade needs to pass the baton smoothly to the next. A common mistake is scheduling trades too tightly together, leaving no room for error. If the gib-stopper takes a day longer than expected, it can have a domino effect, pushing back the painter, the electrician, and the flooring installer, potentially costing you time and money.
A smarter approach is to build in buffer days between major phases. For instance, after the scheduled completion of all demolition and framing, add two or three "flex days" before the plumbing and electrical rough-in is set to begin. This buffer can absorb small delays without throwing the entire project into chaos. A seasoned project manager knows that a slow, deliberate start that focuses on proper preparation is far better than a rushed one. This philosophy, sometimes called the "5 Ps"—Proper Preparation Prevents Poor Performance—minimises challenges and unexpected costs down the line.
The simple infographic below illustrates the three core stages of construction oversight, showing how each phase must logically follow the one before it.
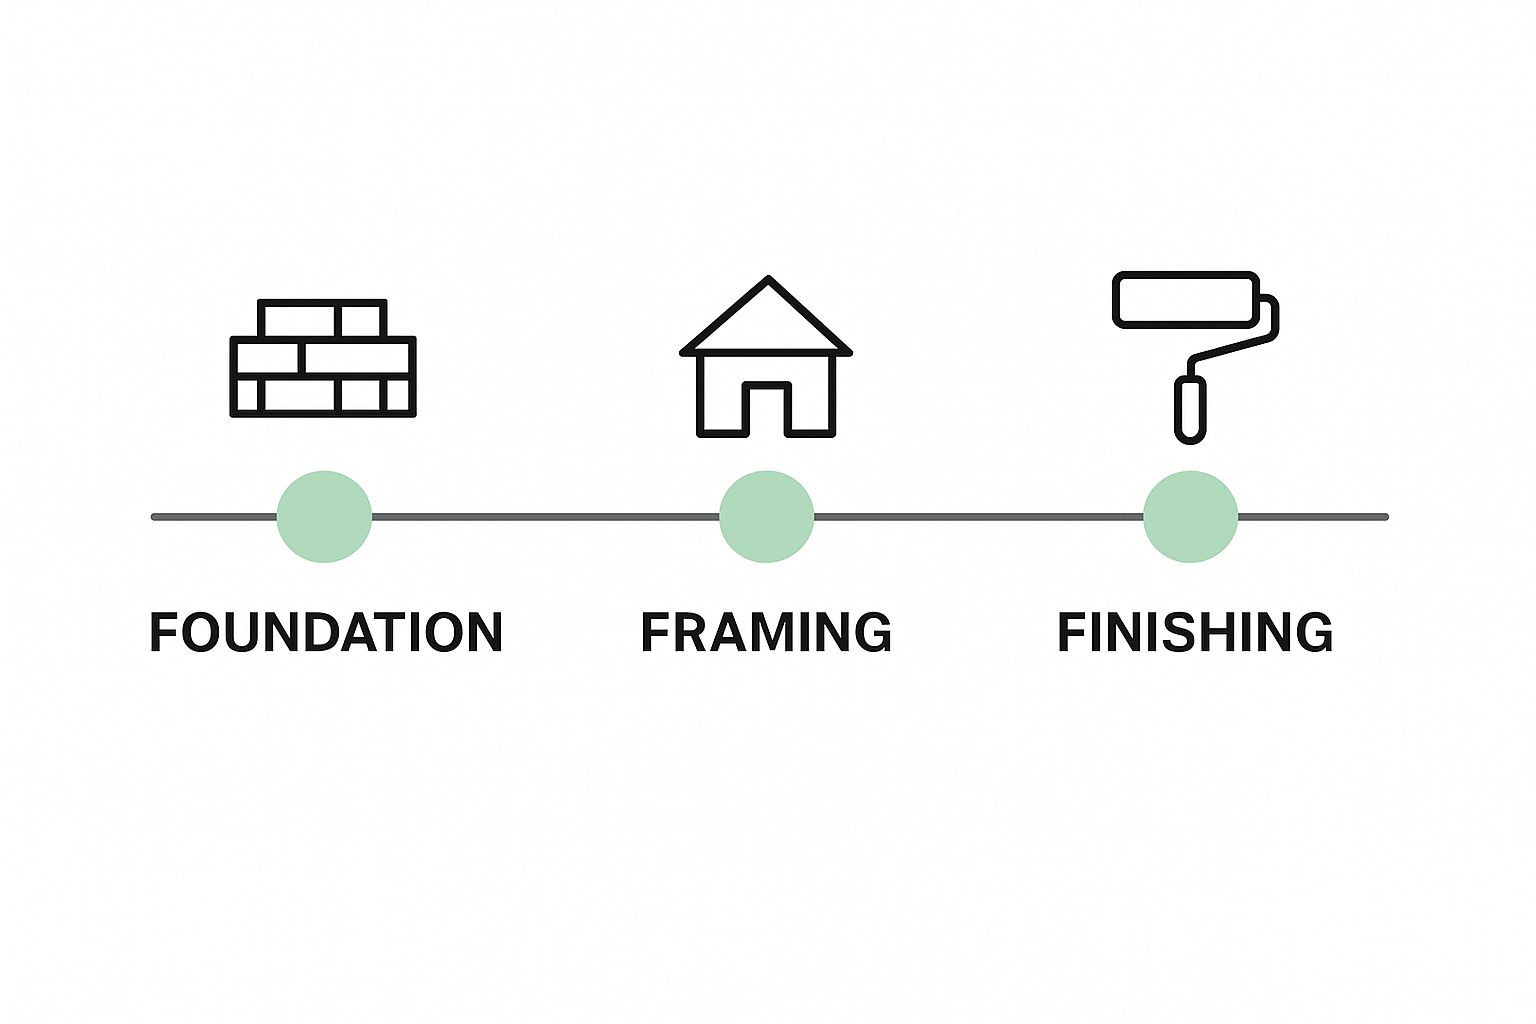
This visual shows the natural progression from the foundational work to the final finishing touches, underscoring why you can't rush or reorder these core construction phases.
Building a Realistic and Flexible Timeline
When mapping out your schedule, it's crucial to account for things completely outside your control. In New Zealand, this means factoring in potential weather delays, especially for any exterior work like painting or roofing. It also means confirming lead times for materials and key products. That beautiful freestanding bath you ordered might have a 12-week lead time, and your schedule needs to reflect that from day one.
To help you get started, here's a look at how you can plan for realistic timings. This table breaks down the common phases of a renovation, comparing an ideal scenario with a more practical one that accounts for the unexpected.
Typical Renovation Timeline: Phase-by-Phase Breakdown
Realistic timeframes for different renovation phases, including buffer time for common delays and dependencies between trades
| Renovation Phase | Optimistic Timeline | Realistic Timeline | Common Delays | Dependencies |
|---|---|---|---|---|
| Demolition & Prep | 3-4 Days | 5-7 Days | Hidden structural issues | Site access, rubbish bin delivery |
| Framing & Structural | 1 Week | 1-2 Weeks | Weather, material shortages | Engineering inspections |
| Plumbing/Electrical Rough-in | 1 Week | 1.5 Weeks | Complex wiring, coordination | Framing complete, fixture selection |
| Insulation & Plasterboard | 1 Week | 1-2 Weeks | Drying times, inspections | All in-wall services complete |
| Painting & Tiling | 2 Weeks | 2-3 Weeks | Curing times, humidity | Plastering complete and sanded |
| Cabinetry & Flooring | 1 Week | 1.5 Weeks | Delivery delays, acclimatisation | Painting finished |
| Fixtures & Fit-off | 1 Week | 1.5 Weeks | Missing parts, trade availability | Power and water connected |
As you can see, the realistic timeline consistently adds 25-50% more time to each phase. This isn't pessimism; it's experience. This buffer is what allows you to handle a delay without stress. For instance, a complex job like installing new ventilation might take longer than anticipated. To prepare, you can check out a detailed rangehood ducting guide for NZ to understand the requirements and potential complexities before your contractor even starts.
When delays do happen—and they will—communication is everything. A quick text or call to your painter to let them know the plasterer needs one more day gives them a chance to adjust their own schedule. This proactive communication keeps relationships positive and the project moving forward, turning potential chaos into a managed, orderly process.
Navigating Permits and Compliance Without Losing Your Mind
Let's talk about the part of home renovation project management that can make even the most enthusiastic homeowner a bit nervous: council permits and building compliance. The mere mention of paperwork, applications, and inspections can feel like a huge headache, but it doesn’t have to derail your project. With a bit of know-how, you can handle it efficiently, ensuring your renovation is safe, legal, and adds genuine value to your home. Think of it less as a hurdle and more as a built-in quality check.
Tempted to just skip this bit to save time or a few dollars? That's a high-stakes gamble. Unconsented work can cause massive problems down the line, especially when you try to sell your home or make an insurance claim. Even worse, councils have the power to issue a "notice to fix," which could mean you have to rip out brand new work to make things right. It's a risk that's just not worth taking.
When Do You Actually Need a Building Consent?
One of the first questions on every renovator's mind is, "Do I actually need a building consent for this?" In New Zealand, the Building Act sets out what work is exempt, and it’s often more complex than people think. It’s definitely not just about knocking down major walls.
Here’s a general guide to what usually needs a building consent from your local council:
- Structural Work: This is the big one. Any changes to load-bearing walls, foundations, support beams, or the roof structure will almost certainly require consent.
- Additions and Alterations: If you're adding a new room, building an extension, or significantly changing the internal layout of your home, you'll need to get the council involved.
- Plumbing and Drainage: Any major changes to your plumbing, like adding a new bathroom or connecting new pipes to the main sewer or stormwater system, will require consent.
- Safety Systems: Installing or modifying things like certain types of fire alarm systems or putting up a fence around a new swimming pool also falls under consented work.
On the other hand, cosmetic jobs like painting, putting up new wallpaper, or replacing kitchen cupboards in the exact same spot typically don't need a consent. If you're looking for some high-impact changes that don't involve the consent process, check out these creative wall art display ideas on our blog. But remember, this is just a guide. Always double-check with your local council or a building professional. A quick phone call upfront can save you a world of trouble later on.
Preparing Your Application and Managing Inspections
A thorough, well-prepared application is your best friend for a smooth approval process. Councils often delay applications because the plans are vague or missing key information. Your application needs detailed architectural drawings, any necessary engineering specs, and clear descriptions of the work and materials you plan to use. This is where having a great architect, designer, or Licensed Building Practitioner on your team really pays off—they know exactly what the council needs to see.
Once your consent is approved and the tools come out, you’ll have a series of mandatory inspections. These are checkpoints at critical stages of the build—for example, once the foundations are laid, before the Gib goes on the walls, and after the plumbing is roughed in. The inspector’s job is to verify that the work is being done according to the approved plans and the Building Code.
To help your inspections go off without a hitch:
- Make sure the site is tidy, safe, and easily accessible for the inspector.
- Have your approved plans and all the consent documents on-site and ready to go.
- Try to be there for the inspection, or at least have your builder or project manager available to chat with the inspector and answer questions.
If you can see the council inspector as a partner in quality control rather than an obstacle, the whole experience becomes much less stressful. They are there to help ensure your home is well-built and safe for your family. A proactive, organised approach to permits and compliance is a sure sign of a well-managed renovation.
Managing the Daily Chaos: Communication and Problem-Solving
Living through a renovation is a real test of anyone's patience. The day-to-day reality is often a whirlwind of constant dust, unavoidable noise, and a non-stop parade of quick decisions you never saw coming. Good home renovation project management isn’t just about the big picture; it’s about how you handle these daily realities while keeping your sanity and relationships from falling apart.

This daily chaos is where communication goes from being helpful to absolutely essential. It can be the difference between a small hiccup and a huge budget issue. Imagine your builder opens up a wall and discovers some dodgy, old plumbing that wasn't on any plans. If communication is poor, they might just make a snap, expensive decision on your behalf. But with solid communication systems in place, you’ll get a call, talk through the options, and make a smart choice together.
Establishing Clear Communication Channels
Before a single hammer swings, sit down with your contractor and agree on how you'll communicate. This isn't about being bossy; it's about staying organised and making sure nothing gets lost in translation. A simple, shared system is your best defence against misunderstandings.
Here are a few practical methods that work wonders:
- A Daily Check-In: A quick, 10-minute chat on-site every morning gets everyone on the same page for the day. It's the perfect chance to ask questions and get a sense of what's happening.
- A Shared Digital Document: Using a simple cloud-based tool to log decisions, questions, and approvals creates one single record everyone can refer back to. This puts an end to any "he said, she said" confusion.
- Weekly Site Meetings: For bigger projects, a more formal weekly meeting is great for tackling larger issues, checking progress against the schedule, and planning for the week ahead.
Putting these practices in place means that when unexpected problems pop up, you already have a clear process for dealing with them. It turns a moment of potential panic into a structured, problem-solving task.
Living in the Construction Zone
If you’re staying in your home during the reno, managing the mess is a major hurdle. Construction dust, especially the fine plaster stuff, has a magical ability to get everywhere. Your contractor should take basic steps to contain it, but you can do more to protect your home and your health. Sealing off the work area with heavy-duty plastic sheeting and tape is non-negotiable. Also, cover furniture in other rooms and consider using HEPA filters in your vacuum and air purifiers to catch the fine particles.
It's also vital to remember that all this disruption won't last forever. Keeping things in perspective is key. Plan for simple meals that don’t need a full kitchen and find a quiet, dust-free corner of the house where you can escape. To keep family relationships strong during this stressful period, talk openly about the challenges and make a point to celebrate the small wins together. Finishing the demolition or seeing the new plasterboard go up are milestones worth a high-five. These small celebrations help keep spirits up and maintain momentum through the messy middle patch.
Finishing Strong: Quality Control and Project Completion
You’ve made it through the dust, the noise, and what feels like a million tiny decisions. The finish line is finally in sight, but this last stretch is what separates a good renovation from a truly great one. There’s a saying in the industry that the last 5% of a project takes 20% of the effort, and it’s all about nailing the details. This final phase of home renovation project management is make-or-break; it determines whether you’ll absolutely love your new space, or be forever irritated by a slightly crooked tile or a paint drip on the skirting board.
This isn’t the moment to relax and coast. It’s time to switch on your most critical eye and get ready for the final handover.
The Art of the Snag List
Before you even consider signing off and making that final payment, you need to walk through the entire space and create a snag list. This is simply a room-by-room list of every single thing that isn't quite right. Don't feel bad about being picky—this is your chance to make sure the work delivered is the standard you’ve paid for. A great tip is to walk through at different times of the day; the morning light might reveal an imperfection in the plaster that you’d miss in the afternoon shade.
Get methodical and be specific. A vague list is an unhelpful list. Here’s what a detailed snag list should capture:
- Paint and Plaster: Look for patchy paint jobs, obvious roller marks, scuffs on fresh walls, or spots where the plaster wasn't sanded smooth. Check that the cut-ins around ceilings, windows, and trim are sharp and clean.
- Fixtures and Fittings: Flick every light switch. Test every power point (a cheap phone charger is great for this). Run every tap. Turn on every new appliance. Do all the cupboard doors and drawers open and close smoothly without catching? Are the handles and knobs on tight?
- Joinery and Tiling: Run your hand across tiled surfaces. Can you feel any lippage, where one tile sits higher than its neighbour? Check the grout lines for consistency and make sure the silicone seals in the bathroom and kitchen are neat and complete.
- Flooring: Walk around and listen. Are there any squeaks? Look closely for gaps between boards, or any scratches and dents that occurred during the final fit-out.
A detailed snag list leaves no room for confusion. Instead of "fix kitchen paint," a better entry is, "Paint drip on the wall next to the pantry door, and a scuff mark above the light switch." This level of clarity helps your contractor sort out the issues quickly and without any back-and-forth.
Managing the Handover and Final Payments
Once your snag list is submitted and the builder has fixed every last item, it's time for the official handover. This is the point where you should be given a folder of all the essential documents for your renovation. This should include product warranties for your new oven and dishwasher, instruction manuals, and specifications for things like paint colours used on the walls. This info is invaluable for future touch-ups and maintenance.
When it comes to the final payment, a smart approach is to hold back a small, pre-agreed amount—often 5-10% of the total contract value. This is standard practice in New Zealand and acts as a strong motivation for your team to get every last item on your snag list ticked off to your satisfaction.
Finally, remember that the relationship with your builder doesn't have to end the moment the money changes hands. A project that finishes well can be the start of a great long-term connection. You'll have a trusted professional to call for future work, and they’ll be more than happy to pop back for any warranty issues that might arise down the line.
Feeling inspired to start your own project? At Folders, we provide the quality appliances and home essentials to bring your renovation vision to life. Explore our range today and let’s build something amazing together.